
If you’re using GoHighLevel for your business, connecting your Google Calendar is a must for ensuring your schedule is always up to date. In this guide, we will walk you through the process of integrating your Google Calendar with GoHighLevel so that you can manage your appointments effortlessly and prevent any scheduling conflicts.
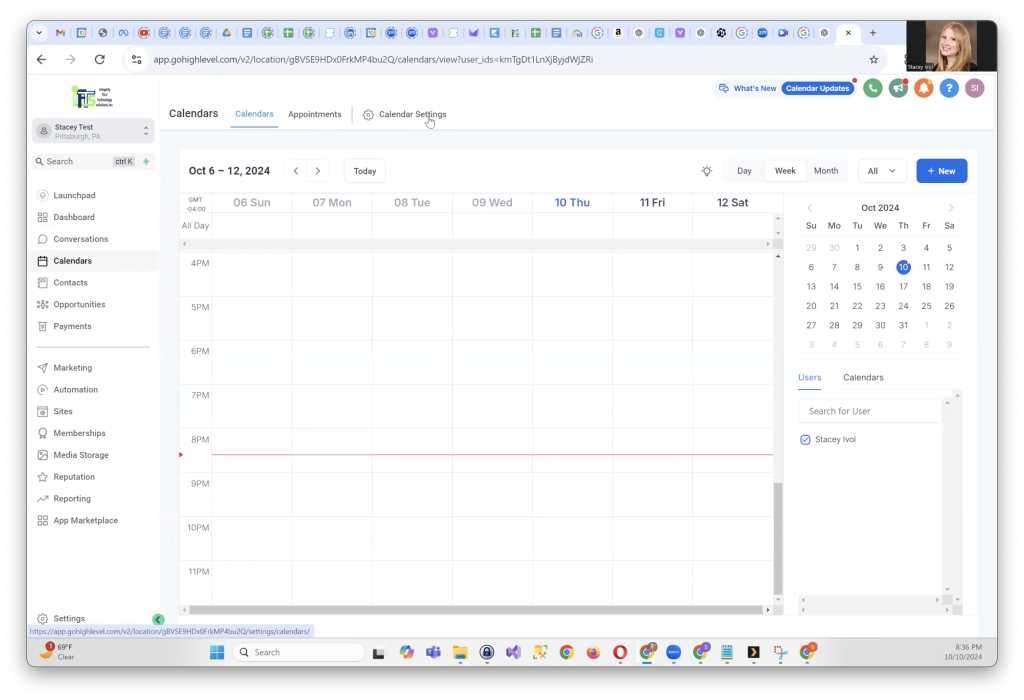
First, log into your GoHighLevel account. On the left-hand menu, click on Calendars, then select Calendar Settings from the upper menu. Here, you will see your current calendar setup.
You might notice open slots in your calendar, which will soon be synced and updated automatically once you connect your Google Calendar.
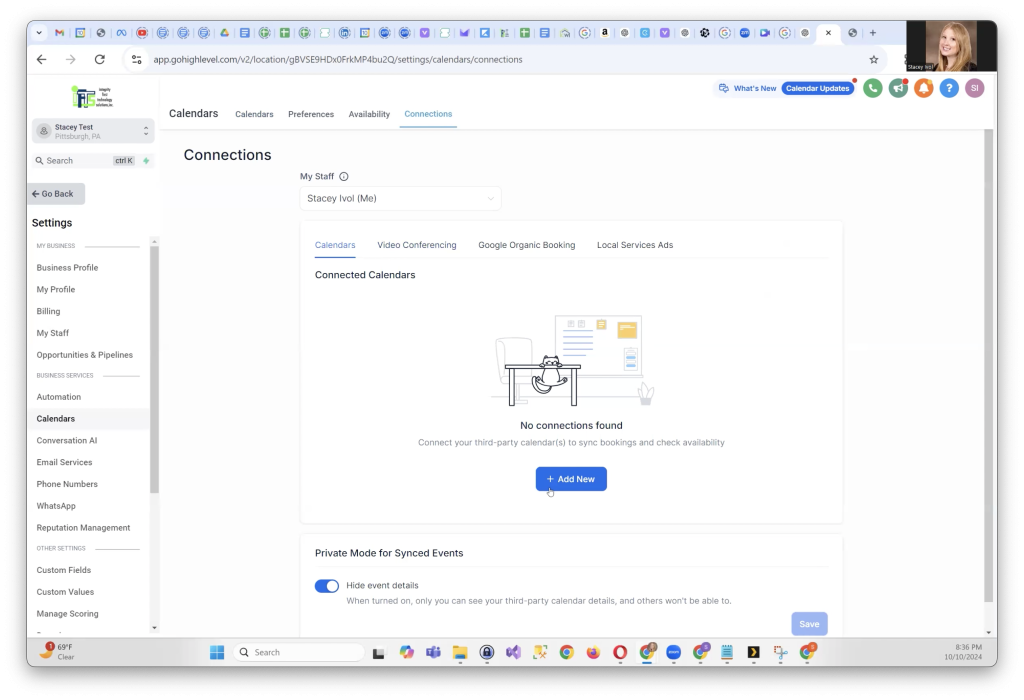
In the upper menu, click on Connections. Under the Calendars section, click on Add New. Now, choose Google Calendar as the service you want to connect.
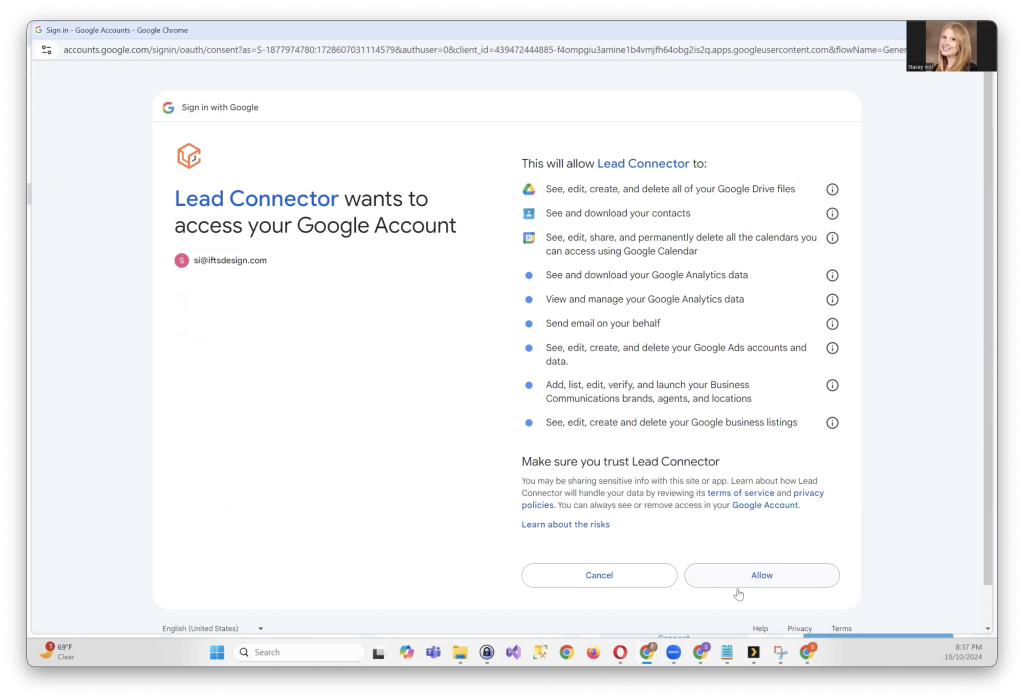
You’ll be prompted to sign in with your Google account. Select the account that you want to sync with GoHighLevel and click Continue.
GoHighLevel uses a system called “Lead Connector” to sync with Google. When asked, click on Allow to complete the connection.
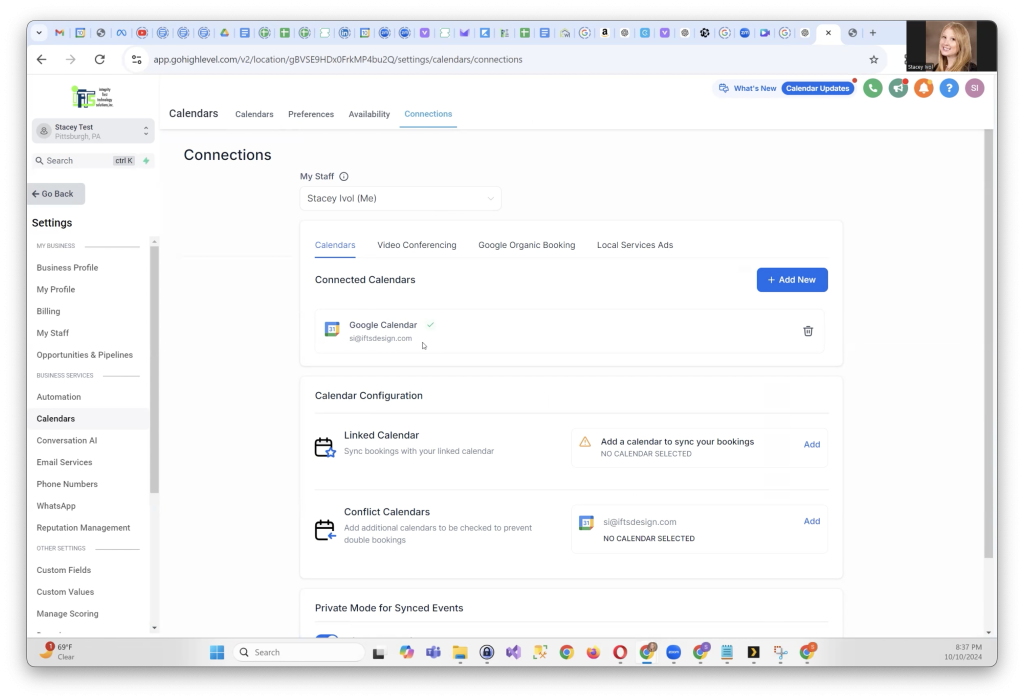
Although there isn’t an immediate confirmation, go back to Calendar Settings and click on Connections again. You should now see your Google Calendar listed as available.
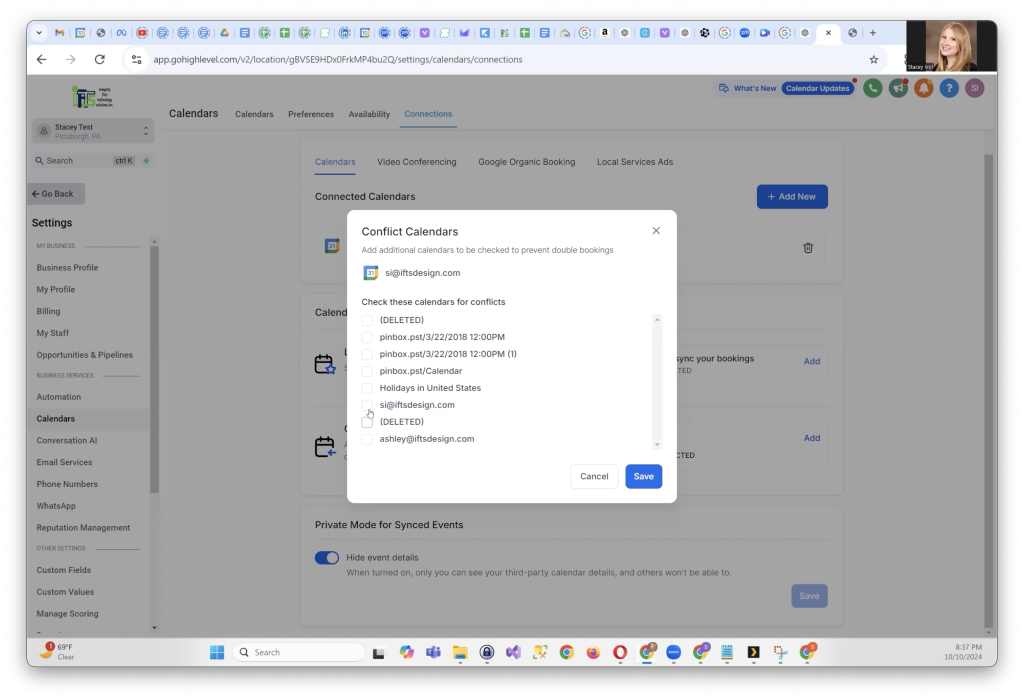
It’s crucial to set your connected Google Calendar as a Conflict Calendar to avoid double bookings. Select your Google Calendar from the list, name it (for example, “Google Calendar” or your company name), and click Save.
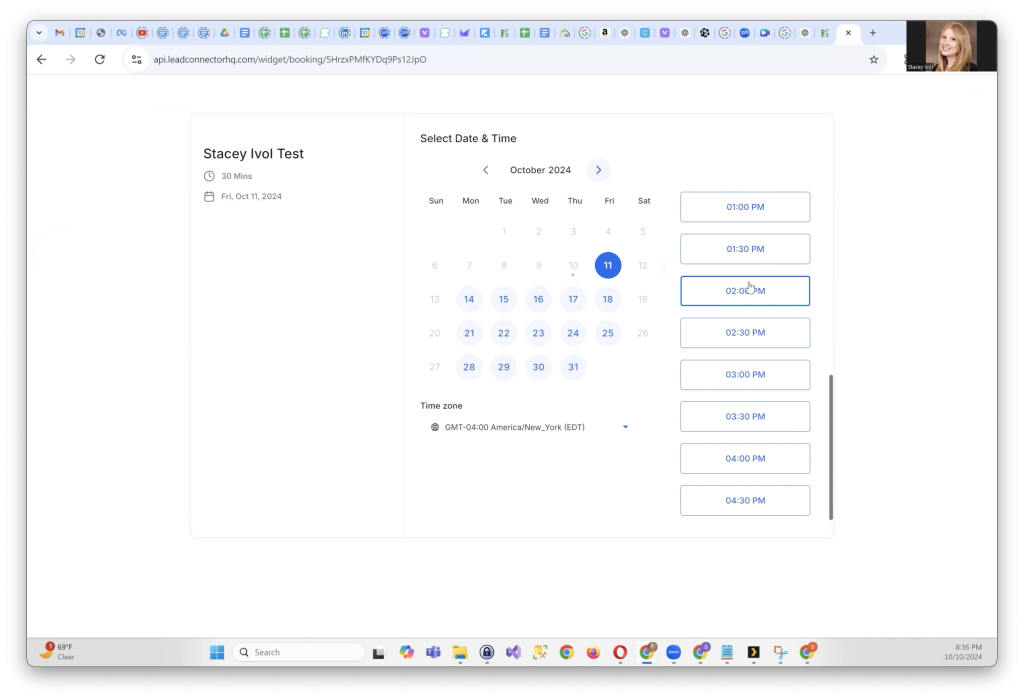
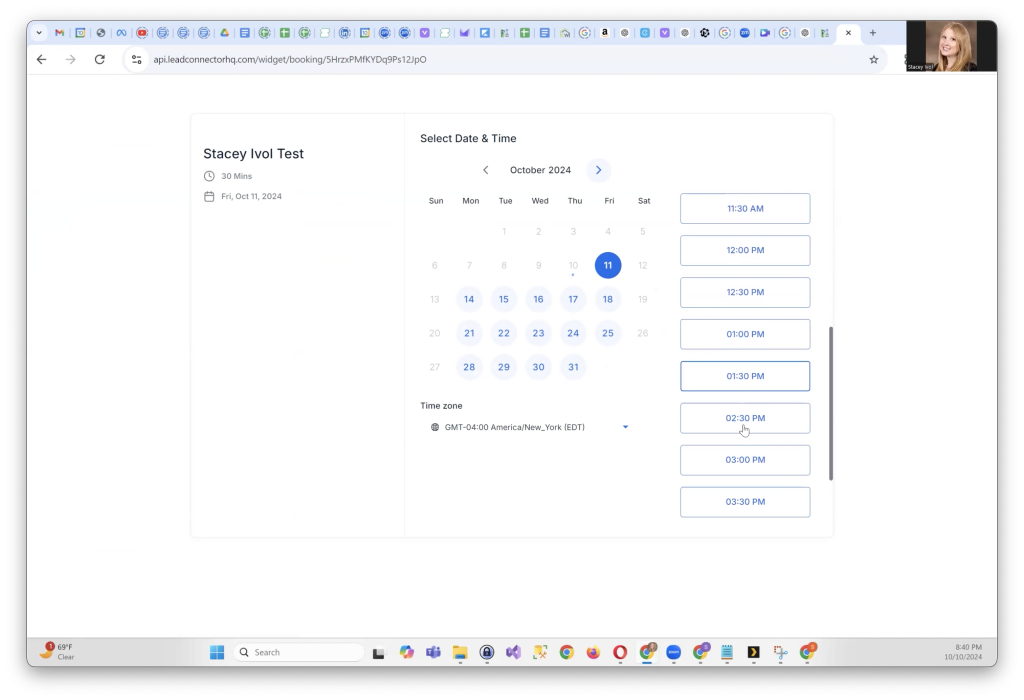
You’ll see a “processing” status as the sync happens. If this seems to take a while, try refreshing the page to speed up the process. Once it’s done, you’ll see that GoHighLevel is now synced with your calendar. You can test this by checking your available slots—appointments should now reflect correctly in your calendar.
Syncing your Google Calendar with GoHighLevel is a quick process that helps you stay on top of your appointments and prevents scheduling conflicts. Follow these steps, and you’ll have a fully integrated system for managing your schedule in no time!
Collecting customer feedback is essential for any business that wants to grow and build credibility. Reviews not only help potential customers make informed decisions but also improve your business’s reputation. But manually managing reviews can be time-consuming. That’s where automating the review process comes in. In this blog, we’ll walk you through setting up an automated review system in GoHighLevel to streamline feedback collection, manage negative experiences, and boost your positive reviews.
Let’s dive into the step-by-step process of setting up this system to automatically gather and manage reviews for your business.
The first step to automating your review process is creating a custom review link that you can share with your customers. This link will direct them to your review page.
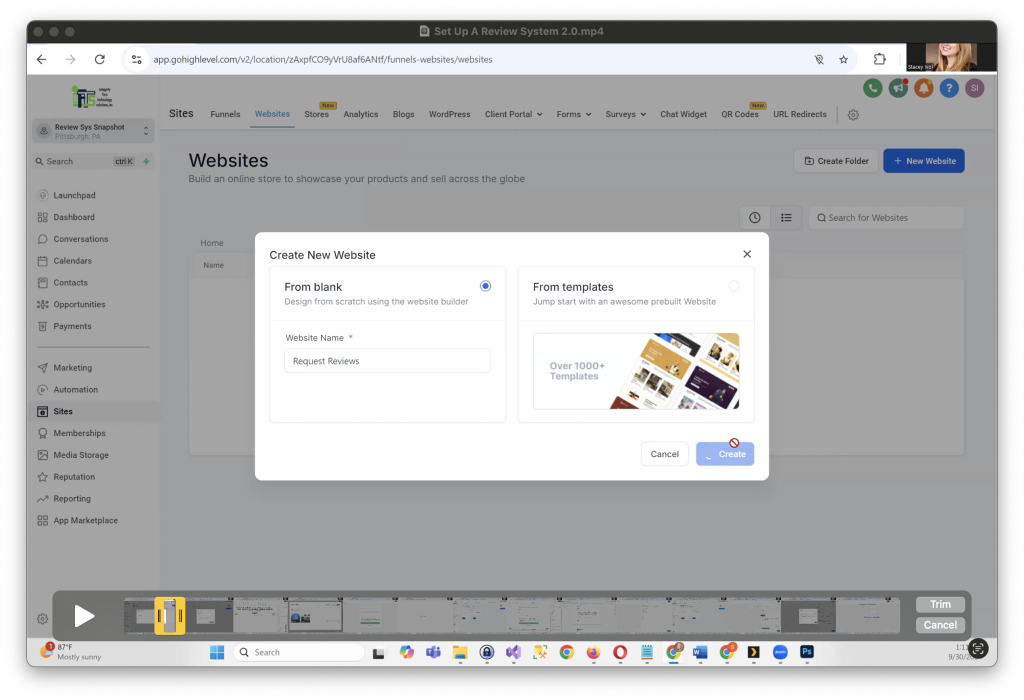
Next, you’ll need to create a simple review page where users can indicate if they had a good or bad experience. This will allow you to filter feedback based on customer satisfaction.
Example text: “Thank you for choosing us! Your feedback helps others find trusted businesses like ours.”
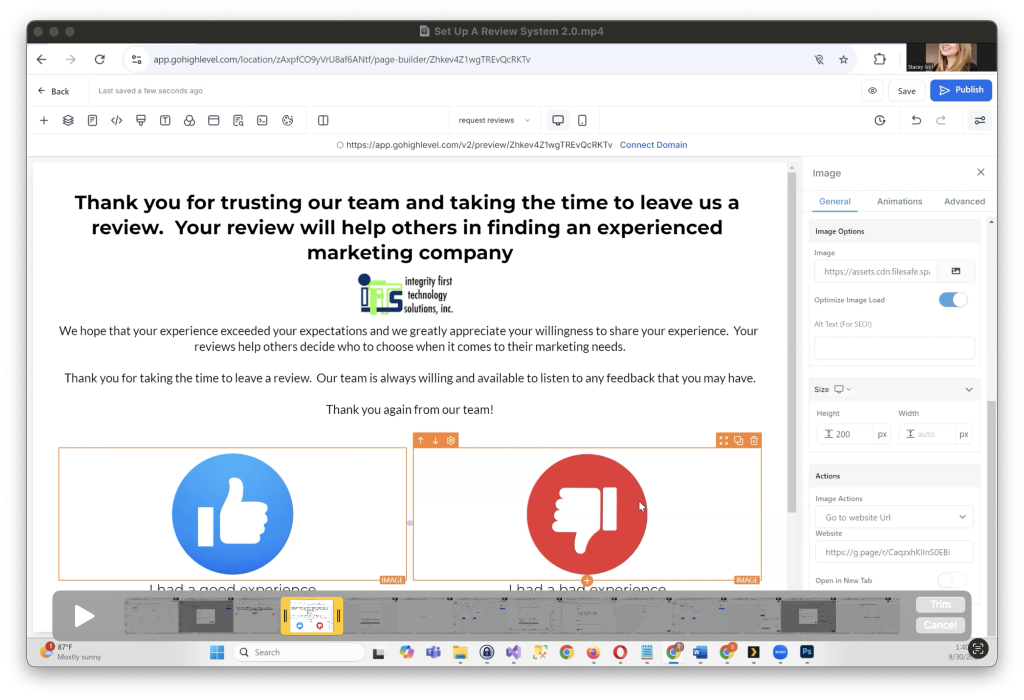
If a customer clicks on the thumbs-up button, you’ll want to direct them to leave a review on your Google Business profile.
Now, anytime a customer has a positive experience, they’ll be directed to leave a review on Google!
One of the most important steps in building an automated review system is handling negative feedback effectively. For this, GoHighLevel allows you to create a separate page for customers to share their bad experiences, ensuring you receive private feedback and maintain Google compliance.
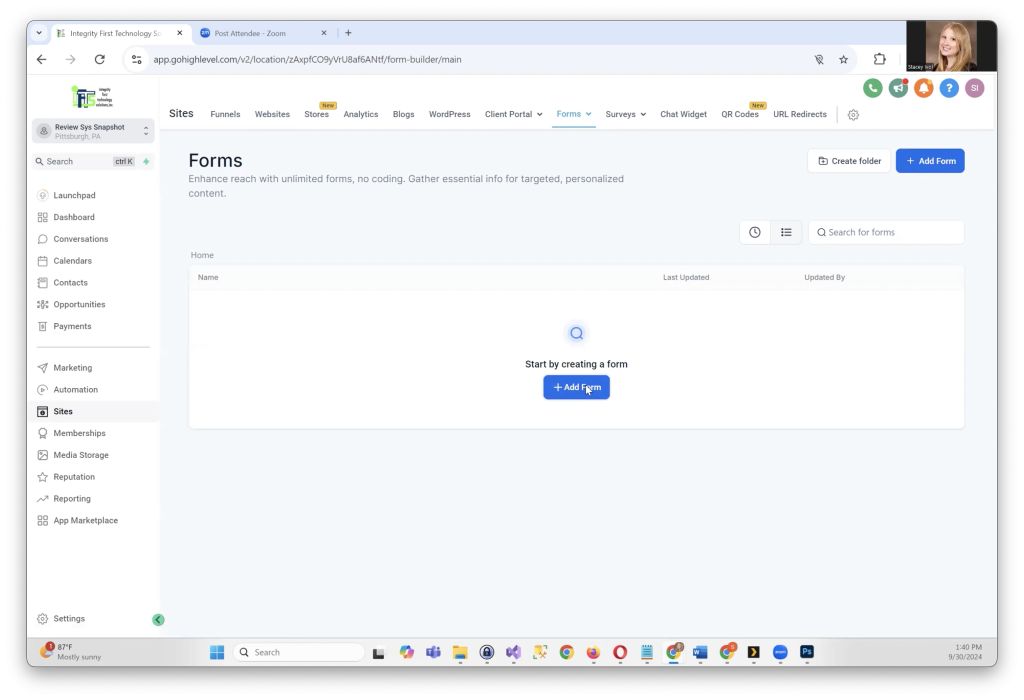
After setting up your main review request page, it’s time to add a dedicated page for customers who didn’t have a positive experience. Here’s how to do it:
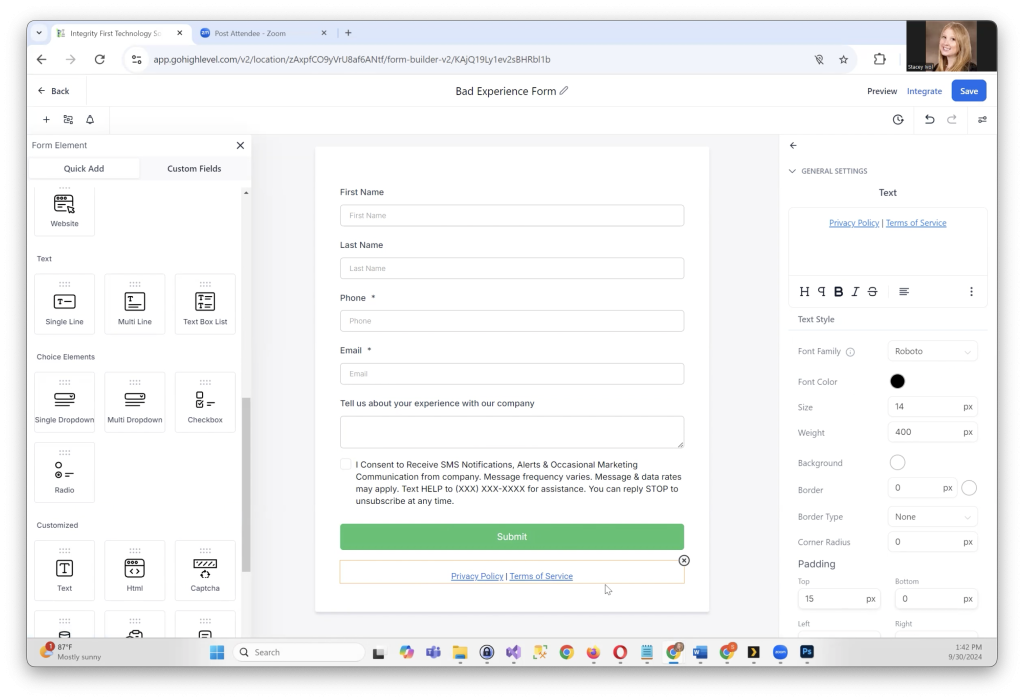
ext, you’ll need to collect detailed feedback about their bad experience. Here’s how to add a form:
This ensures the customer feels heard and reassures them that their concerns are being addressed.
After creating the feedback page, link it to the “I had a bad experience” button on your main review page. Follow these steps:
Google requires that all customers, including those with bad experiences, be given the option to leave a public review. To comply with this:
Once you’ve set up everything, preview your pages to ensure they function correctly. Customers should be able to navigate smoothly between the review request page and the bad experience page. For the final step, publish your changes and test the system.
With this setup, you’ve created an effective way to privately manage negative feedback while still complying with Google’s requirements for review collection.
By ensuring that negative feedback is handled internally while still allowing customers to publicly review your business, you can address concerns privately and maintain your reputation. This is a critical component of building trust with your customers and ensuring you’re continuously improving.
Now that your review pages and forms are set up, it’s time to implement automations that will simplify the process of collecting reviews. Automations help you send reminders and requests without manual effort, ensuring that you stay engaged with your customers and gather more reviews.
To keep your review requests polite but effective, we recommend sending three emails and one SMS over the course of a few days. Here’s a breakdown of what each email and text message should include:
Each email and SMS should include a review link to make it easy for customers to click through and leave their feedback.
Now that your messaging is ready, it’s time to build the automations in GoHighLevel:
To stop sending review requests once a customer has completed a review, you need to create trigger links:
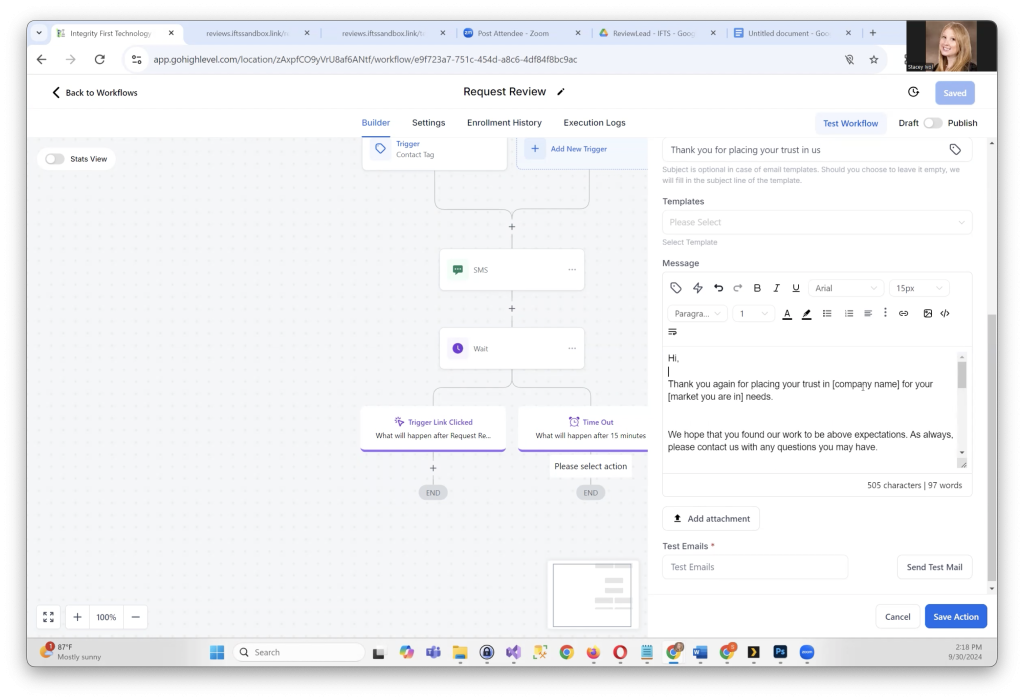
Finally, set up a separate workflow for handling bad experiences:
Once you have your workflows, trigger links, and messaging set up, your automated review request system is ready to go. Now, you can start tagging customers and collecting reviews effortlessly, all while handling negative feedback with care.
With everything in place, your business will enjoy more customer reviews and valuable feedback, which can help boost your online presence and improve customer satisfaction!
When someone submits a form on your site, do you want your website to work for you by contacting that person via automations?
If so, you are in the right place. In part 2 of this article, we’re going to cover:
If you missed part 1 where we created a new form in GoHighLevel and added it to our website, go check it out here:
Now that the form is created and on your website, it’s time to put some email automations behind it. You’ll be using these automated emails to tell the prospect about you and your company, ultimately leading them to choose you in their buying decision.
Let’s get started!
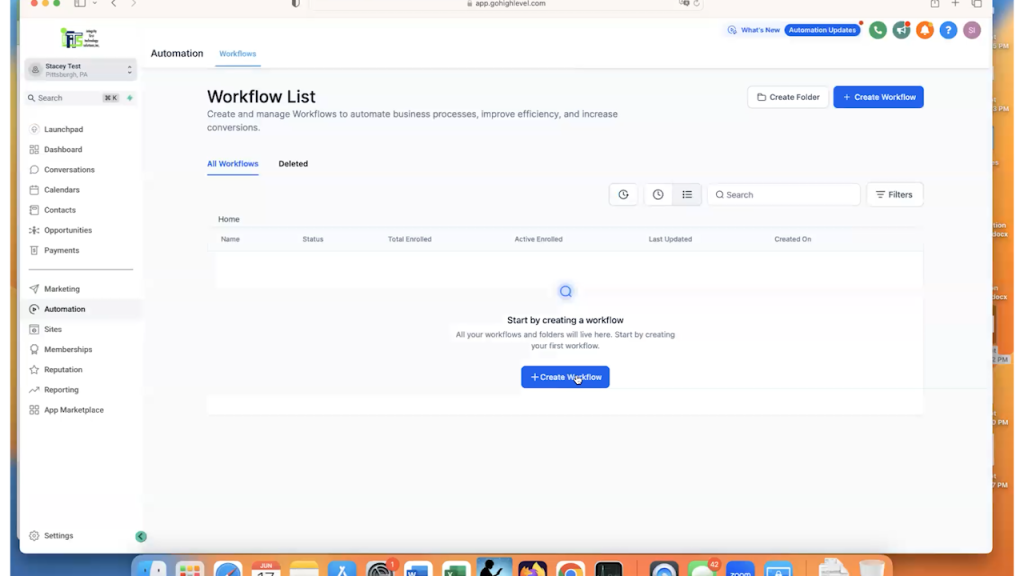
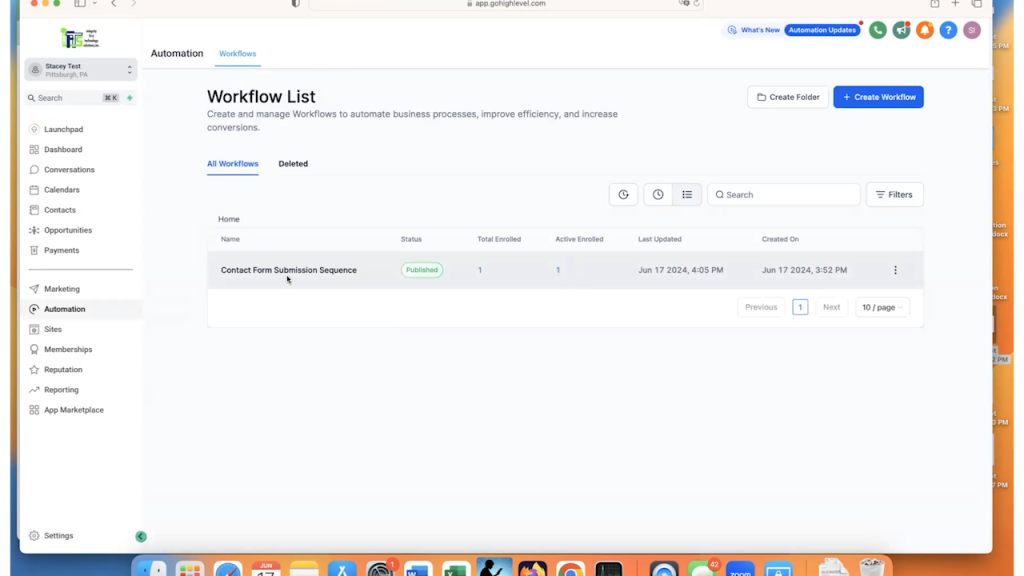
To create an automation, you will want to select “Automation” on the main left-hand menu and click on “Create Workflow”.
A workflow in GoHighLevel is essentially a set of instructions that are to be followed whenever a specific action happens. That action is called a “trigger” by GoHighLevel.
After you select “Create Workflow”, GoHighLevel will give you multiple options for pre-built workflows that they call “Recipes”. Because this is just a simple example where I want to walk you through all of the steps, we are going to select “Start from scratch”.
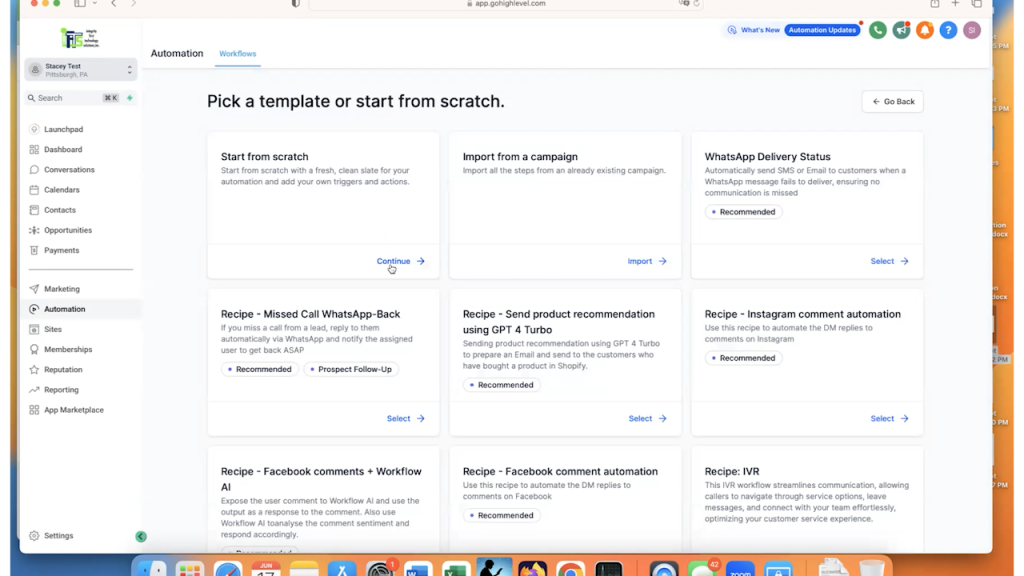
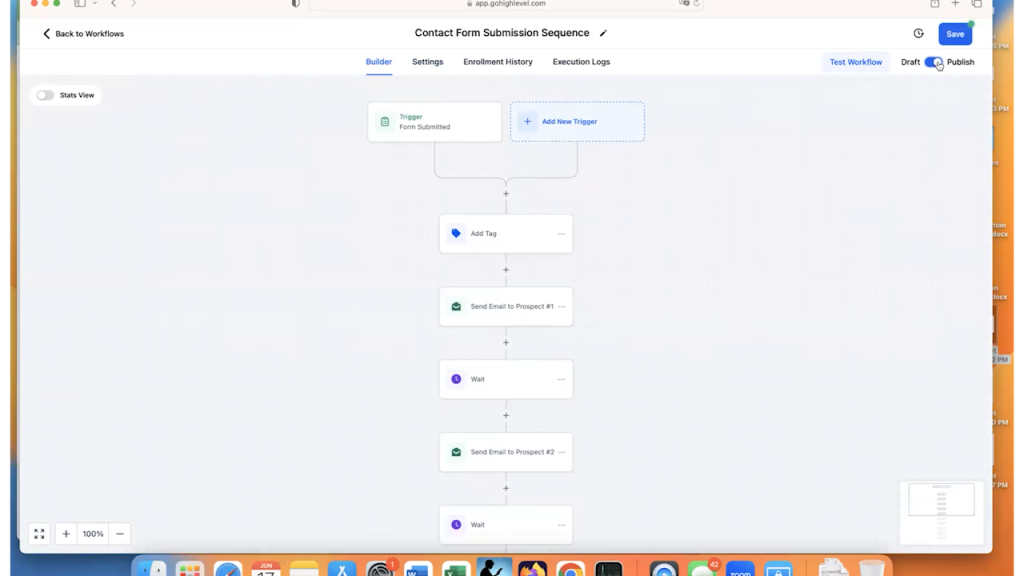
This pulls up a blank workflow form that is pre-named with some numbers.
The first thing that you will want to do is give your workflow a descriptive name. To do this, just click on the current name to make it editable, then re-name it and click save.
So, as I mentioned before, a trigger is how you start a workflow in GoHighLevel.
Some examples of triggers:
In this case, the trigger that we are selecting is “Form Submitted”.
So, click on the “Add New Trigger” and select the “Form Submitted” choice.
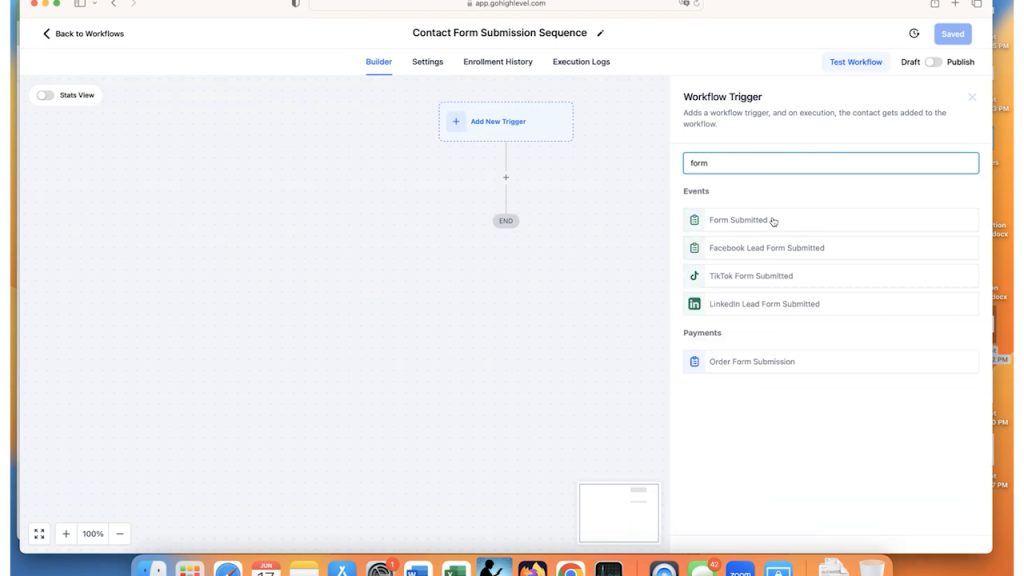
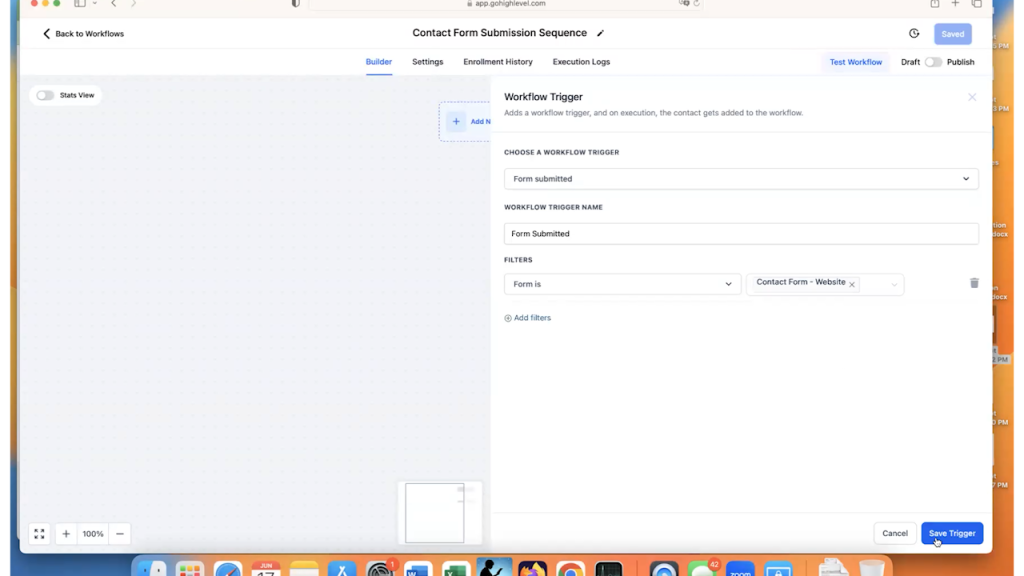
Once you select that option, you will need to specify which form and any other filters that you would like to apply to the workflow.
In the “Filters” section, select “Form Is” and then choose the form that you created in the dropdown. Click “Save Trigger” to finalize your first workflow action.
Now, when someone submits that form, they get entered into the workflow sequence.
Typically, in any CRM, you want to know where lead comes from.
Some normal lead sources include:
In this case, the website is coming from the website contact form. We will want to add a “tag” to the prospect record so that we know how he or she first contacted us.
You can think of a tag as a label or a category. Tags are very helpful when it comes to sending out marketing materials or looking at what marketing methods are working. This is because you can actually search your GoHighLevel contacts by tag type. So, it you have 5 tagged as from Facebook and 20 tagged as from Google Ads, you will know that your Google Ads are probably working better than your Facebook marketing methods.
To tag someone using your workflow, you will click on the “+” to add an action, then select the “Add Contact Tag” action option.
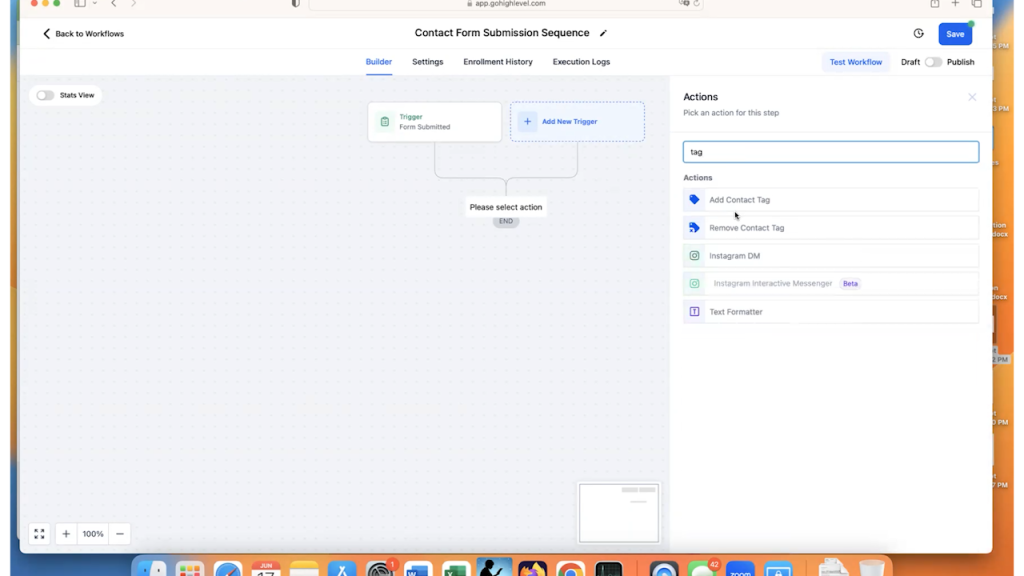
If this is the first time adding a tag, you will need to type one in and click on “Add New Tag”. When I create tags, I typically do Name-of-form-submit as the tag, like you can see in the illustration:
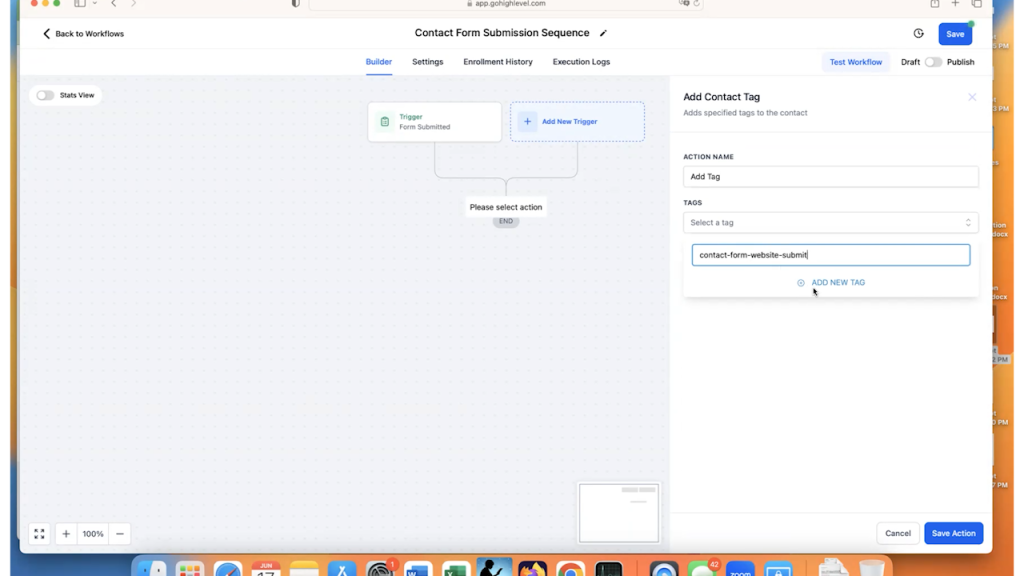
Then, click on “Save Action” to add that step to your workflow.
We now have the workflow setup to start when someone submits the form and to tag them to let us know that they came from the Contact Form on the website.
Next, we need to send them some emails.
The first email that they receive should be an email that lets them know that their submission went through and that we will be contacting them shortly.
To do this, we need to click on the “+” button at the bottom of the workflow and then select the “Send Email” action.
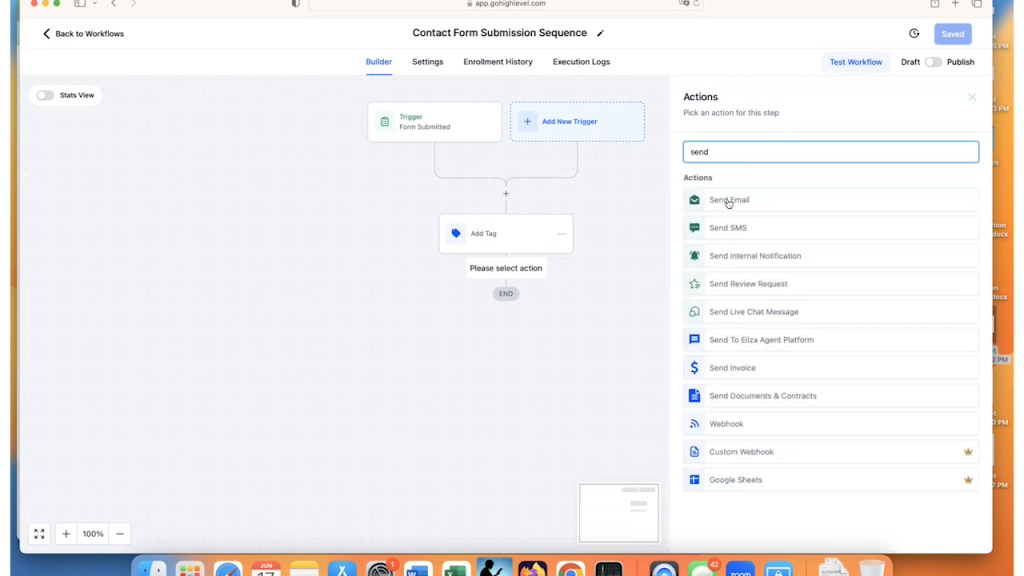
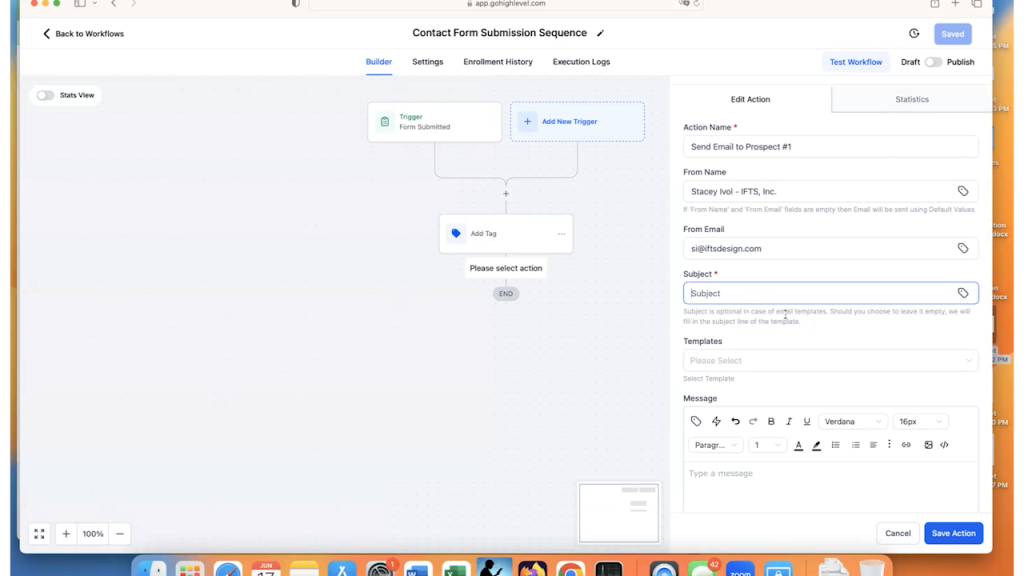
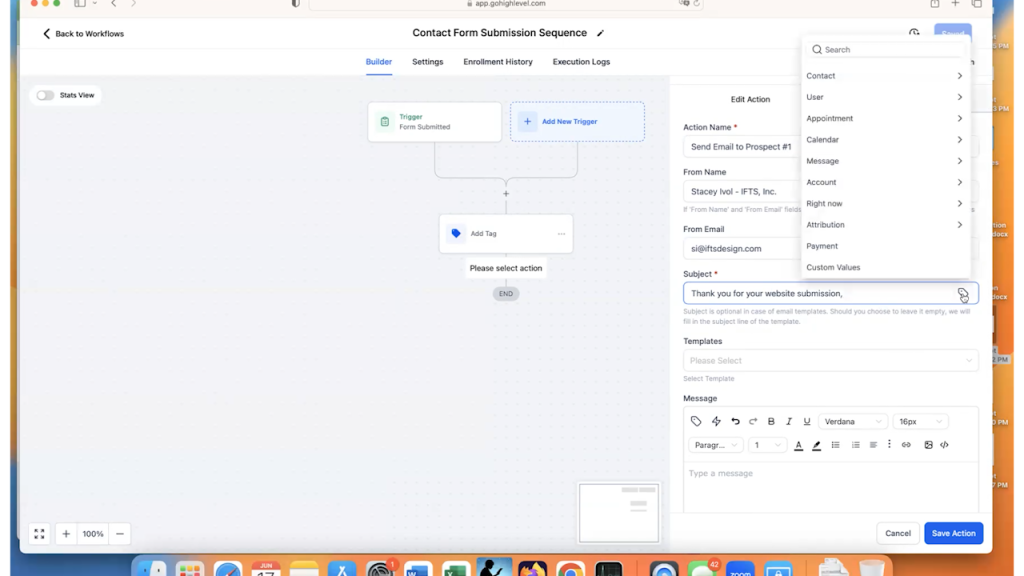
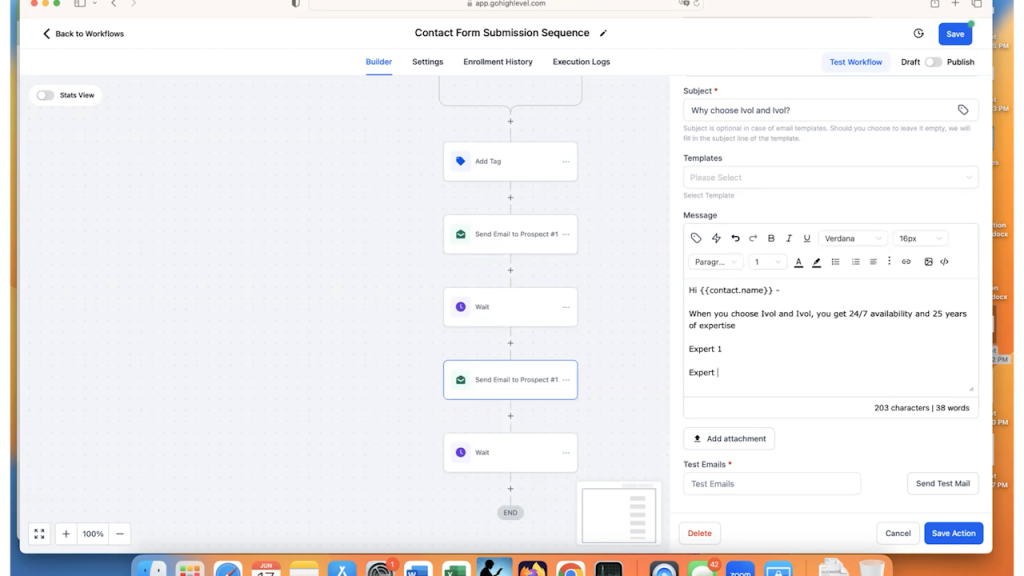
This brings up the default “Send Email” fields on the right-hand side.
We will want to change 5 things:
Here is an example of the set of fields completely filled out:
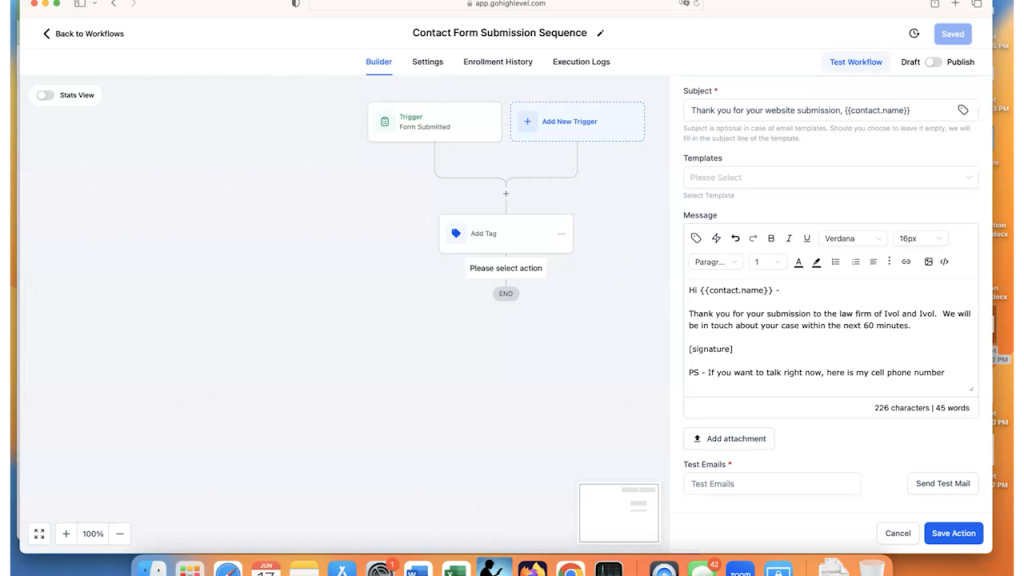
You can see in the subject and in the message that we personalize them with the person’s name.
To add in the name or any other available field from GoHighLevel, click on the “tag” icon in that section and it brings up a dropdown of available fields for you. Select the Contact > Full Name to get the name in the text section.
Then, click on “Save Action” and save the workflow.
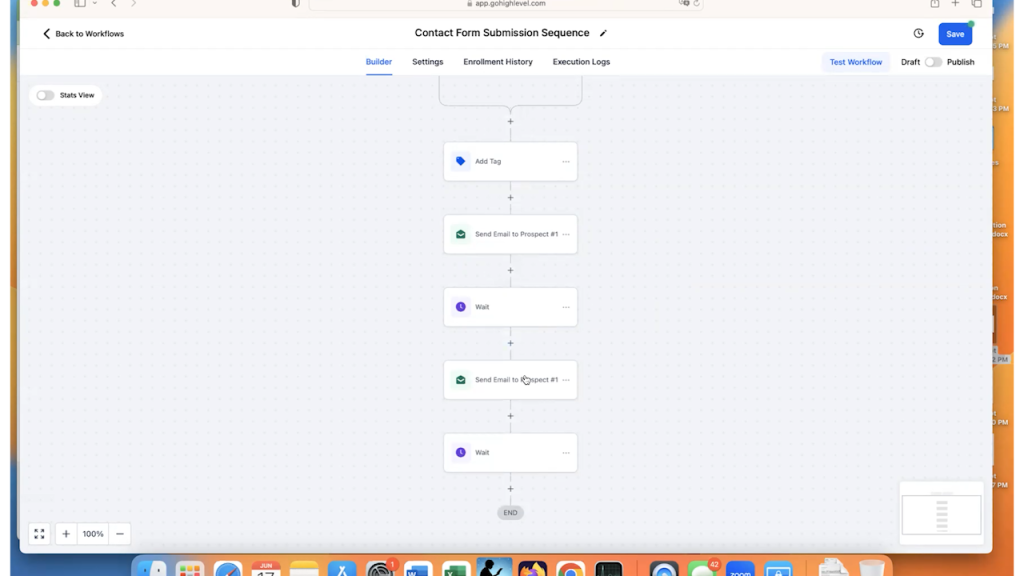
So, we now have the workflow set to:
When a contact submits via your site, most companies like to send them 3 – 5 emails. This allows your website to become your best salesperson that works 24/7/365.
However, you don’t want to send those emails right away.
This is where the very important “Wait” action will come in.
After the first email goes out, we recommend waiting about one hour to send the second one. This is because you are already top of mind with the prospect and (in a perfect world), you will have already contacted them about their submission.
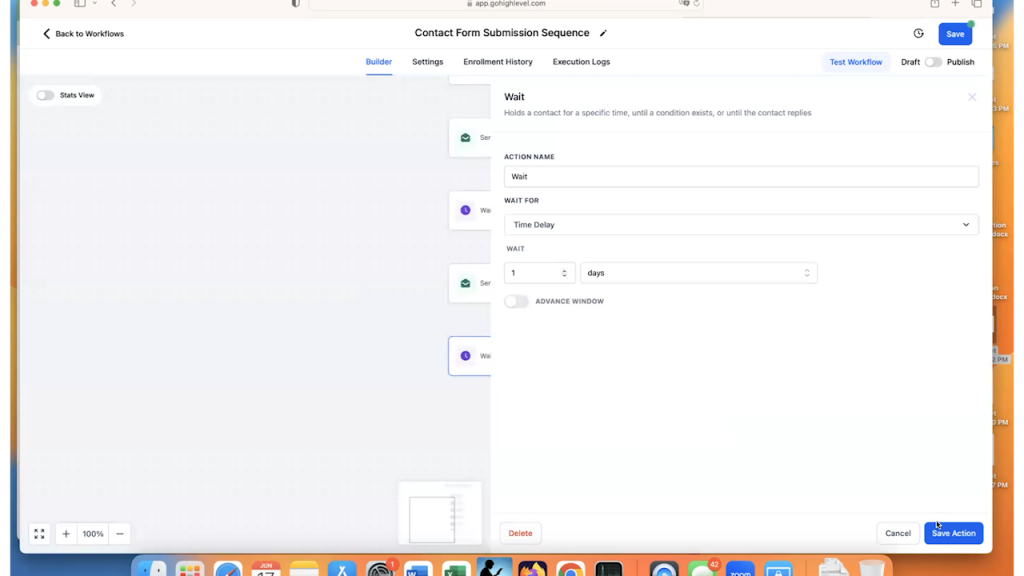
So, click on the “+” button and select the “Wait” action
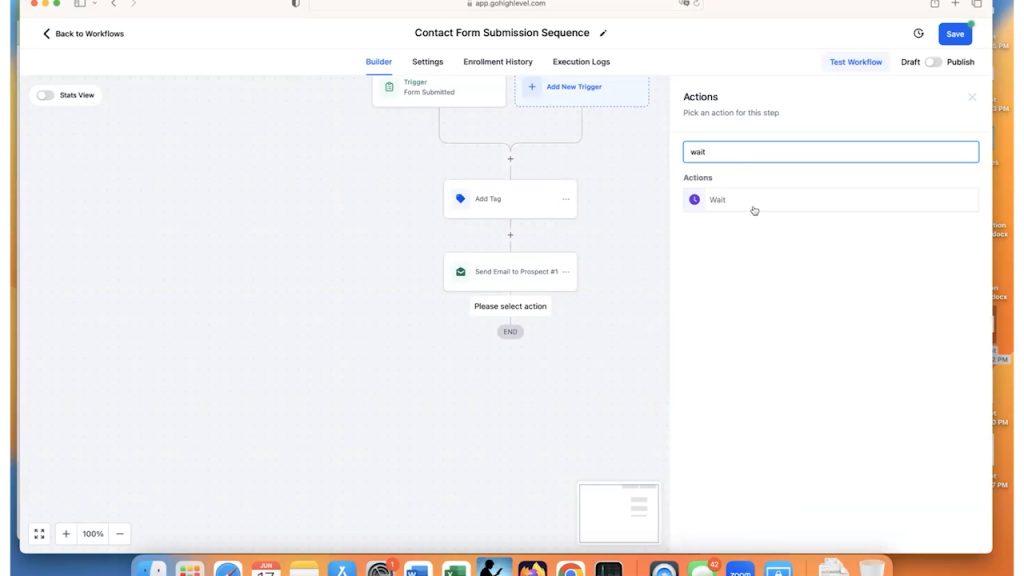
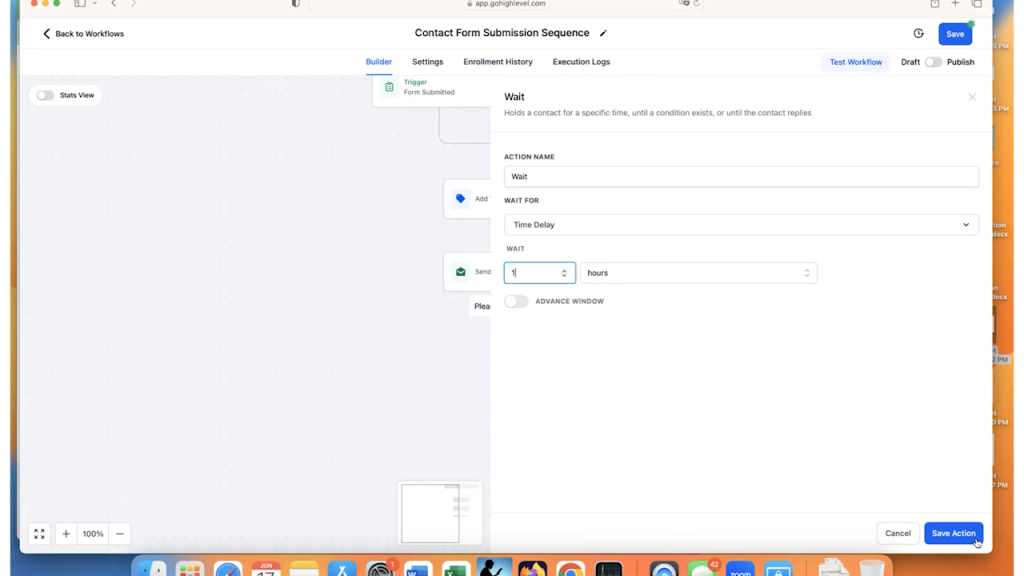
The “Wait” options are very simple.
How long do you want the program to wait before doing the next action in the sequence?
As I mentioned before, one hour is a good option in this case.
So, select “one hour” and save your action and your workflow.
One nice feature of GoHighLevel is that you can copy an action (or a set of actions) within a workflow. This really cuts down on the work needed to create an email sequence because you really only need to change the action name, the subject line and the body of the message.
To make a copy of the email step and the wait step, click on the 3 dots next to the email step. Then select “Copy” and “Copy All Actions From Here”.
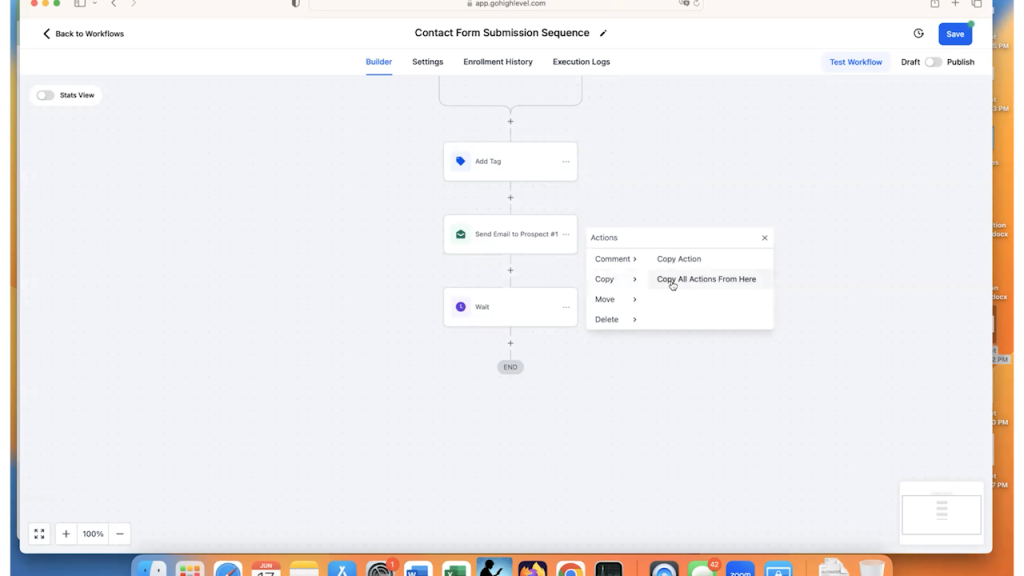
Then, you will be asked where you want those copied steps to go. It’s kind of like copy and paste.
Select the “Copy Here” text at the bottom of the workflow.

This then “pastes” the copied actions to the end of the workflow.
To make changes to these “pasted” actions, you’ll need to click on them to bring up that right-hand menu.
In this example, these are the changes that we made to the second email:

In email 2, we talked about our company and what we specialized in so the prospect would get to know us a little bit.
Once you have made the changes to that email, save the action and save the workflow.
We also will want to change the “Wait” action.
Normally, for the next wait, we recommend one day.
So, go into the “Wait” action and change it from one hour to one day.
Don’t forget to save the action and save the workflow.
For email 3, you will want to repeat the steps above.
Copy the Email 2 action and the Wait action and paste them at the bottom of the workflow.
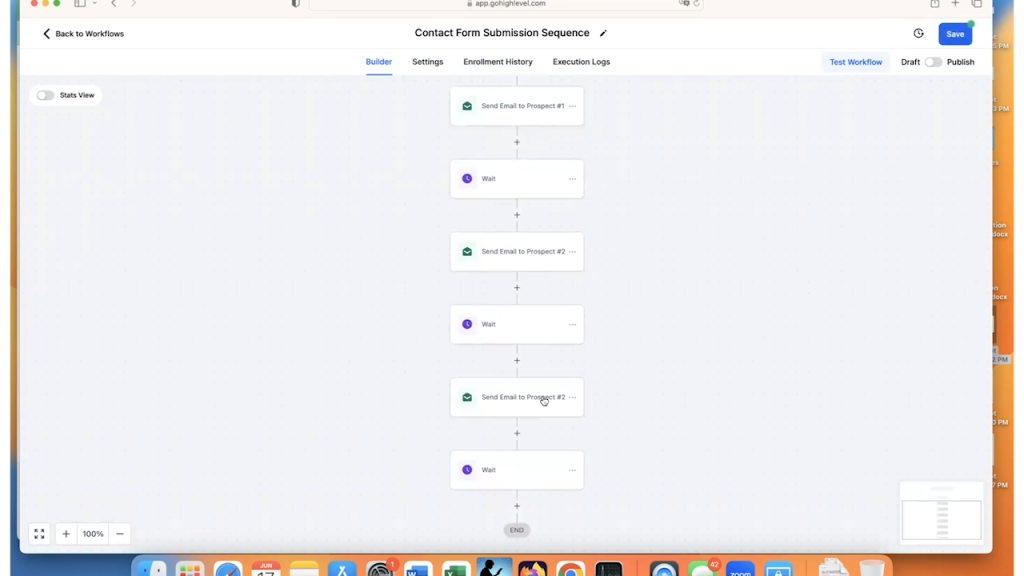
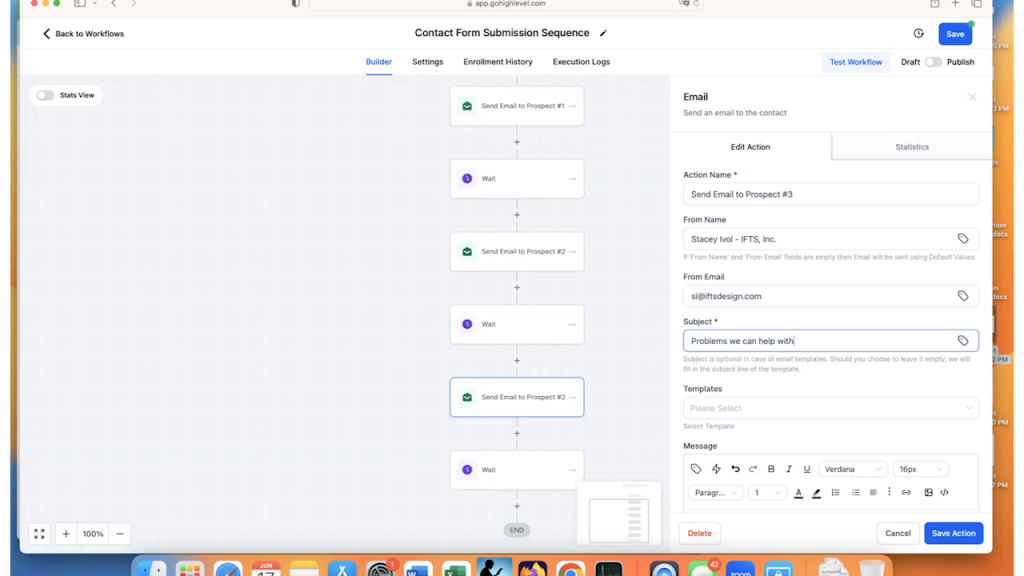
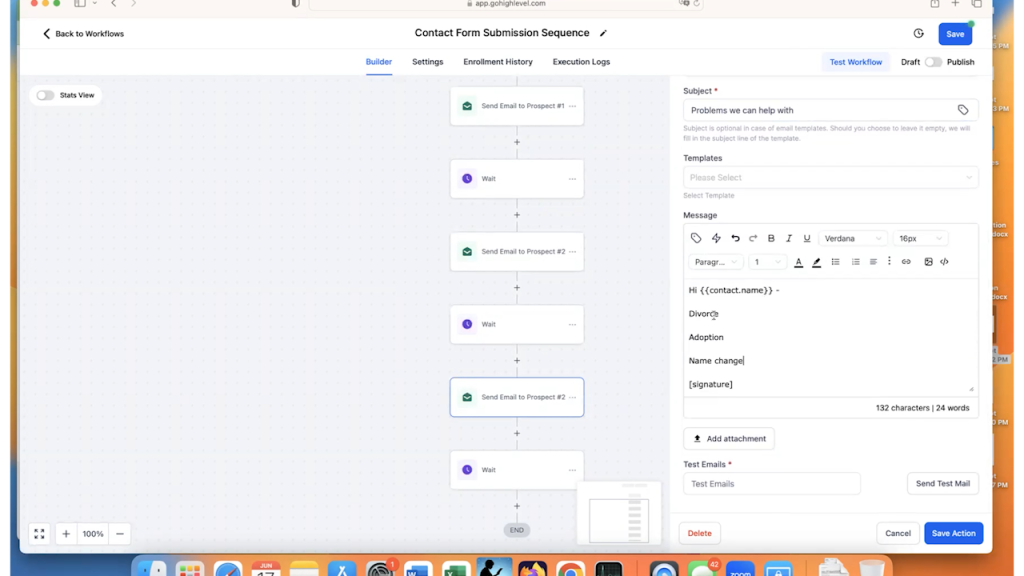
You’ll want to make changes to the name, subject and text of the third email.
This is where you may want to talk about what problems you can solve.
Again, to make changes, click on the email block to bring up the right-hand menu.
Here are the changes that we made in our example:
Save the action and workflow.
Then, you’ll need to change the “Wait” action. Here is where I would change it to two days.
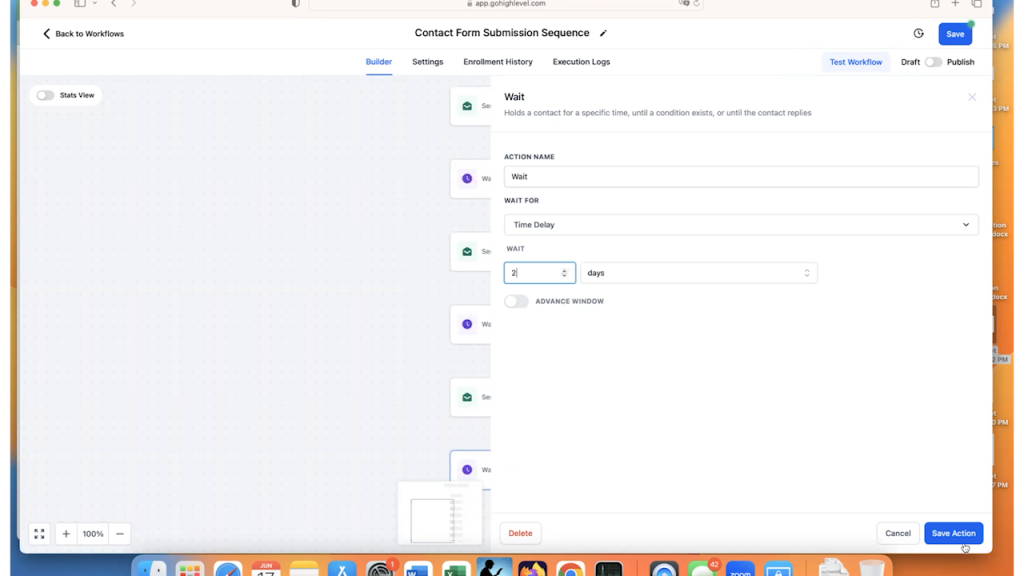
Save the action and workflow.
To create email 4, you’ll copy email 3 and the wait action just as before.
For email 4, you may want to send a few testimonials from Google or Facebook. This lets them know what it is like to work with you and your company. If you have any video testimonials, this is where to use them. Show your prospect smiling, happy people that love you!
For the “wait” action after email 4, I would change it to 3 days.
A commonly recommended sequence for the “wait” actions in an email is derived from the Fibonacci sequence.
Wait 0 (Thank you for your submission email)
Wait 1 (hour)
Wait 1 (day)
Wait 2 (days)
Wait 3 (days)
Wait 5 (days)
Etc.
This sequence is a tried-and-true tested time sequence for sending emails.
Finally, to create email 5, you will copy email 4 this time just like above.
In most sequences, Email 5 should just contain a quick call-to-action (CTA) that is short, sweet and to the point.
Example text for that email could look like this:
Hi [prospect name],
Just wanted to contact you to see if you had any questions or concerns? Let us know!
If not, let’s get started! Give us a call at [number] and you can start in the next 24 hours
[Signature]
Then, save the action and the workflow and you are done implementing the customer email sequence.
There are a few settings that you will want to check in GHL to make sure that everything is going to work the way that you want.
The first thing is that you want people to be able to go through this sequence multiple times. This way, if someone contacts you now and six months from now, they will be re-entered into the workflow.
To turn this on, go to “Settings” in the workflow and make sure that “Allow re-entry” is toggled on.
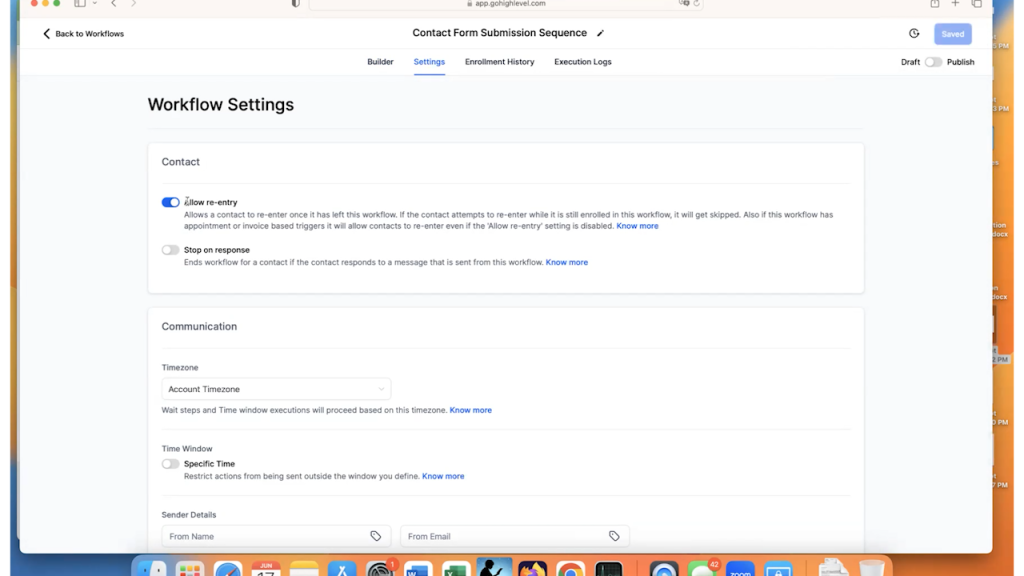
To officially turn on the workflow, toggle on “Publish” from “Draft” (in the upper-right corner) and click on “Save” to finalize that.
You are now LIVE with your workflow in GoHighLevel!
The money is in the follow up. This is why you want your website in your CRM to be your best salesperson. By having these emails sent out automatically, you are on your way to client success.
The best way to test the GHL automation is to step through it with a test user.
So, bring up the form and fill it in, then submit.
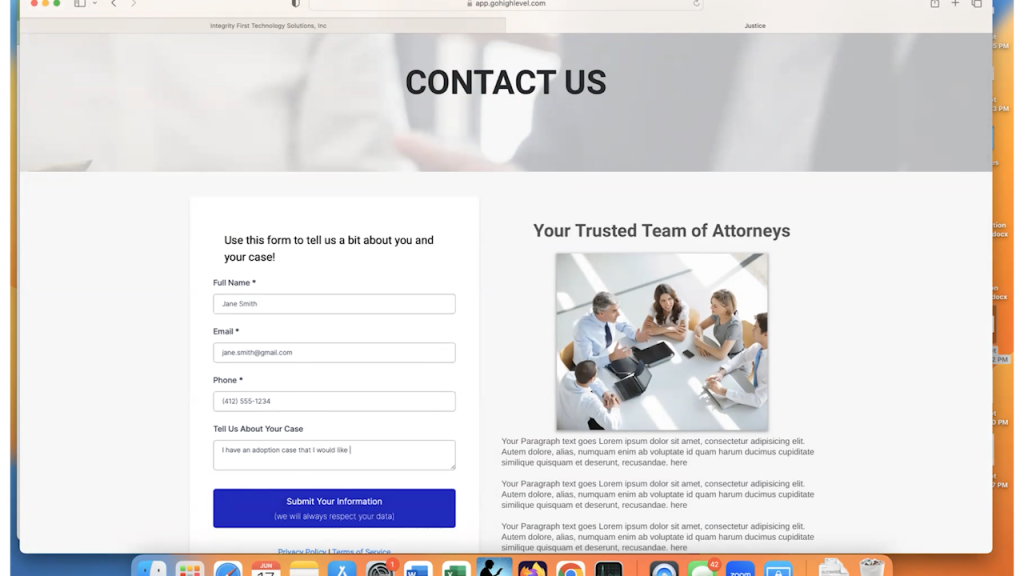
Make sure that the form shows the “Submit Success” message.
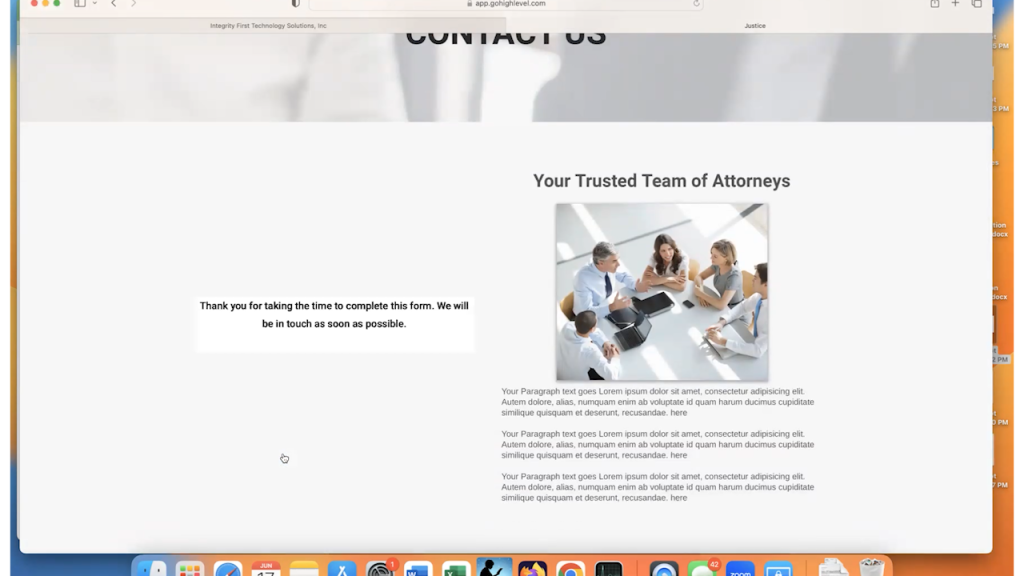
If it doesn’t, you will want to check out part 1 of this blog post here.
Now what happens on the other side in the CRM?
In GoHighLevel, go to the contacts menu and make sure that the person that you entered into the form shows up. In this case, we should see “Jane Smith” in the contacts list.
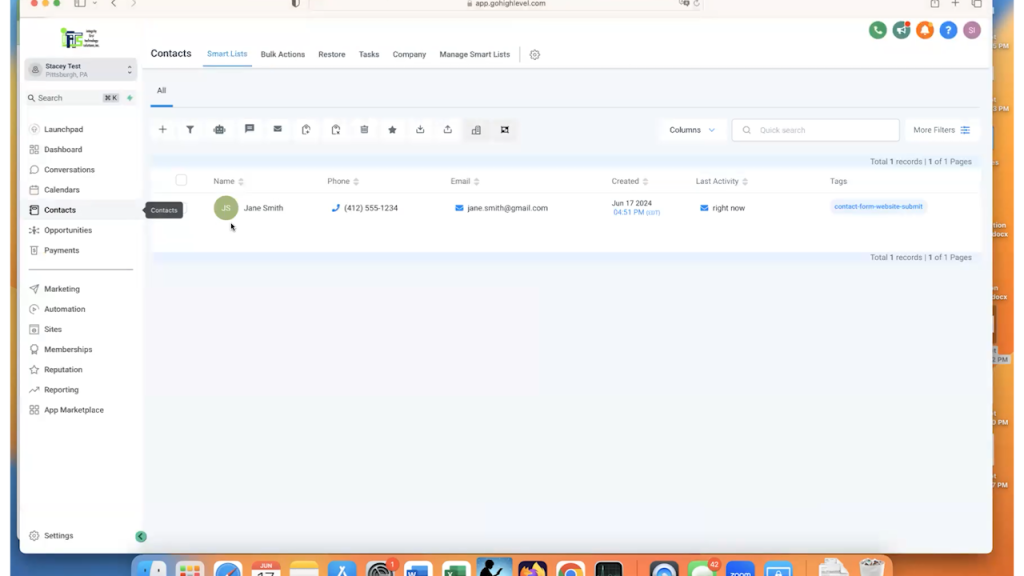
You can see her name, phone number and email that was entered. In addition, you can see that she was tagged correctly, with the “contact-form-website-submit” tag.
To get a little deeper, click on her name to open her record. Then, go down to “Additional Info” to make sure that we see that custom field that we created in Part 1 and that it is filled in.
Final check – look at where she is in the automation workflow.
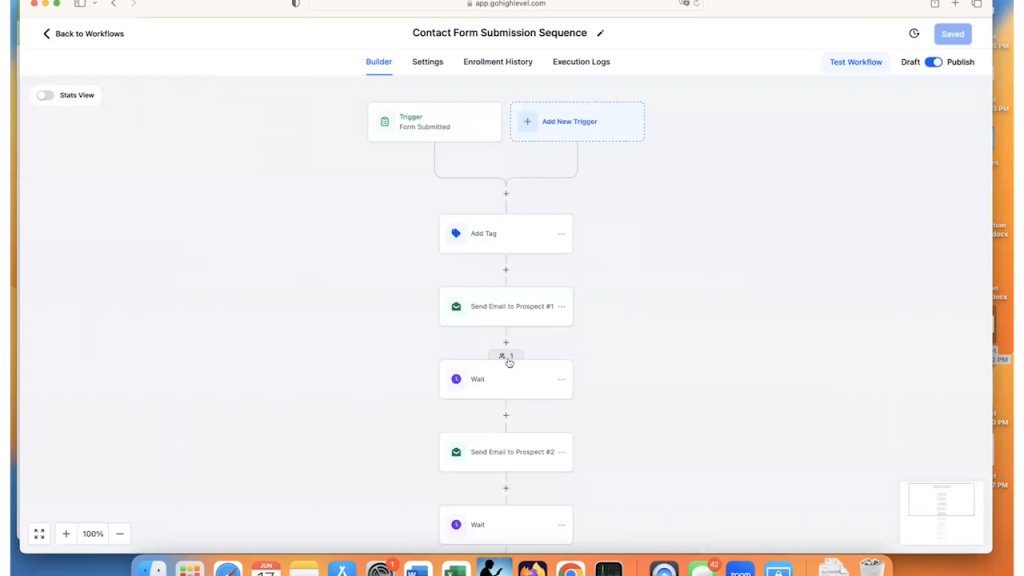
So, go to “Automation” and open your workflow that you created.
You should see one person enrolled and active, which is the test person that you entered in the form. In this case, it will be “Jane Smith”.
Click into the workflow and you can also see the person that is enrolled sitting at the first “Wait” state.
To check into it more, you can click on “Enrollment History”.
In this tab, you can see everyone who has gone through the workflow in the last 30 days. You’ll see the date that people entered the workflow, the current state that they are in, the current status and the next time they are scheduled to move to a new step in the workflow.
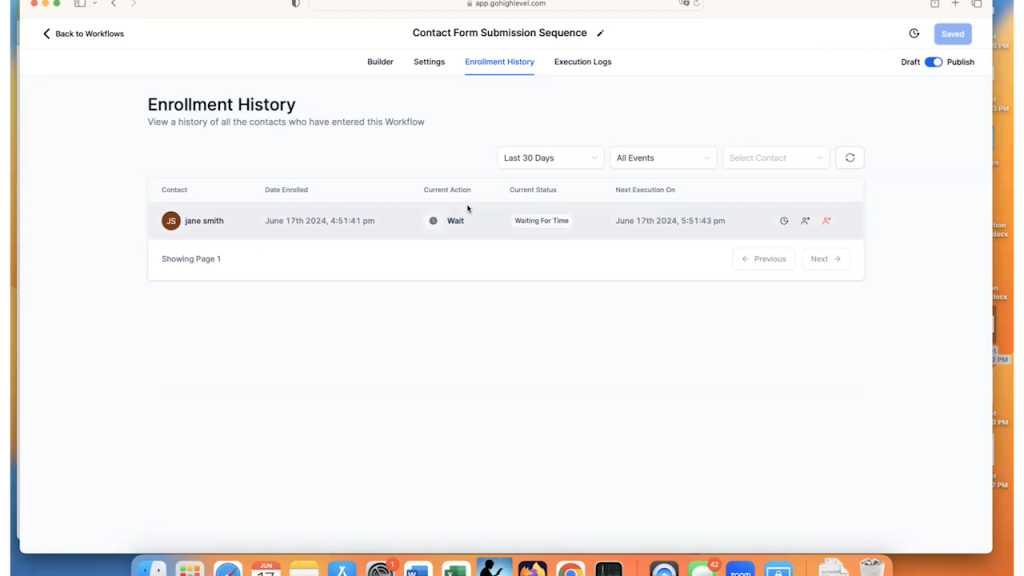
So, any time you want to quickly see where anyone is in your workflow, you can also look at the enrollment history.
The final spot to check is the “Execution Logs”. This is where you can see the tiny details about every action that the automation has taken.
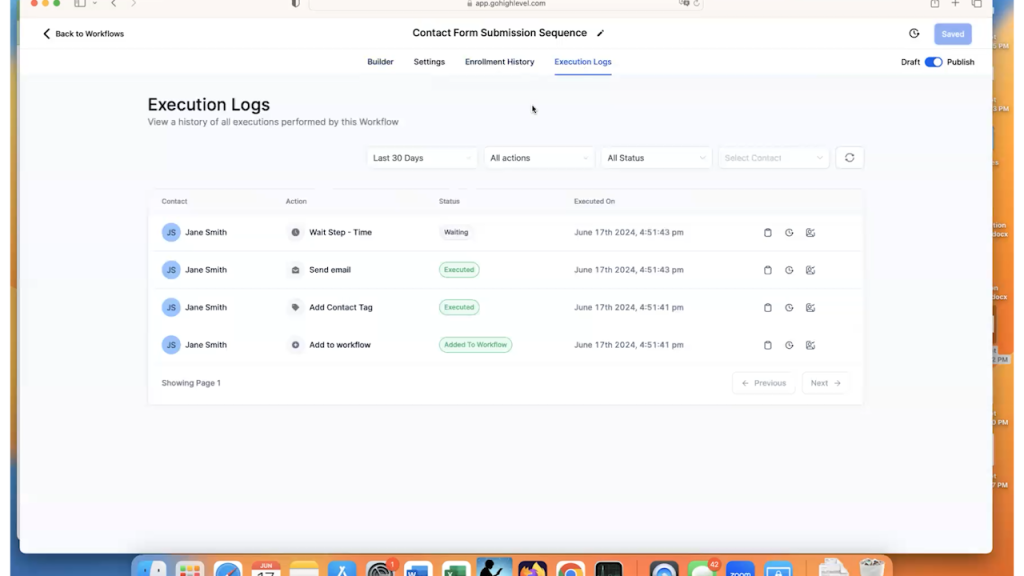
These logs will show you each step that a contact has taken through the automation, when it was taken and if it was successful.
If you don’t want to monitor your contact list closely all day, every day, you will need to know when someone submits the form.
This is where GoHighLevel’s “Internal Notifications” come in.
When someone triggers the workflow, the first thing that you will want to do is notify yourself.
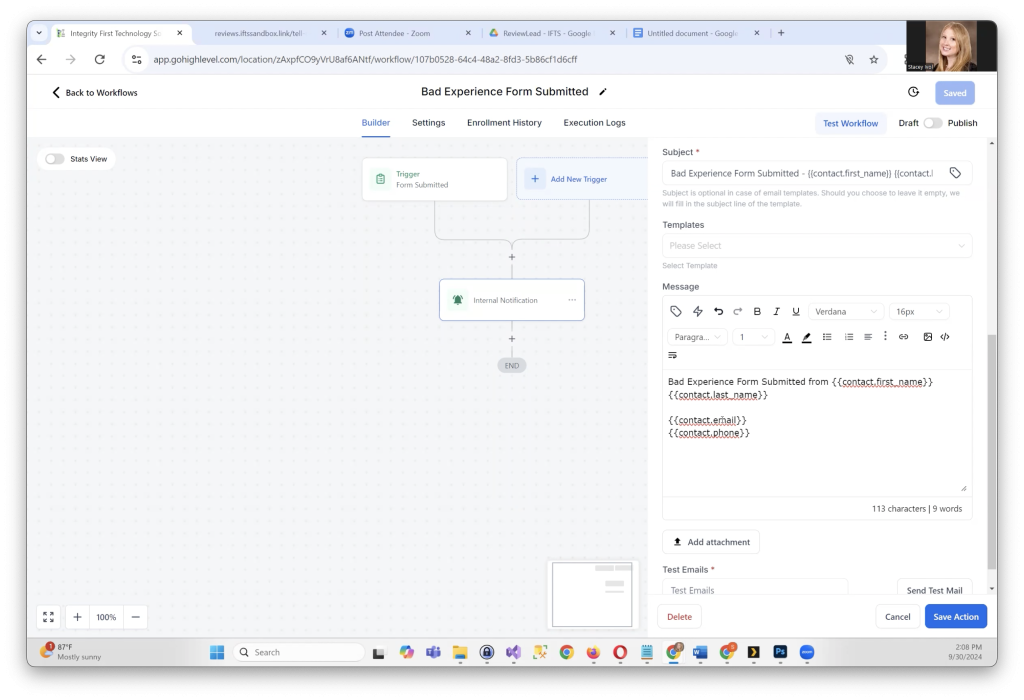
So, go back to your workflow and click on the “+” to add a step directly below the trigger and select the “Send Internal Notification” action from the list.
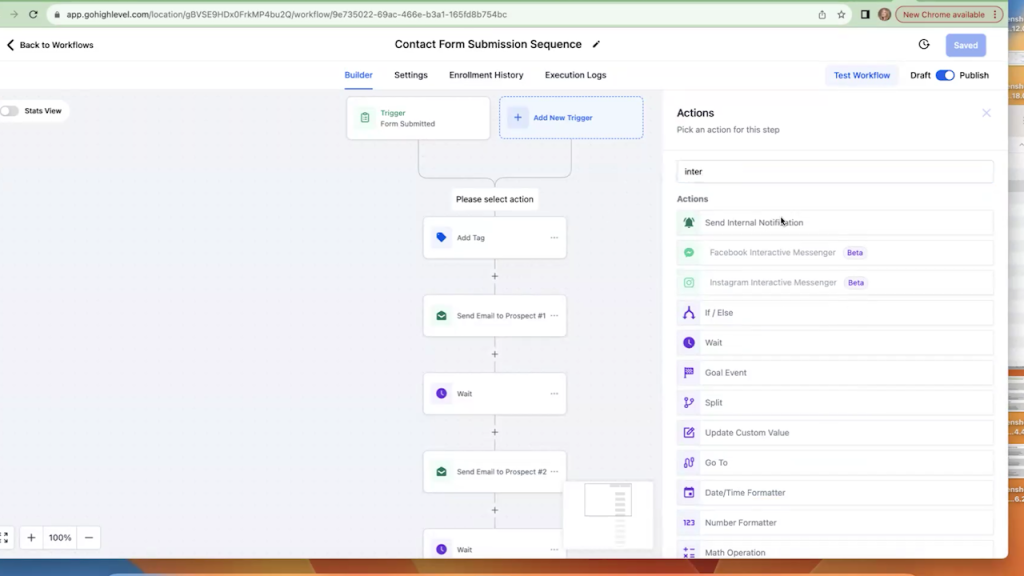
“Internal Notifications” are different than “Send Email” steps in one very important way. The internal notifications go to you or members of your team. The “Send Email” recipients are always outside of your organization.
You have 3 choices for internal notifications in GoHighLevel:
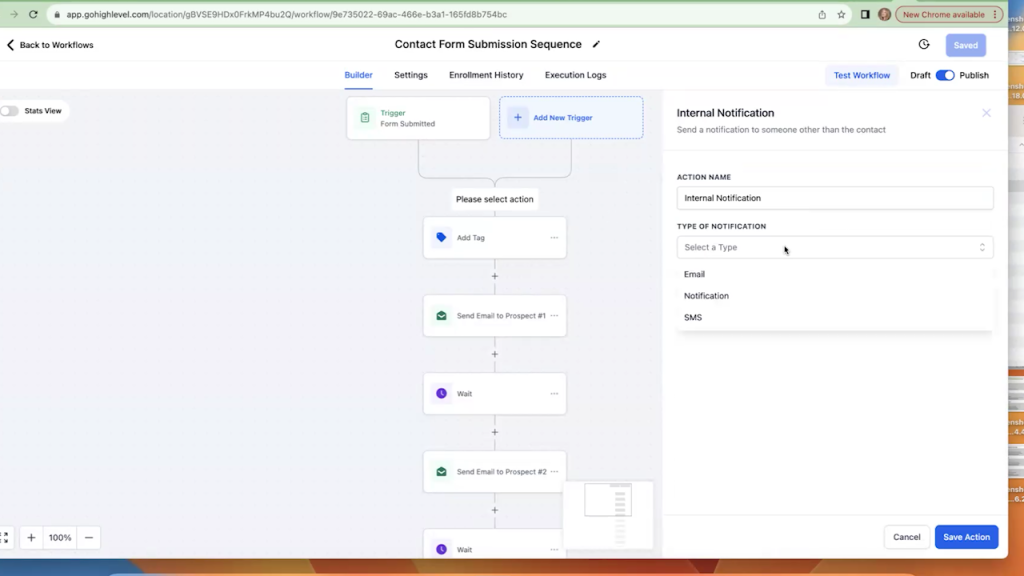
In this example, we are going to choose the easiest one, which is the email.
So, once you choose email, you will need to fill out the following fields:
Let’s review each of these.
The “From Name” and “From Email” are similar to what they were in the “Send Email” step. This is the sender information that will show up in the email. Most people like to either make this their own email address or a “no-reply” email address.
“To User Type” has 3 options:
In this example, we are selecting “Particular User”, then we are going to choose our name.
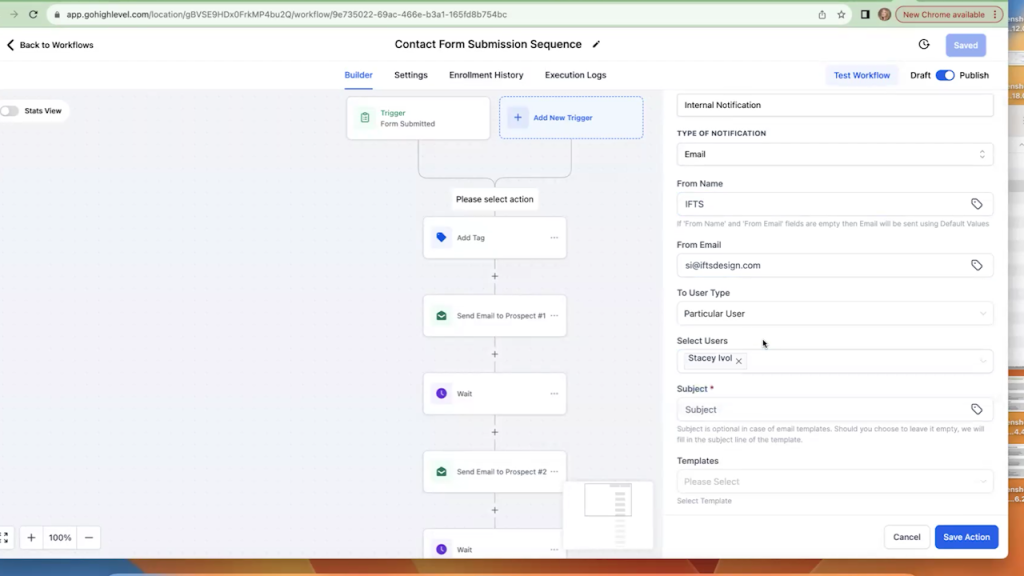
The “Subject” field is the subject that will show up in your email inbox. Typically, I like to add the prospect’s name in the subject line using the custom field ability.
The “Message” field is the body of the email that will be sent to you. You will want to include all of the fields in the form in the text so you have all of a prospect’s information in front of you when you contact that person.
To include the custom text, you will add it just like you did in the “Send Email” section. You will click on the tag, go to Contact and select the field that you want in the text.
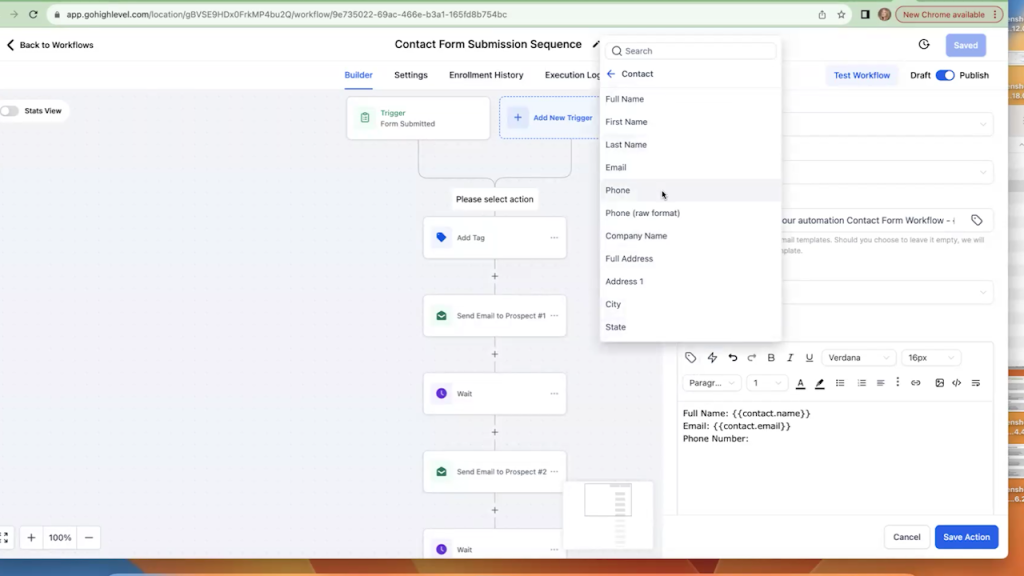
Here is the final example of the subject and the message fields filled out:
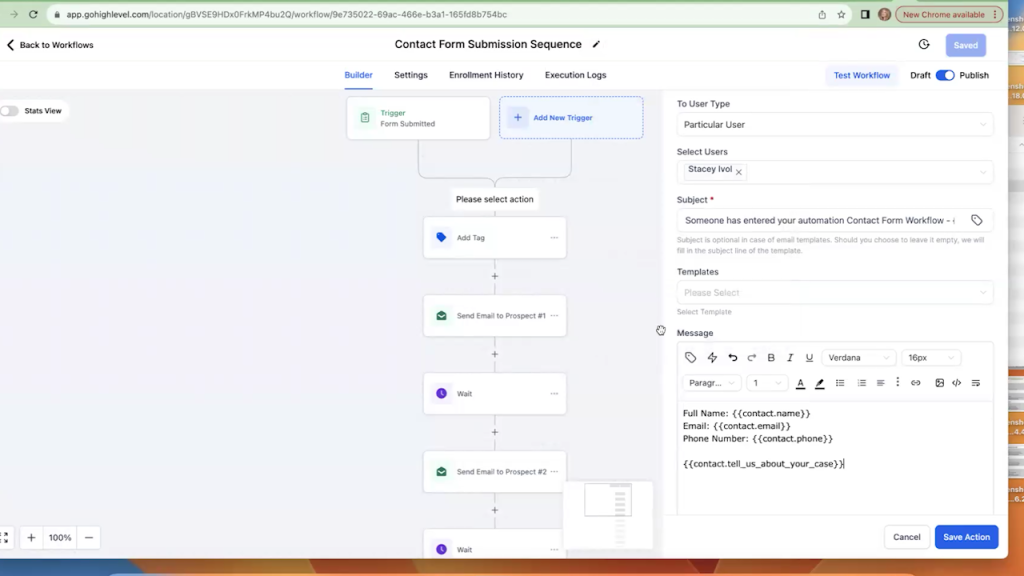
Click on save action and then save the workflow.
You now will be notified as soon as someone submits the form on your website – the automation is complete!
Contact those submissions right away and start getting a ton more clients!
Here’s why implementing all of that automation is so important:
If you contact a new lead within five minutes, you are much more likely to turn them into a client. Studies show that reaching out within this time frame makes you 100 times more likely to talk to the lead and 21 times more likely to qualify them compared to waiting 30 minutes. Plus, 78% of customers buy from the company that contacts them first. So, quickly responding to new leads can greatly boost your chances of making a sale.