fbpx

Helping Your Painting Business Rank in the Google 3-Pack

When you search for a local business on Google, the first three results that appear are known as the Google 3-Pack. The 3-Pack (also known as the local pack or snack pack) is displayed with a map that provides the location of each business as well as basic information about each business. The 3-Pack is above normal search results, which makes it a valuable piece of real estate for any local business that wants to reach people who are looking for something in their area.

Let’s talk about helping your painting business rank in the Google 3-pack.

In our experience, a lot of phone calls come from just showing up below the map in Google when someone is searching for a painter.

The best part about this? These calls are coming to you free of charge. So, how do you get more of these free calls?

To rank in the 3-pack, Google looks at 3 things:

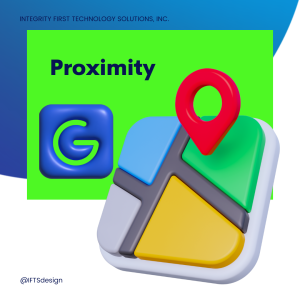
1 – How close your business address is to the searcher, or proximity

2 – How prominent your business and brand are online, or prominence

3 – How related your company is what the person is looking for, or relevance

Now, you can’t do much about the first one, so you need to concentrate on the other 2.

Let’s start with prominence.

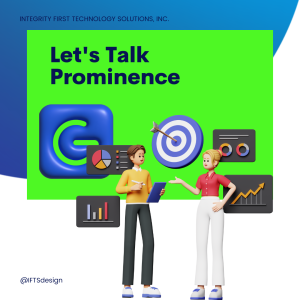
For this, Google is going to look at how many other websites link to you online.

This isn’t about the quantity of links, but the quality of the links. So, you want to be sure to have links from all of the organizations that you belong to and if possible, from all of the charities that you participate in. These are the types of high-quality backlinks that Google is looking for.

Google is also going to look at a bunch of different online directories/citations and make sure that your name, address and phone number all match what is in your Google Business Profile and on your website.

If you’ve moved locations a few times, you may want to look into a tool like Yext to help you get that all straightened out. We also offer this service at our company.

Now, let’s move onto relevancy.

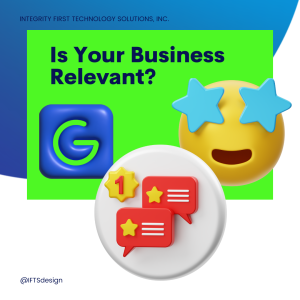
It used to be that the closer your company name was as seen in your Google Business Profile to the search terms that someone put in, the more likely it was that you would show in the 3-pack. However, companies started to game this system by naming themselves things like “Pittsburgh House Painters” in their Google Profiles. Once Google became aware of this issue, they replaced looking at the business name with looking at your reviews!

So, Google now wants to see detailed reviews about your company, and they will look at the keywords used within the reviews to determine the relevancy to a person’s search term.

For example, if someone in Oklahoma City was looking for someone to paint their living room, Google would probably expect words like “interior painting”, “painters”, and “OKC” to be in the review text.

So, what does this tell you?

You need to get reviews on a regular basis to establish the relevancy that Google wants to see.

Unfortunately, these can’t just be any reviews.

They need to be high-quality reviews that mention words that Google wants to see…which will help you get more free phone calls.

So, how do you accomplish this seemingly impossible task of putting words into people’s heads? 

You’re not a magician.

Well, when you ask for a review via text or email, we have found that it’s good to provide a nice basis for them, which helps avoid writer’s block and allows you to put ideas in their heads…kinda like Inception, but without Leonardo DiCaprio.

As an example, you could send the following email:

“Mrs. Smith – 

We hope that you found our service to be extraordinary.  If that is the case, we would love for you to leave us a review.

To help you get started (and avoid writer’s block), we have found that the most impactful reviews answer these questions:

  • What work did we do for you and where are you located?
  • Was it done well?
  • Why did you pick our company?
  • What was the best thing about working with our company?
  • Would you recommend us to family and friends?

Please click here and it will take you directly to our Google Review Page: [Link]

Thank you for choosing us and we really appreciate you taking the time to leave a review.” 

By asking these questions, you help guide them to use the words and phrases that will make your reviews relevant to most searchers looking for companies like yours. In addition, they will leave reviews that look non-spammy and well thought out.

The other thing about reviews is that you need to get them regularly…and this is for a few reasons.

Reason 1 – Google wants to see recent reviews to help with relevance

Reason 2 – Prospects want to see recent reviews to help them make a decision

In fact, almost 50% of people won’t even consider a review relevant if it was written over one month ago.

So, you’ll need to create a system that helps you get reviews on a regular basis.  We have a whole video about this, which I’ll link to in the description.

As a bonus, you should respond to reviews to help increase your relevancy. In your response, it gives you a chance to mention the place you worked and what the job was. It also allows you to express your gratitude to the person that took the time to leave you a review.

So, in summation, ranking in the 3-pack requires 3 things:

  • Proximity
  • Prominence
  • Relevance

Because you can’t change the first one, be sure to concentrate on the second two to have the best profile possible and get more phone calls than your competition.

If you have any questions about the topic discussed in this article, or if you need help with ranking in the Google 3-pack, contact IFTS at 412-715-6266 or email Stacey Ivol at si@iftsdesign.com.

Creating Video Marketing Content With Canva: Useful Strategies For Your Small Painting Business

Creating Video Content With Canva: Useful Strategies For Your Small Painting Business, PART 2

Let’s face it, in the world of small business marketing, standing out can be tough, but is critical. In our last blog, we gave you the tools to create professional-looking videos with Canva, without needing a Hollywood production team. 

But hold on to your paintbrushes, because in this article, we’ll be unleashing your inner creativity to make those videos shine brighter than a fresh coat of paint!

Let's Get Creative

Canva also allows small businesses and house painters to add text, graphics, transitions, and music to make their marketing videos more engaging and effective. These features can add interest to the message and grab the viewer’s attention.

Here are some simple ways to make your videos stand out from the crowd!

Got Graphics?

Graphics and text are a great addition to your marketing video and help you create a moving story for your brand. Try not to get too carried away with adding these elements to your video, though. You can always add more later! Start simple by doing the following:

  1. Select the “Elements” tab from the toolbar on the left-hand side of the editing screen.
  2. Choose the graphic or icon you want to add to your video and drag it onto the timeline.
  3. Resize and adjust the graphic as necessary and position it where you want it to appear by dragging the corners of the purple box that appears when you select a graphic.
  4. Click on the graphic to also customize the color, size, position, rotation, or transparency of it.
  5. Repeat the process to add more graphics to your video as required.
  6. The same steps can be applied for adding custom text by selecting the “Text” tab located on the same toolbar as the “Elements” tab.

Add Animation!

Animating graphics in Canva can add a lot of interest and movement to your marketing video. Animations can make your video look better and help you tell the story in a more exciting way. Here’s how to animate graphics in Canva:

  1. Select the graphic that you want to animate by clicking on it in the editing screen.
  2. Click on the “Animate” button located in the upper left corner of the editing screen.
  3. Choose the animation style that you want to apply to the graphic, and adjust the animation settings as necessary. Canva provides a range of animation effects, such as fade-in, slide-in, and bounce.
  4. Adjust the timing and duration of the animation by clicking on the “Animation length” button and setting the length of time you want the animation to last.
  5. Preview your animated graphic by clicking on the “Play” button located in the bottom left corner of the editing screen.

*Pro tip* –  Like graphics and text elements, animations should be used sparingly to avoid overwhelming the viewer with too many moving elements.

Timing is Everything

Timing is a critical aspect of video editing, and it’s no different when adding graphic elements to your marketing video in Canva. If the timing of your graphic elements is off, it can take away from its effectiveness and impact on your viewer. Therefore, it’s important to know how to change the timing of these elements in Canva.

  1. You will need to navigate to the timeline tab located at the bottom of the editing screen. This is where all of the elements you have added to your video are displayed in order of appearance.
  2. Once you have located the graphic element you want to adjust the timing for, simply click on it to select it. You will notice a tab with three dots appears above, and when you click on those dots, a new menu pops up with several icons, including a timer.
  3. Choose the timer icon to show its timing, which is now displayed as a purple bar with a thumbnail of the graphic just above your video timeline at the bottom of the editing screen.
  4. To adjust the timing of the graphic element, simply click and drag it to the left or right along the timeline.

*Pro tip* – keep in mind that the timing of your graphic elements should be in harmony with the overall rhythm and pacing of your video. You can experiment with different durations and timings to see what works best for your video.

Smooth Transitions

When you have more than one video clip in your video timeline, you can choose to transition between those clips in fun and unique ways such as fades, slides, pops and more! Transitions can help create a smooth or more interesting flow between the sections of your video. Here’s how to add them:

  1. With your cursor, hover over the space between two clipped sections of your video. A plus icon will appear, as well as the transition icon.
  2. Select the transition icon and a menu will appear with different types of transitions you can apply to your video.
  3. Choose the desired transition style and it will appear on your video’s timeline between the two video clips.
  4. While in the transitions menu, you can adjust the duration by dragging the slider bar that appears below your selection.
  5. Repeat the process to add as many transitions as you’d like.

*Pro tip* – To add the same transition between each video clip, click on the “apply between all pages” button at the bottom of the menu to save time.

Music to My Ears

And last but not least, don’t forget about the audio. Your visuals might be on point, but bad audio can kill a video faster than you can say “soundcheck.” Make sure your audio is crystal clear and be sure to add music to your video to make it more engaging and emotional. Canva has a library of music you can use or you can upload your own. Just make sure you have the right to use it. Here’s how to adjust the volume of your video’s audio and add music:

  1. Select the “Music” button from the toolbar on the left-hand side of the editing screen.
  2. Choose the desired music track from Canva’s library or upload your own track.
  3. Select the music track and a new audio timeline bar will appear below your video’s timeline.
  4. When you click on the audio timeline bar an audio effects menu will show at the top of the video editing screen. Adjust the volume of the music by clicking the audio icon and dragging the slider in the volume tab.
  5. Trim the audio clip as necessary by dragging its edges.

*Pro tip* – If the track you’ve added to your video is too short, simply click the ending point of the track in your video and add it again. You may need to adjust where the music tracks overlap so they are in sync.

Get Ready to Roll!

Once you’re done adding effects and editing the visuals, it’s time to review your work and make sure that everything looks perfect and is ready for export. To do this, you can use Canva’s play button located near the top left corner of the page to preview how your entire video flows together.

Made a mistake? No problem!

The undo button is also located near the top left corner of the page, or with Canva Pro, you can revert to a previous version of the video and go from there.

Once you’ve finished editing your video, it’s time to export it so you can use it for marketing purposes. Simply click on the “Export” button and choose your desired video format and resolution. 

Canva offers a range of options, including MP4, GIF, and MOV. You can also choose the quality and resolution of your video.

*Pro tip* –  Keep in mind, many social media platforms only allow videos of a certain length to be posted, so be sure to adjust accordingly.

This is the Way

Don’t be afraid to experiment with different types of videos to see what resonates with your audience. Try creating how-to videos, product demos, behind-the-scenes videos, or customer testimonial videos to see what works best for your business.

By using videos to showcase your products and services, share your expertise, and promote your events, you can increase engagement and reach a wider audience.

Now you’re ready to share your videos on social media, embed them on your website, use them in your email marketing campaigns, and start getting the most out of your video content! 

With these tips and strategies, you’ll be able to create professional-looking marketing videos that promote your small business or house painting services that attract new customers and blow your competition away!

Remember, making videos should be fun and creative, so don’t be afraid to experiment and try new things. Happy video-making!

Need more help? Contact our social media experts at IFTS, and we will get the job done for you! Give us a call today at 412-715-6266, and we’ll get you started on creating videos that will take your business to the next level.

Creating Video Marketing Content with Canva: Useful Strategies for Your Small Painting Business

Creating Video Content with Canva: Useful Strategies for Your Small Painting Business, PART 1

Marketing videos can be a great way to promote your small business or house painting services. They allow you to showcase your skills and services in an engaging and visually appealing way. However, creating high-quality marketing videos can be challenging, especially if you don’t have the resources to hire a professional videographer or video editor.

What if we told you there’s an easier way to create those videos yourself?

We’re talking high-quality, friends – images and videos that will make your video look like a million bucks (even if it only cost you $12.99 a month for Canva Pro).

That’s right, you can make professional-looking videos yourself using Canva, which is a user-friendly graphic design tool that will have you making amazing videos in a matter of minutes. In the past, we’ve covered making social media posts quicker and easier using Canva, but in this blog, we’ll give you some of our most useful pointers for making marketing videos, specifically for small businesses and house painters. 

Creating marketing videos for a small business or painting company can seem daunting. But with Canva, you can create an amazing video without having to be a professional videographer.

Have a Plan For Your Marketing Videos

How Can Small Painting Businesses Use Videos to Market Their Products and Services?

Like with social media post creation, you need a plan for your video marketing. This doesn’t have to be complicated. Decide how you want to promote your services and who your audience is.

For instance, if you own a painting company, you may want to use video to showcase your team at work, customer reviews, tips and tricks, or a recent project, highlighting your attention to detail.

Here are some ways small painting businesses can use videos to market their products and services:

  • Showcasing Products

You can create videos that show your products in action, such as videos of painting techniques, before and after shots of painting projects, or your favorite paint brands.

  • Sharing Expertise

As a painting business owner, you have expertise in the field that your customers can benefit from. You can create videos that share your expertise, such as videos on how to choose the right paint color, how to paint a room like a pro, or how to prepare a surface for painting.

  • Behind-the-Scenes Videos

Behind-the-scenes videos are a great way to show your customers what goes on behind closed doors. You can create videos that show your team at work, your painting process, or a day in the life of your painting business.

  • Promoting Events

Videos can be used to promote events such as workshops, or charity events. You can create videos that showcase what your customers can expect at the event, including the painting project they will work on, the tools they will use, and the techniques they will learn.

  • Sharing Testimonials

Customer testimonials are a powerful marketing tool, and videos can be used to showcase them. You can create videos that feature satisfied customers talking about their experience with your painting business, including the quality of your work, your customer service, and your attention to detail.

These decisions will help you create an effective video that resonates with your target viewers.

Be sure you stay on brand, though. If your brand is fun and upbeat, go ahead and reflect that in your videos!

First Things First - Getting Started in Canva

Create A Canva Account

To start creating videos in Canva, follow these easy steps: 

  1. Log in to your Canva account. If you don’t have one, you can easily sign up for a free account. 
  2. Once you’re logged in, click on the “Create a design” button and select “Video” from the dropdown menu. 
  3. Once you’re in the design screen, you’ll need to upload your video footage. Canva makes this easy by allowing you to upload videos directly from your computer.

*Pro-Tip* – If you’re feeling a little camera shy, you can even access various stock footage that is specifically designed for businesses and house painters and add your own uploaded audio files as the background. 

This footage can be a great way to add an extra layer of professionalism to your video and make it stand out from the crowd!

Choose the Right Template

So, you know your brand and your audience, but you may not know how (or have the time) to create the overall style of your video from scratch.

This is where Canva Pro is worth the upgrade. With hundreds of templates for making marketing videos and other graphics, it’s easier than ever to choose the right template for your needs!

*Pro Tip* – If your brand colors are blue and green, you might want to choose a video template that already incorporates overlays and graphics with those colors or one that uses shapes that mimic the shapes used on your website.

Keeping it Simple-Streamline the Editing Process

Once you’ve uploaded your audio and/or video files and chosen a template, incorporating the style and colors of your brand, it’s time to start editing. When it comes to editing a marketing video using Canva, it can be helpful to approach the editing process in a step-by-step way.

Break down the editing process into smaller tasks and complete each task one at a time, rather than jumping back and forth between tasks. This will make it easier to stay focused and keep track of what you’ve completed and what still needs to be done so you can avoid getting bogged down in one aspect of the editing process and losing momentum.

To use a sequential editing process in Canva, here are some rules to go by:

Adjusting the Size and Scale Of Your Video

To do this, you’ll need to crop the footage first so that only the parts of the clip that are relevant to your message remain in the final product. It’s important to keep in mind that cropping a video will remove any parts of the footage that fall outside of the crop box.

Additionally, if you want to maintain the original aspect ratio of the video, you should ensure that the crop box is proportionally sized. Canva makes this easy by allowing you to select specific parts of your video and delete anything else by following these steps:

  1. After uploading your video into Canva, select the video on the timeline that now shows on the timeline bar at the bottom of the editing screen.
  2. Click on the crop icon located on the toolbar above the timeline.
  3. Use the crop handles that appear on the edges of the video to adjust the size and shape of the footage.
  4. Move the crop box over the area of the video you want to keep and adjust the size and shape as needed.
  5. Click the “Apply” button to crop the video to the selected dimensions.
  6. If you want to adjust the crop again, simply select the video and click the crop icon to reopen the cropping tool.

*Pro tip* –  Aspect Ratio requirements vary between social media platforms. Instead of cropping your video manually, with Canva’s pro feature, you can copy and resize your video to fit any format automatically. You may have to adjust your video to fit the new screen size, but it is a quick way to create videos for a variety of social media outlets. So if you know you will be posting a video on several sites, this is a helpful tool.

Add Your Logo

Continue the editing process by adding your logo to the video first, before cutting the footage. This ensures that your branding is prominently displayed throughout the video and creates a cohesive look and feel. Here’s how:

  1. Select the “Uploads” tab or the “Brand Hub” tab (See our previous article about using Canva’s Brand Kit to save all of your logos, fonts, and colors in one area for easy access in this tab)and upload or select your company logo.
  2. Drag and drop your logo onto the video timeline and adjust its size and position as necessary.
  3. You can also add other branding elements, like your company name or contact information, at this stage.
  4. Don’t forget to change out any of the pre-designed template fonts with the fonts you use on your website or with a font very similar to your other marketing documents.

Cut Your Footage

Cutting a video is an essential step in creating a marketing video using Canva, as it allows you to remove any unnecessary footage that doesn’t add value to your message. There are a couple of ways to do this, but here is the easiest way we’ve found to cut a video in Canva:

  1. Select the small thumbnail of your video in the timeline tab at the bottom of the editing screen so that it is outlined with a purple box.
  2. Play your video back in the editing screen and simply hit the “S” key on your keyboard to cut the video at a certain point. You can also hit the pause button and then hit the “S” key.
  3. Repeat the split tool process to cut your video footage into different segments, depending on how many different clips you want to include in your final marketing video.
  4. You now can simply select and delete any portions you want to remove from your final video. Remember to keep your audience in mind when selecting which portions to include and which to cut, as their engagement is key to the success of your video marketing efforts.

*Pro tip* –  If you want to have an image or one of Canva’s stock videos playing over your video, but still be able to hear the sound, simply select your video in the main editing screen. A three-dot tab will appear and when clicked on, choose the option to detach your video from the background. Then, select the checkerboard icon at the top of the screen and adjust the transparency of your video to zero.

Now that you’ve got a plan and the basics down, look for our next article, Part 2, where we will jump right into adding some flair to your videos with all of our favorite Canva creative tips to make your videos really pop!

Need more help? Contact our social media experts at IFTS, and we will get the job done for you! Give us a call today at 412-715-6266, and we’ll get you started on creating videos that will take your business to the next level.