Collecting customer feedback is essential for any business that wants to grow and build credibility. Reviews not only help potential customers make informed decisions but also improve your business’s reputation. But manually managing reviews can be time-consuming. That’s where automating the review process comes in. In this blog, we’ll walk you through setting up an automated review system in GoHighLevel to streamline feedback collection, manage negative experiences, and boost your positive reviews.
Let’s dive into the step-by-step process of setting up this system to automatically gather and manage reviews for your business.
Creating a Custom Review Link
The first step to automating your review process is creating a custom review link that you can share with your customers. This link will direct them to your review page.
- Log into your GoHighLevel account.
- Navigate to Settings and click on Domains.
- Add a subdomain specifically for reviews. We recommend using something like reviews.yourdomain.com.
- Verify the DNS settings with your provider (e.g., GoDaddy, Namecheap) by adding the required CNAME record. Once verified, your domain is ready for use.
Designing a Thumbs-Up/Thumbs-Down Review Page
Next, you’ll need to create a simple review page where users can indicate if they had a good or bad experience. This will allow you to filter feedback based on customer satisfaction.
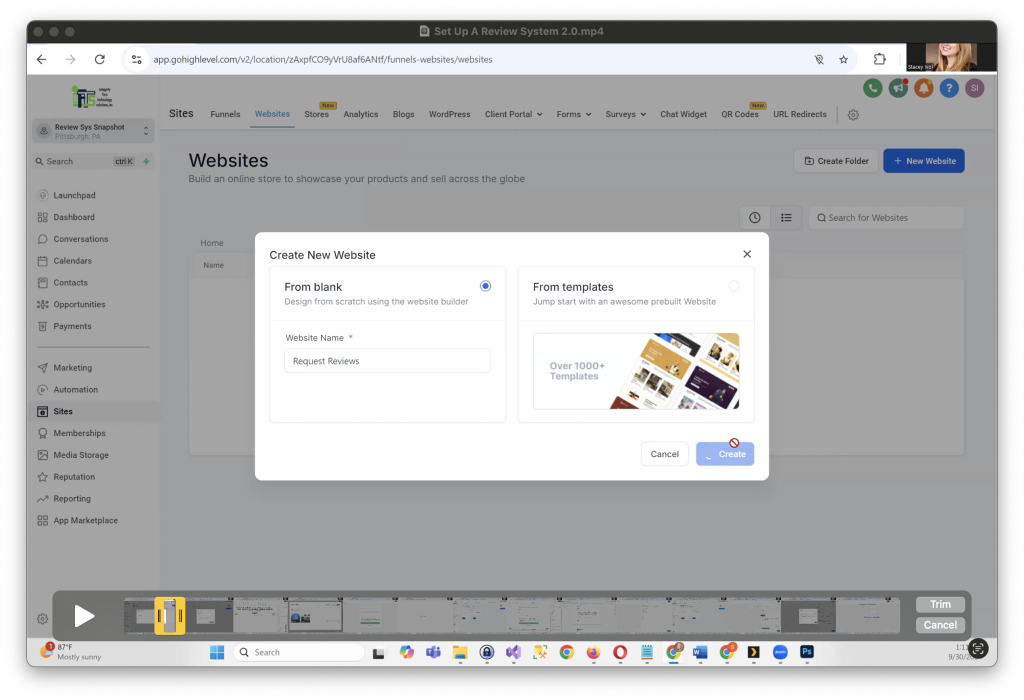
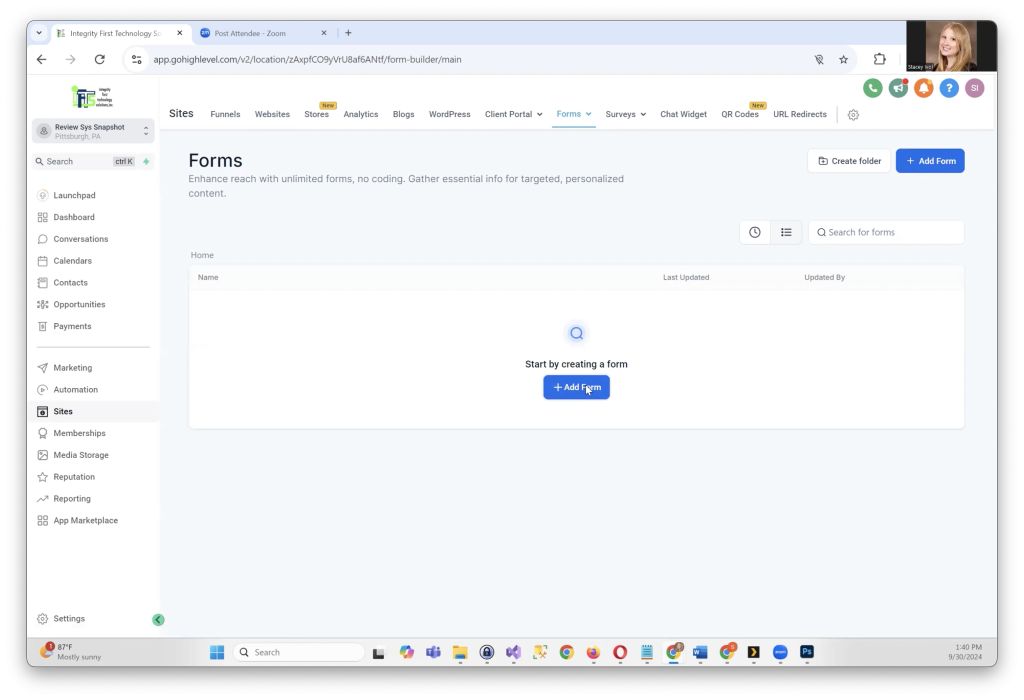
- Go to Sites > Websites and create a new page.
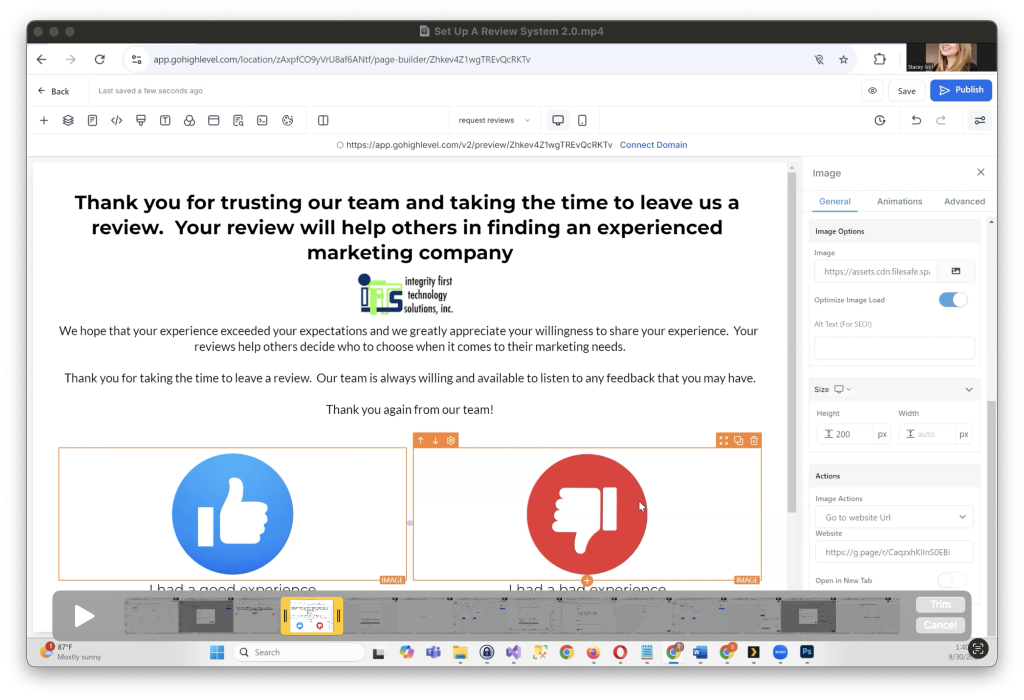
- Design the page with two simple buttons: Thumbs-Up for positive feedback and Thumbs-Down for negative feedback.
- Add a thank-you message above the buttons, expressing appreciation for their time.
Example text: “Thank you for choosing us! Your feedback helps others find trusted businesses like ours.”
Redirecting Positive Reviews to Google
If a customer clicks on the thumbs-up button, you’ll want to direct them to leave a review on your Google Business profile.
- Go to your Google Business Profile and copy the direct link for leaving a review.
- In GoHighLevel, select the thumbs-up button, set the action to open a URL, and paste the Google review link.
- Save your changes.
Now, anytime a customer has a positive experience, they’ll be directed to leave a review on Google!
Creating a Bad Experience Feedback Page and Staying Google Compliant
One of the most important steps in building an automated review system is handling negative feedback effectively. For this, GoHighLevel allows you to create a separate page for customers to share their bad experiences, ensuring you receive private feedback and maintain Google compliance.
Step 1: Create a "Tell Us About Your Bad Experience" Page
After setting up your main review request page, it’s time to add a dedicated page for customers who didn’t have a positive experience. Here’s how to do it:
- Navigate back to Websites in GoHighLevel, and select the Request Review site.
- Create a new page named “Tell Us About Your Bad Experience.” You can create the URL path as something like /sorry/tell-us-more to keep it simple.
- For the design, start with a blank, full-width layout. Add a single-column section where you’ll include your logo and a headline, such as:
- “Please tell us about your experience with our company.”
Step 2: Add a Feedback Form
ext, you’ll need to collect detailed feedback about their bad experience. Here’s how to add a form:
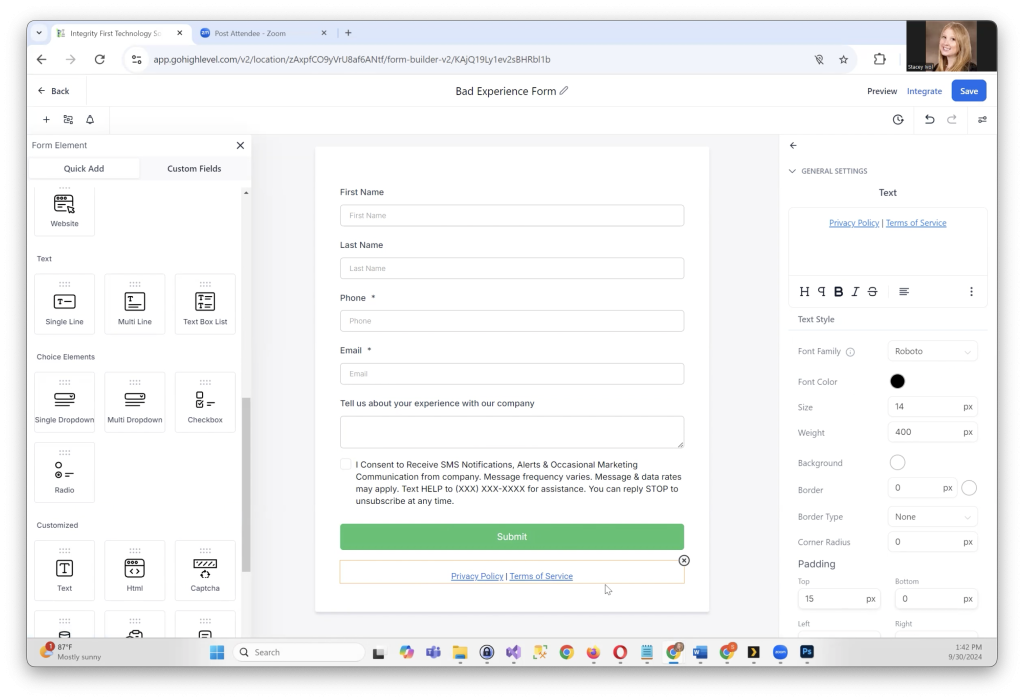
- Add a form element to the page that asks for basic information, such as First Name, Last Name, Phone, Email, and a multiline text box for them to describe their experience.
- Customize the form’s submit action by selecting Form Builder, then under Options, set up a message that thanks the customer for completing the form. Example message:
- “Thank you for taking the time to share your feedback. A member of our team will be in touch shortly.”
This ensures the customer feels heard and reassures them that their concerns are being addressed.
Step 3: Linking the Bad Experience Option
After creating the feedback page, link it to the “I had a bad experience” button on your main review page. Follow these steps:
- Copy the URL of your bad experience page.
- Edit your main review request page, go to the “I had a bad experience” image, and set the action to go to website URL.
- Paste the URL of the bad experience page and save your changes. Now, when a customer clicks on “I had a bad experience,” they’ll be directed to your feedback form.
Step 4: Staying Google Compliant
Google requires that all customers, including those with bad experiences, be given the option to leave a public review. To comply with this:
- On the bad experience page, add a text link at the bottom that says:
- “No, thank you. I would like to leave a review.”
- Link this text to your Google review page. Be sure to open the link in a new window, so customers don’t lose their place on your feedback form.
Step 5: Publish and Test
Once you’ve set up everything, preview your pages to ensure they function correctly. Customers should be able to navigate smoothly between the review request page and the bad experience page. For the final step, publish your changes and test the system.
With this setup, you’ve created an effective way to privately manage negative feedback while still complying with Google’s requirements for review collection.
By ensuring that negative feedback is handled internally while still allowing customers to publicly review your business, you can address concerns privately and maintain your reputation. This is a critical component of building trust with your customers and ensuring you’re continuously improving.
Creating Review Request Automations
Now that your review pages and forms are set up, it’s time to implement automations that will simplify the process of collecting reviews. Automations help you send reminders and requests without manual effort, ensuring that you stay engaged with your customers and gather more reviews.
1. Creating the Review Request Emails and SMS
To keep your review requests polite but effective, we recommend sending three emails and one SMS over the course of a few days. Here’s a breakdown of what each email and text message should include:
- Email 1 (Day 1):
Subject: Thank you for placing your trust in us
Body:- Thank the customer for their business and offer to answer any questions they may have.
- Ask them to take a moment to leave a review and provide a direct link to the review page.
- Example: “Would you take a moment to review us at the link below? Your review will help others find the best service for their needs.”
- Email 2 (Day 3):
Subject: Just a reminder and a thank you
Body:- Remind the customer about your review request and thank them again for their trust.
- Reiterate how their review will help others in the market find your services.
- Include the review link again.
- Email 3 (Day 6):
Subject: One last reminder
Body:- Let the customer know that this is the final reminder and that you won’t send any more review requests.
- Provide the review link and mention how their feedback helps others.
- SMS (Day 1):
Message:- Keep it short and simple: “Hi, [Company Name] here. Just wondering if you could take a moment to leave us a review. [Insert Link]”
Each email and SMS should include a review link to make it easy for customers to click through and leave their feedback.
2. Automating Review Requests
Now that your messaging is ready, it’s time to build the automations in GoHighLevel:
- Step 1: Create a Workflow
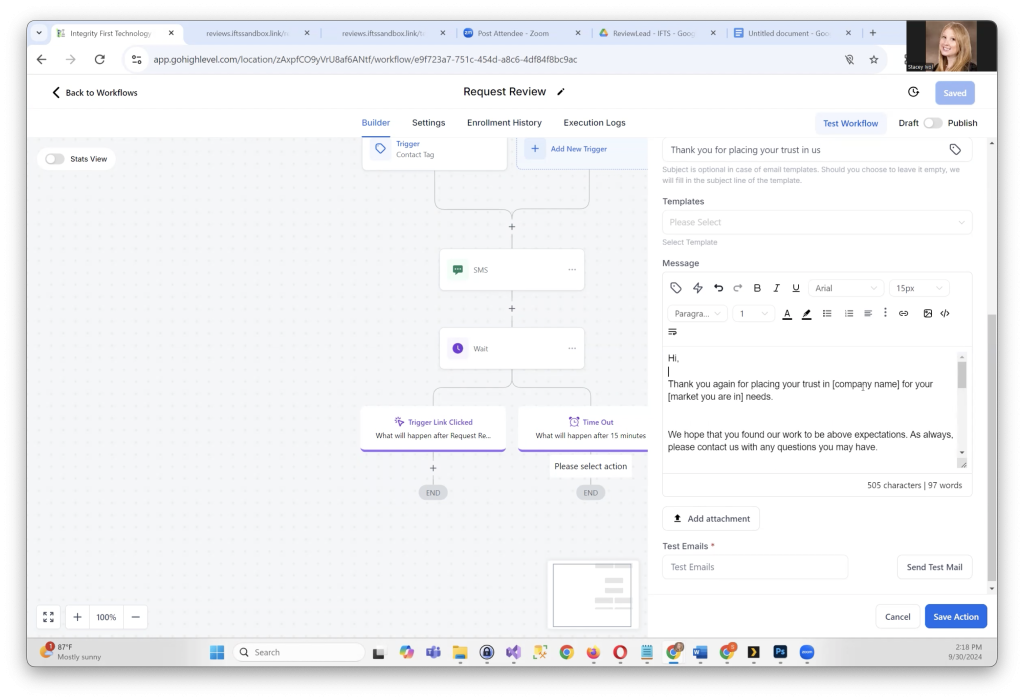
Go to Automation > Create Workflow, and start from scratch. Name this workflow something like “Review Request Automation.” - Step 2: Trigger the Workflow
You can trigger the workflow by adding a tag to the customer’s profile after they’ve completed a service with you. For example, you can create a tag called “Request Review.” When the tag is added, the workflow starts. - Step 3: Send the SMS
Once the workflow starts, send the first SMS message, asking the customer to leave a review. - Step 4: Wait for 15 Minutes
Add a 15-minute wait to see if the customer responds by clicking the review link. If they do, the automation ends. If not, proceed to the next step. - Step 5: Send Email 1
If the customer hasn’t clicked the link in the SMS, send the first email request with the review link. - Step 6: Wait for 3 Days
Wait for three days to see if the customer clicks the review link in the email. - Step 7: Send Email 2
If they haven’t left a review yet, send the second email reminding them to review your business. - Step 8: Wait for 3 More Days
Wait another three days to give the customer time to click the review link. - Step 9: Send Email 3
Send the final reminder, letting the customer know it’s their last chance to leave a review.
3. Creating Trigger Links
To stop sending review requests once a customer has completed a review, you need to create trigger links:
- Step 1: Go to Marketing > Trigger Links, and add a link to your review page.
- Step 2: Name the link something like “Request Reviews” and save it.
- Step 3: Use this trigger link in your emails and SMS messages. When the customer clicks on it, the automation will stop sending further review requests.
4. Internal Notifications for Bad Experiences
Finally, set up a separate workflow for handling bad experiences:
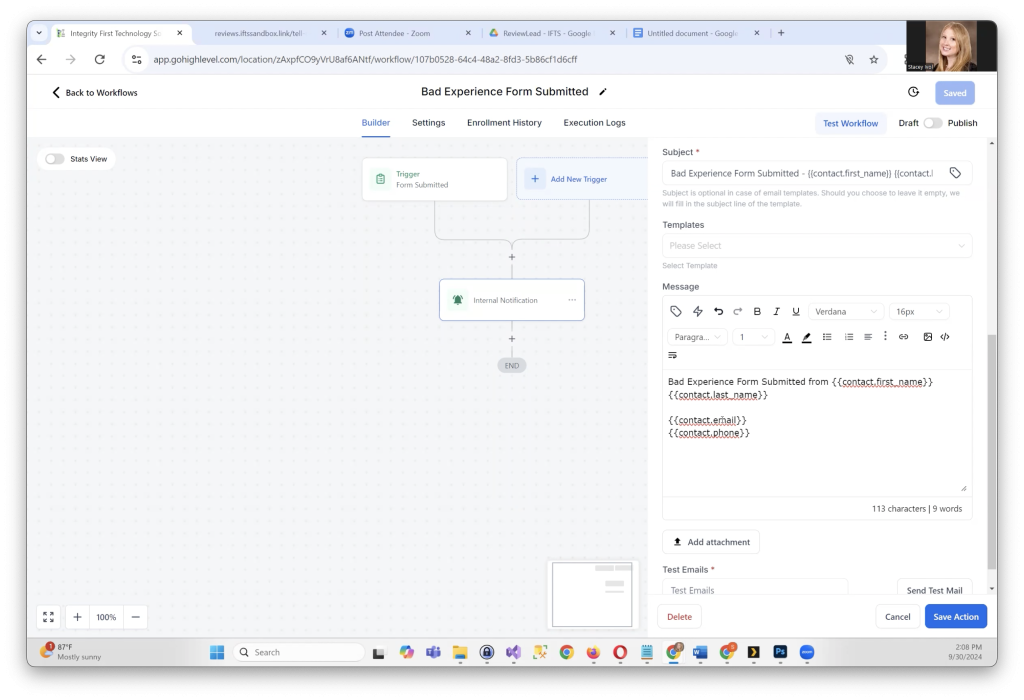
- Step 1: Create a new workflow called “Bad Experience Submitted.”
- Step 2: Set the trigger as the submission of the bad experience form.
- Step 3: Assign an internal notification to alert your team when someone submits the form. The notification can include the customer’s name, email, phone number, and their feedback so your team can follow up quickly.
Launch Your Review Request System
Once you have your workflows, trigger links, and messaging set up, your automated review request system is ready to go. Now, you can start tagging customers and collecting reviews effortlessly, all while handling negative feedback with care.
With everything in place, your business will enjoy more customer reviews and valuable feedback, which can help boost your online presence and improve customer satisfaction!