Over 1 billion professionals are on LinkedIn, but only 2% of them post content weekly. For small law firms, this is a huge opportunity to stand out. However, If you’re like many attorneys, you know you should be posting more on LinkedIn, but you aren’t quite sure how often is enough — or what to post.
A common worry that we hear is that you might “annoy” your followers. However, unless your post goes viral, it is typically seen by less than 6% of your overall network.
You might also worry about running out of ideas or simply not having the time to keep up with it all.
When it comes to LinkedIn, here’s the thing: the more consistently you post, the more visibility and engagement your law firm will get.
This isn’t just a hunch — it’s backed by data, which we are about to show you
In this article, we’ll cover:
How often lawyers from small to mid-sized firms should post on LinkedIn for maximum engagement
The exact numbers behind why posting frequency matters
What types of content perform best for attorneys
A simple way to keep your firm visible without spending hours each week creating posts
Why LinkedIn Matters for Lawyers
LinkedIn is no longer just a place to upload your resume.
For attorneys and law firms, it’s a powerful platform for:
Attracting new clients who search for answers and help directly on LinkedIn andGoogle
Building referral relationships with other professionals
Demonstrating credibility and expertise to potential clients and colleagues
Staying top-of-mind with past clients and your local network
With over1 billion members worldwide and a professional audience that trusts the platform, LinkedIn is one of the best places for small law firms to market themselves – especially when you don’t have a huge ad budget.
However, there’s a catch: having a profile isn’t enough.
To get real results, you need to post regularly.
Let’s Get Into The Data: Why Posting More Drives More Engagement
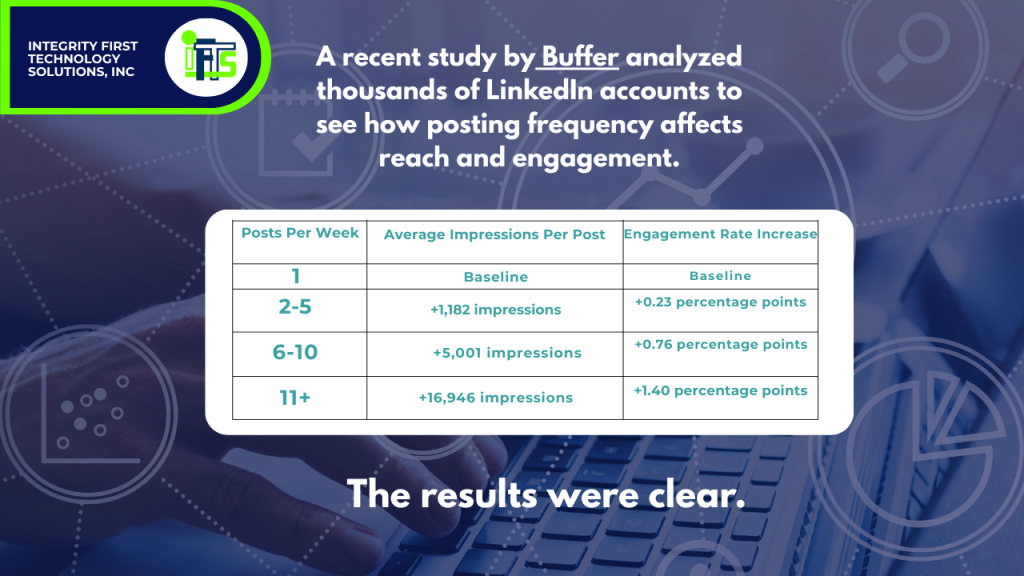
A recent study byBuffer analyzed thousands of LinkedIn accounts to see how posting frequency affects reach and engagement.
The results were clear:
Takeaway: Posting just 2-5 times per week results in a noticeable boost in visibility!
Attorneys that go beyond 6 posts per week see exponential growth — up to 3× more engagement compared to posting only once per week.
This growth happens whether you have 200 followers or 20,000. In other words, small firms benefit just as much as large firms.
For small law firms, this means that even a modest increase in posting frequency can dramatically expand your visibility — without spending more on ads!
How Often Should You Post on LinkedIn as an Attorney?
If you belong to a firm with 10 or fewer attorneys, here’s a realistic way to think about posting frequency:
Starter Plan: 2-3 posts per week Great for attorneys just getting started or testing out LinkedIn marketing. This keeps you visible without overwhelming you
Growth Plan: 5 posts per week Ideal for attorneys ready to build momentum and generate consistent engagement.
Accelerated Plan: 6-10 posts per week For attorneys with lots of stories to share or using outside help (like a marketing partner), this level maximizes reach and lead generation.
If you’re currently posting only once or twice a month, aim to start small and ramp up gradually. Consistency matters more than perfection.
What to Post on LinkedIn: Ideas Just for Attorneys
One of the biggest questions lawyers always have is: “What do I even post about?”
Here are proven content types that work well for law firms:
1. Educational Tips & FAQs
Example: “What to Do If You’re Involved in a Car Accident: 3 Quick Steps”
These establish you as a trusted expert while being genuinely helpful.
2. Myth-Busting Posts
Example: “3 Common Misconceptions About Estate Planning”
Great for engagement because they spark curiosity.
3. Behind-the-Scenes Firm Culture
Showcase your team, firm events, or community involvement to humanize your practice. Clients love to see the “human” side of the firm.
4. Case Studies or Success Stories
Share anonymized examples of how you’ve helped clients.
5. Video Clips
Short, educational videos get higher engagement and help prospects feel like they “know” you before ever meeting you.
Why Outsourcing Your LinkedIn Marketing Might Make Sense
You went to law school to practice law, not to spend hours brainstorming LinkedIn content. That’s where we come in.
At IFTS, we specialize in helping small law firms like yours stay visible online without adding to your workload.
OurVideo Content Marketing Package uses AI video technology to create an “AI twin” of you — so it’s your face and voice on the content, but we handle all the work.
Here’s what that means for your firm:
We produce engaging, on-brand videos based on your expertise.
We repurpose those videos into LinkedIn posts and other formats.
We schedule and post them at the optimal times for maximum engagement.
You stay focused on serving clients while we grow your online presence.
It’s the easiest way to maintain a 5-10 post per week schedule that drives real results — without ever having to hit “record” or write captions yourself.
Start Posting More on LinkedIn Today!
LinkedIn is one of the most powerful marketing tools available to small law firms today. The data is clear: posting more often leads to more engagement, visibility, and ultimately more clients.
Start by committing to just 2-3 posts per week and build up from there. When you’re ready to maximize growth without sacrificing billable hours, consider partnering withIFTS to handle the strategy, content creation, and posting for you. You can schedule a FREE strategy session here:https://iftsdesign.com/get-more-clients
Because the more your firm shows up on LinkedIn, the more opportunities you’ll create — and the easier it becomes to grow your practice.
Adding a second website to an existing Google Analytics property is a common task for many digital marketers and website owners. Whether you’re managing multiple sites for a client or expanding your online presence, the good news is that you can easily track multiple websites under the same Google Analytics account.
In this comprehensive guide, we’ll walk you through the step-by-step process of adding a second website to your Google Analytics property, ensuring all your data is accurately tracked and easily accessible.
Why You Might Need to Add a Second Website to Google Analytics
Before diving into the how-to, it’s important to understand why adding a second website to your Google Analytics property might be beneficial. By consolidating your websites under a single Google Analytics account, you can:
Streamline Data Management: Monitor multiple sites without switching between accounts.
Comprehensive Reporting: Compare performance metrics across different websites from a single dashboard.
Centralized Data: Simplify the process of analyzing traffic sources, user behavior, and conversion rates across all your sites.
Getting Started: Preparing to Add a Second Website
Let’s assume you already have a Google Analytics property set up for your main website. Now, with the launch of a second website, you’ll want to ensure both sites are tracked under the same account. This makes it easier to manage and compare data across multiple properties.
Step 1: Creating a New Google Analytics Property
The first step in adding a second website is to create a new property within your existing Google Analytics account. Follow these instructions:
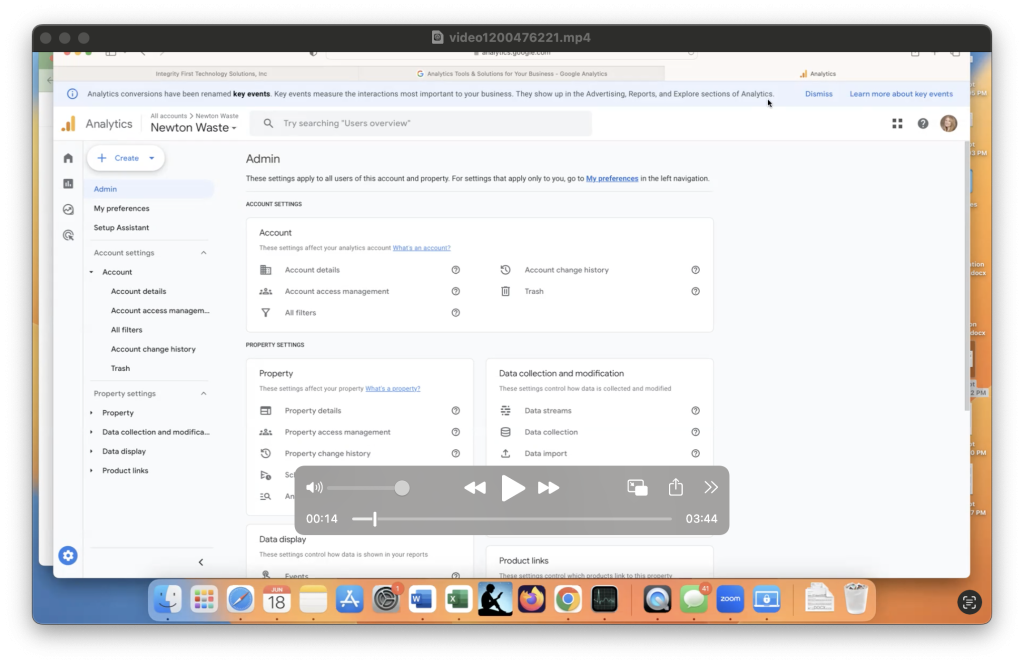
1. Access the Admin Section:
Log in to your Google Analytics account and navigate to the Admin section, located at the bottom-left of the screen.
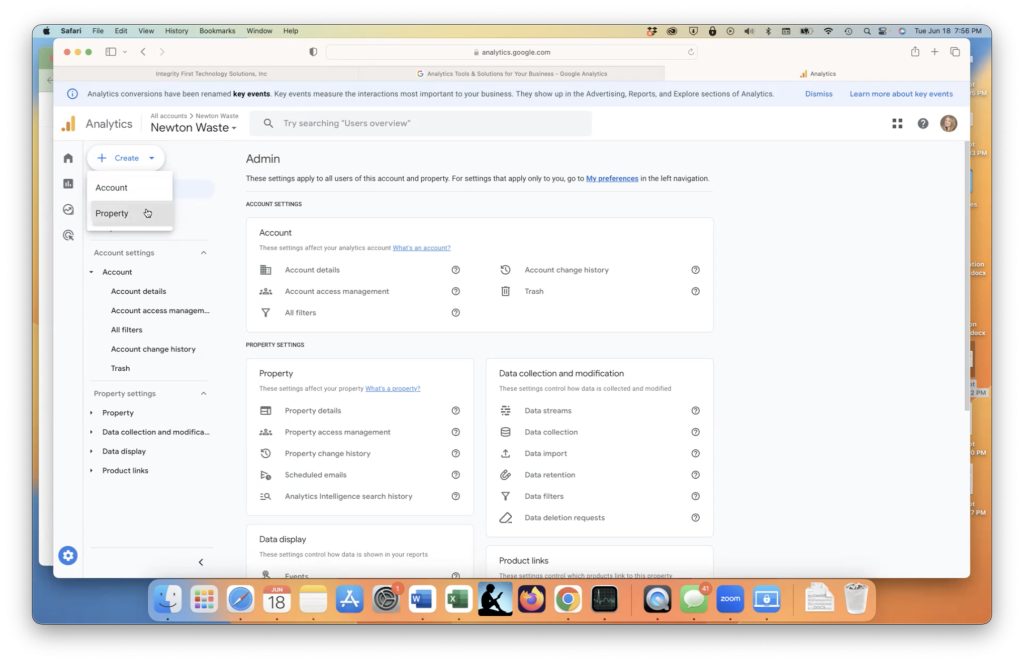
2. Create a New Property:
Under the “Property” column, click on the “Create Property” button.
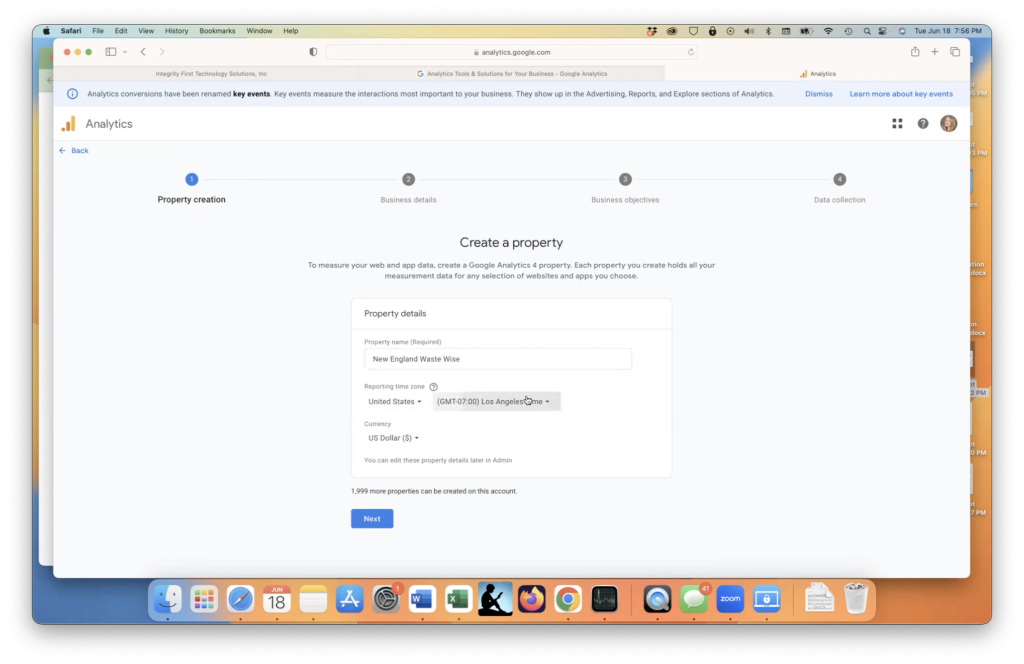
3. Enter Website Details:
Provide the necessary information for your new website, including the website name, timezone, industry category, and business size. This information helps Google Analytics tailor reports and insights specific to your industry.
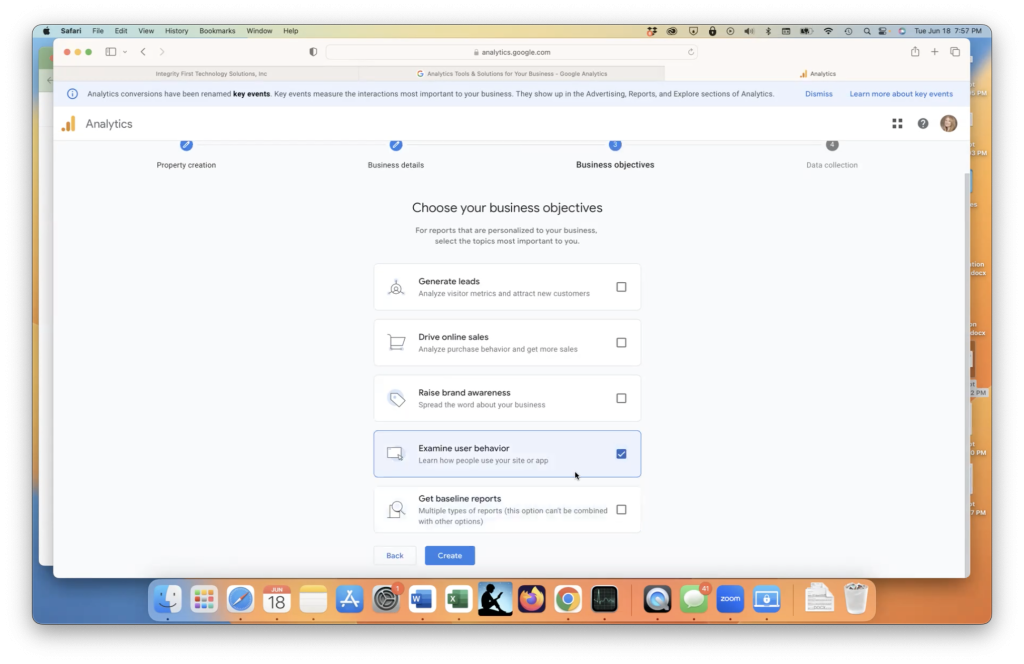
4. Choose Business Objectives:
For this example, we chose to receive reports that examine user behavior on how they use the website.
5. Data Sharing Settings:
Choose the appropriate data sharing settings. These settings determine how your data is shared with Google and other services.
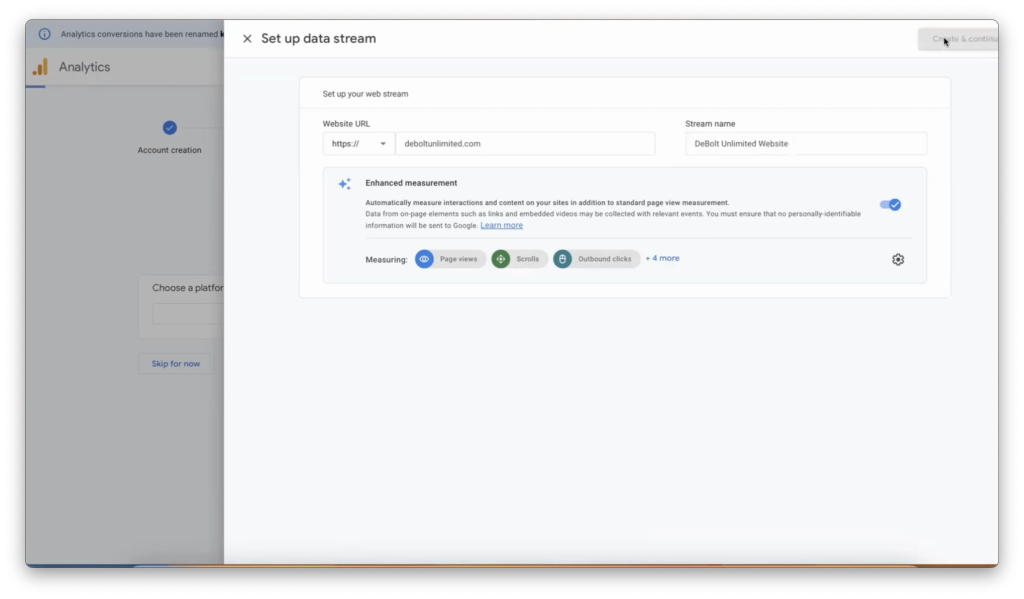
6. Set Up the Data Stream and Finalize the Setup:
Obtain the URL of your client’s homepage from Go HighLevel. Navigate to Sites > Websites, and copy the homepage URL.
Remove the “https://” prefix and paste the URL into the provided field. Name the property using your client’s name plus the word “website.”
Click “Create” to complete the setup process for the new property.
Step 2: Installing the Google Analytics Tracking Code on the Second Website
With your new property created, the next step is to install the Google Analytics tracking code on your second website. This code is essential for tracking visitor data and activity on your site.
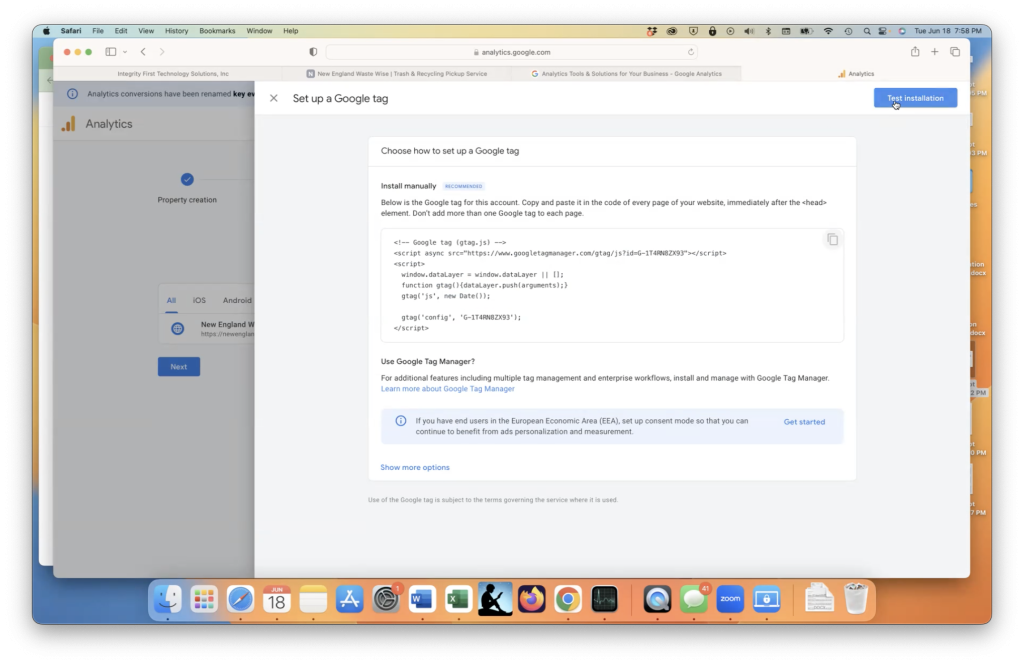
1. Locate the Tracking Code:
In your new property, navigate to the “Tracking Info” section and copy the tracking code snippet provided by Google Analytics.
2. Insert the Code into Your Website:
Access the backend settings of your second website. Paste the tracking code into the header section of your site, just before the closing </head> tag.
In this case, we are accessing the website using GoHighLevel.
Go to Go HighLevel: Navigate to your client’s website settings in Go HighLevel.
Paste Tracking Code: In the main website settings, paste the tracking code into the “Head Tracking Code” section.
Save Changes: Click “Save” to apply the changes.
Step 3: Verifying the Installation of the Tracking Code
To ensure that your Google Analytics tracking code is working correctly on the second website, it’s crucial to verify the installation.
1. Test the Tracking Installation:
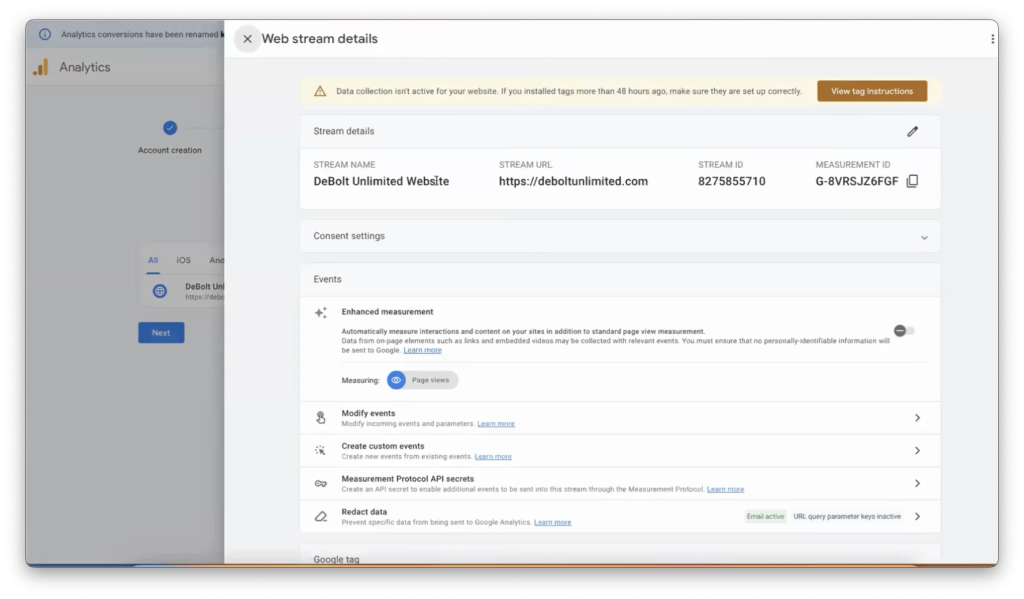
Return to the Google Analytics interface and click on “Test Track Installation” within the “Tracking Info” section.
2. Confirm Successful Tag Detection:
If the tag is detected correctly, you’ll receive a confirmation message indicating that Google Analytics is successfully tracking data from your second website.
Initially, you may see a message indicating that data collection is inactive. This is normal and should resolve within 48 hours. After this period, Google Analytics will start tracking visitor activity, including metrics such as bounce rate and session duration.
What’s Next? Managing Multiple Websites in Google Analytics
Now that you’ve successfully added a second website to your Google Analytics property, you can enjoy the benefits of centralized data management. Here are a few tips for managing multiple websites:
Utilize Filters: Set up filters to segment data by website, allowing you to analyze each site individually.
Custom Dashboards: Create custom dashboards for each website to focus on specific metrics relevant to each site’s goals.
Set Up Goals: Define goals for each website to track conversions and other key actions.
Adding a second website to your Google Analytics property is a straightforward process that can greatly enhance your ability to manage and analyze multiple sites. By following the steps outlined in this guide, you can ensure that all your websites are accurately tracked, providing you with the insights needed to optimize performance.
If you found this guide helpful, be sure to check out our other resources on Google Analytics and digital marketing strategies. Have any questions or need further assistance? Leave a comment below or contact us directly—we’re here to help!
Are you ready to jump into the world of data-driven insights for your WordPress website?
Google Analytics is an essential tool that helps you understand your audience and optimize your site. Today, we’ll walk you through the process of setting up Google Analytics on your WordPress site using the Monster Insights plugin. Let’s get started!
Step 1: Sign In to Google Analytics
Head over to Google Analytics and sign in with your Google account.
Step 2: Create a New Account
In the admin settings, click on “Create” and then select “Account.” Here, you will create a new account for your client or project.
Fill in the account name. You can name it after your website or client. Decide whether to share data with Google by checking or unchecking the options. For this example, we will opt out of data sharing but you can adjust these settings later.
Step 3: Set Up Property Details
Next, you will need to provide details for the new property.
Property Name: Enter your client’s name again for the property name.
Time Zone: Select the appropriate time zone (e.g., Eastern Standard Time for New York).
Currency: Choose the relevant currency (e.g., US Dollar).
Click “Next” to proceed.
Step 4: Business Details
Provide information about the business.
Business Category: Select the category that best describes your client’s business.
Business Size: Specify the size of the business.
Business Objectives: Choose the primary objectives for using Google Analytics. For this example, we will select “Examine the user behavior.”
Click “Create” to finalize the setup.
Step 5: Accept Terms of Service
Review and accept the Google Analytics Terms of Service to proceed.
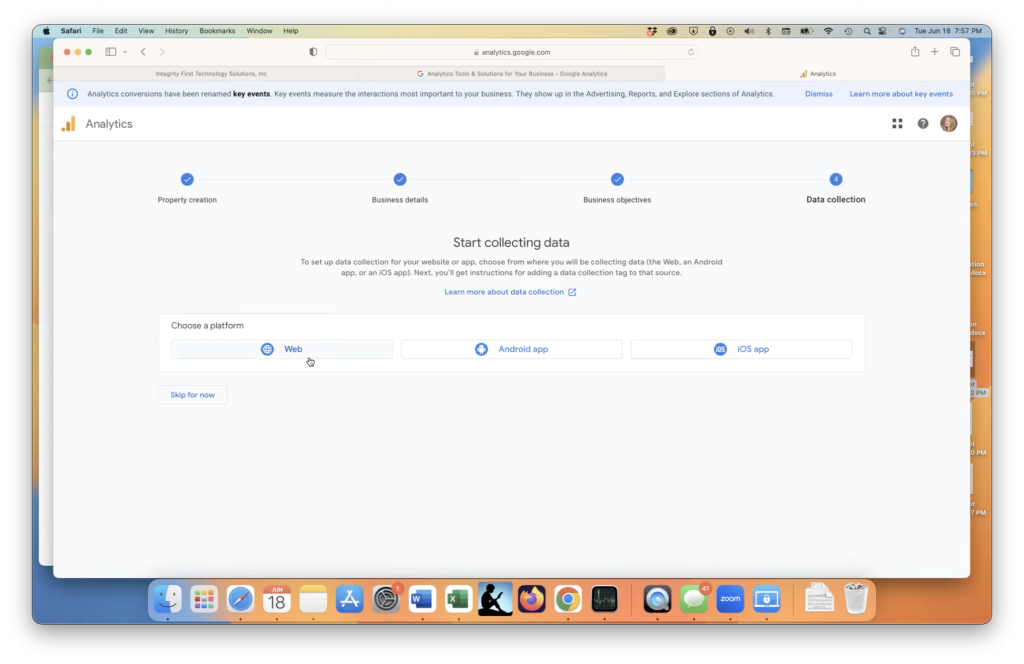
Step 6: Choose a Platform
To start collecting data, select the platform you will be using. For this guide, we will focus on setting up a property for the web.
For the platform, choose “Web.”
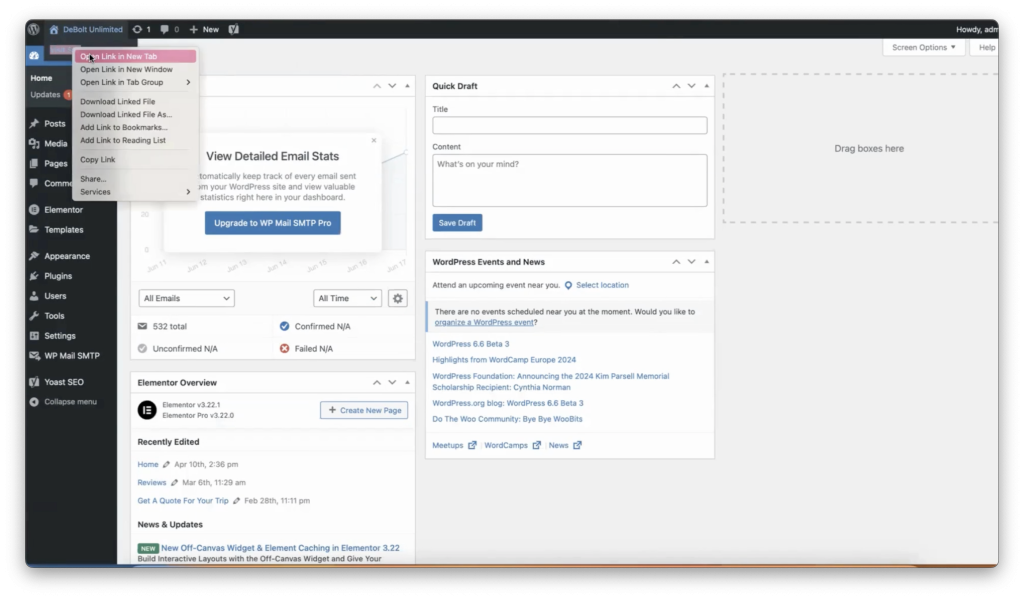
Open your WordPress site in a new tab, copy the homepage URL, and paste it into the setup form in Google Analytics. Make sure to remove the “http://” or “https://”.
Name your data stream “client name” and then “website.”
Click on Create Stream and continue.
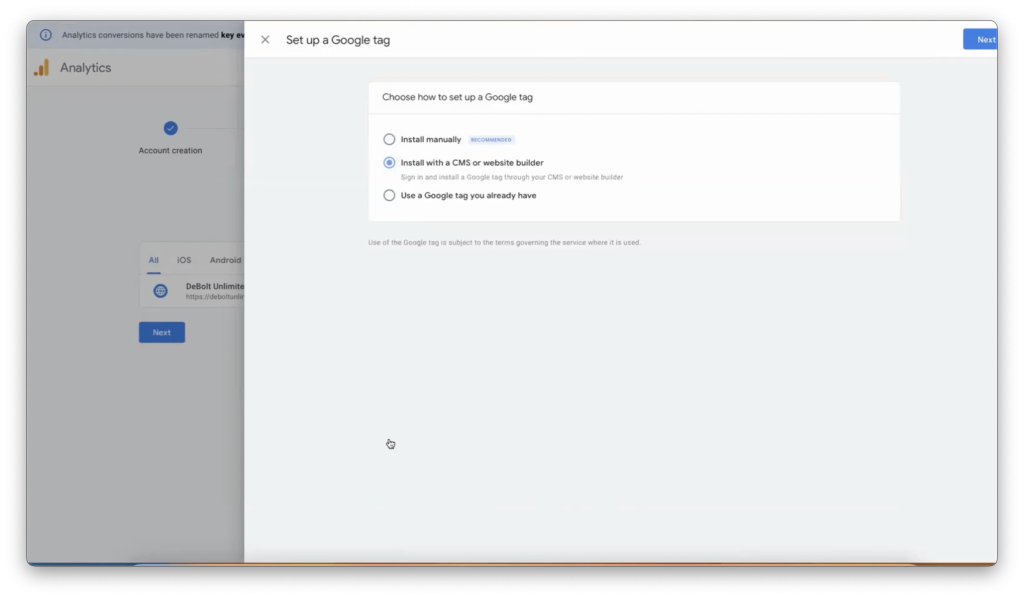
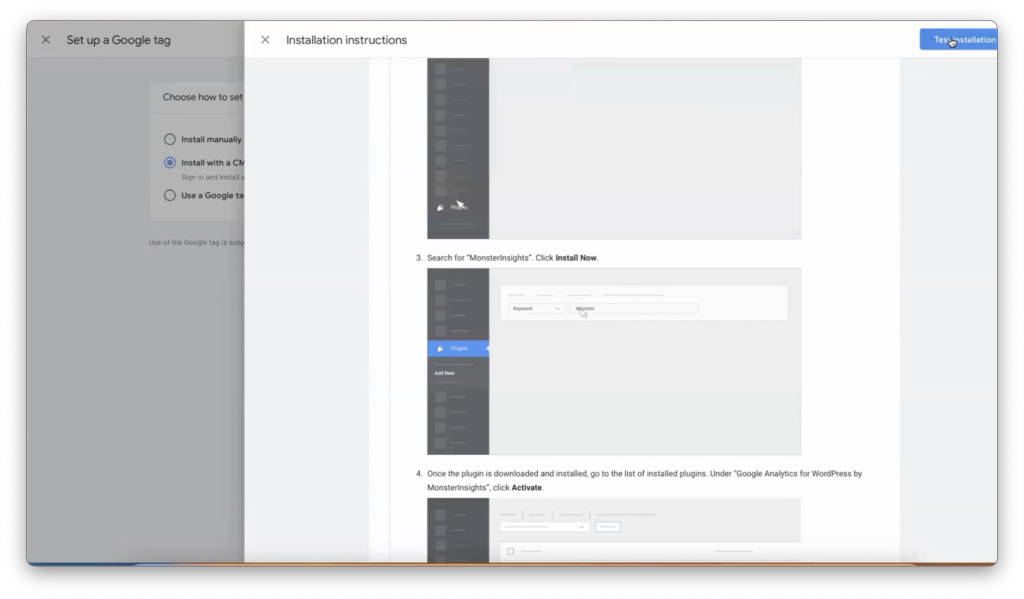
If you click on show more options, you can select install with a CMS or website builder and then click next.
Install Monster Insights Plugin
To easily connect Google Analytics to your WordPress site, we’ll use the Monster Insights plugin.
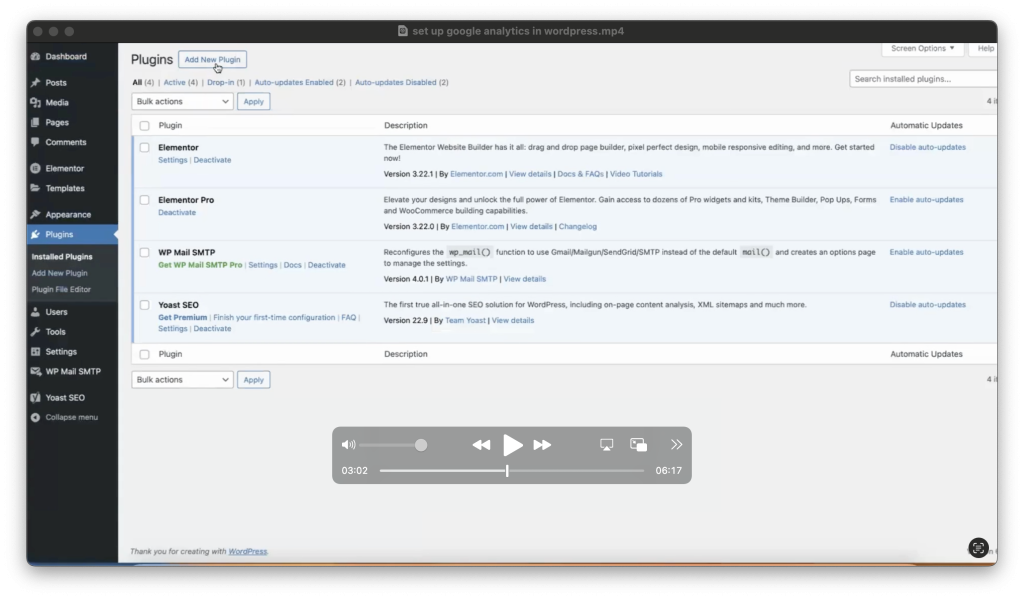
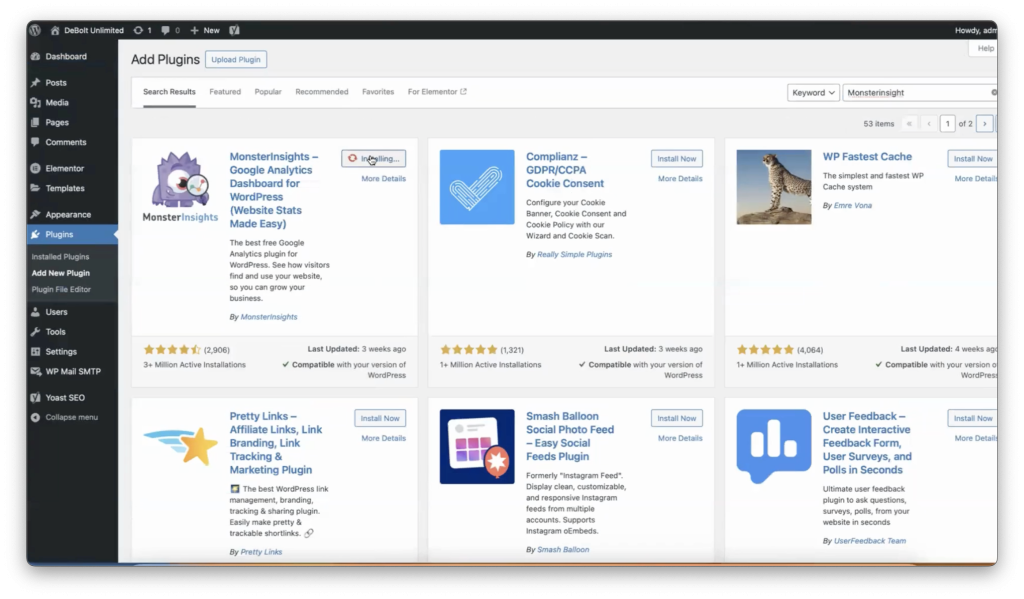
In your WordPress dashboard, go to Plugins > Add New.
Search for “Monster Insights” and install the plugin.
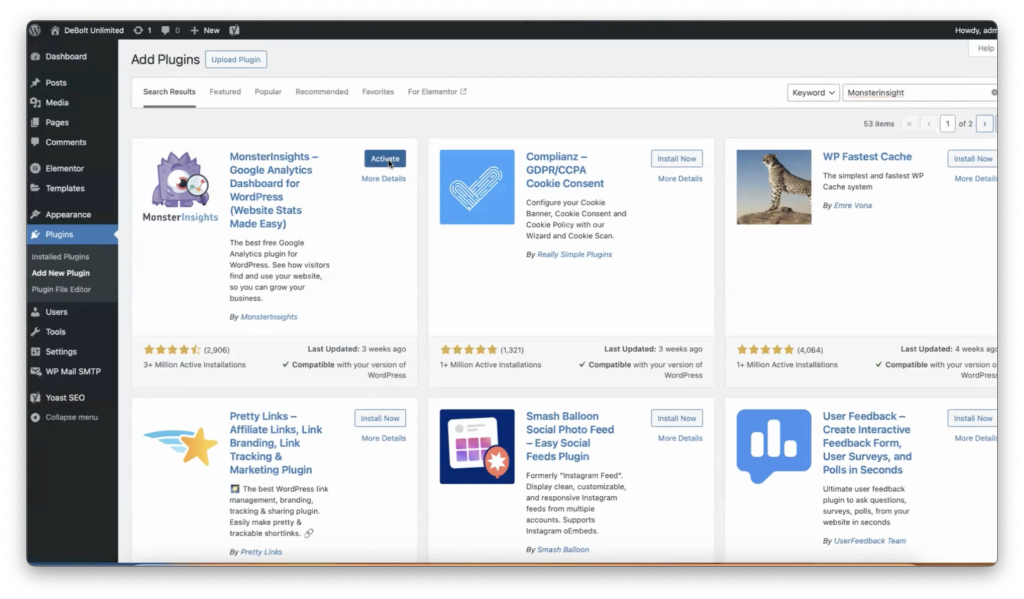
Once installed, click on Activate.
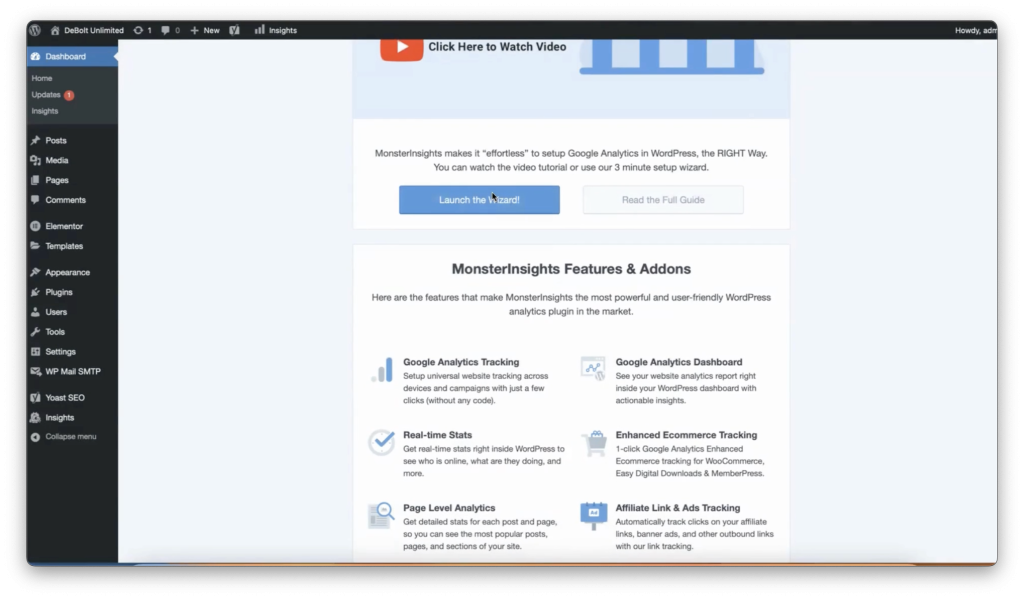
After activation, click on Launch Setup Wizard to start the setup process.
Connect Monster Insights to Google Analytics
Choose Website Category: Select the category that best describes your website (e.g., Business).
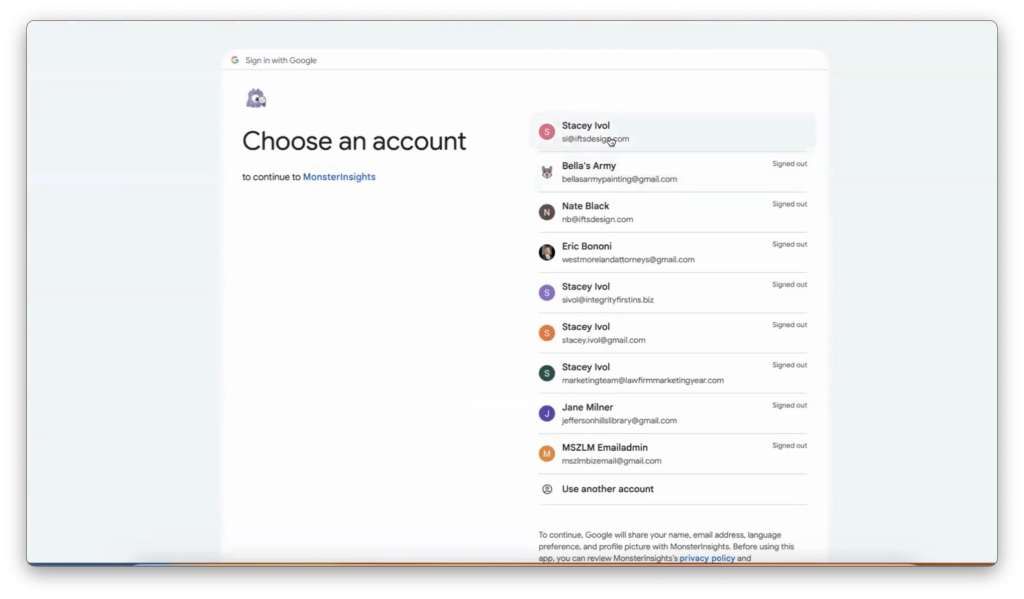
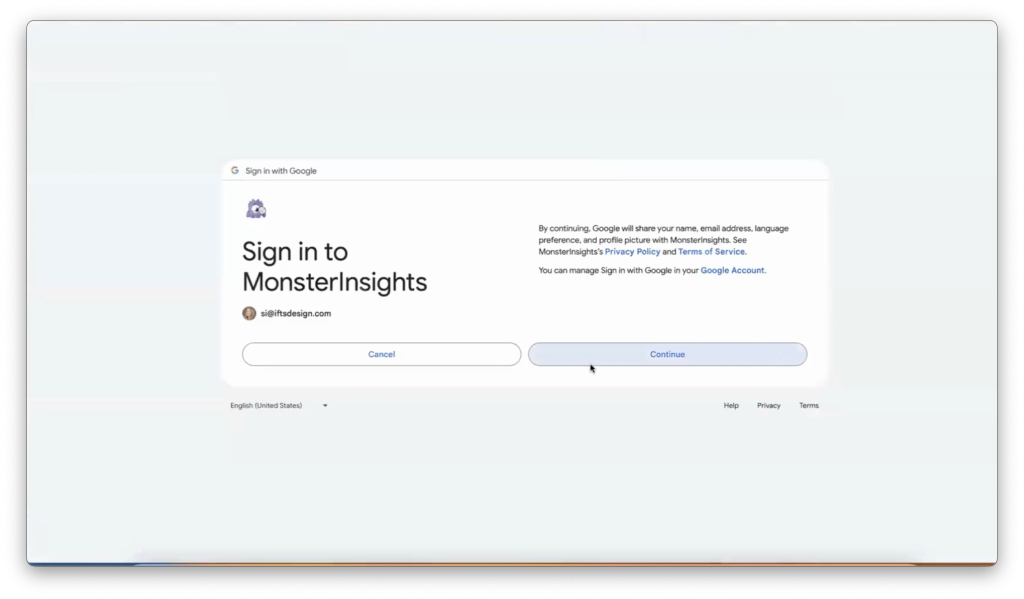
Connect to Google: Click on Connect Monster Insights and sign in with your Google account.
Allow Access: Allow Monster Insights to access your Google Analytics data.
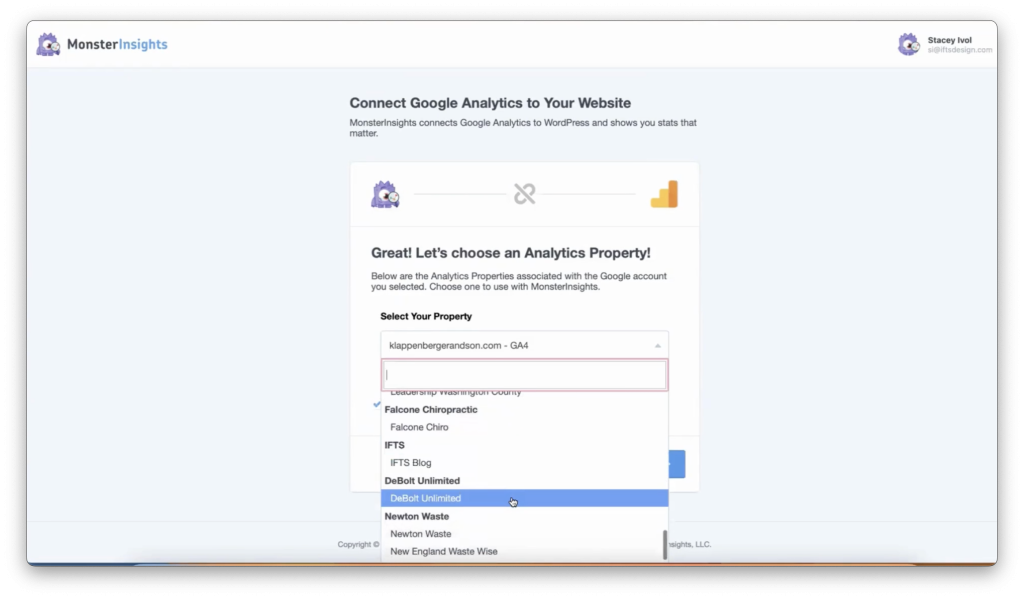
Select Property: Choose the Google Analytics property you created earlier.
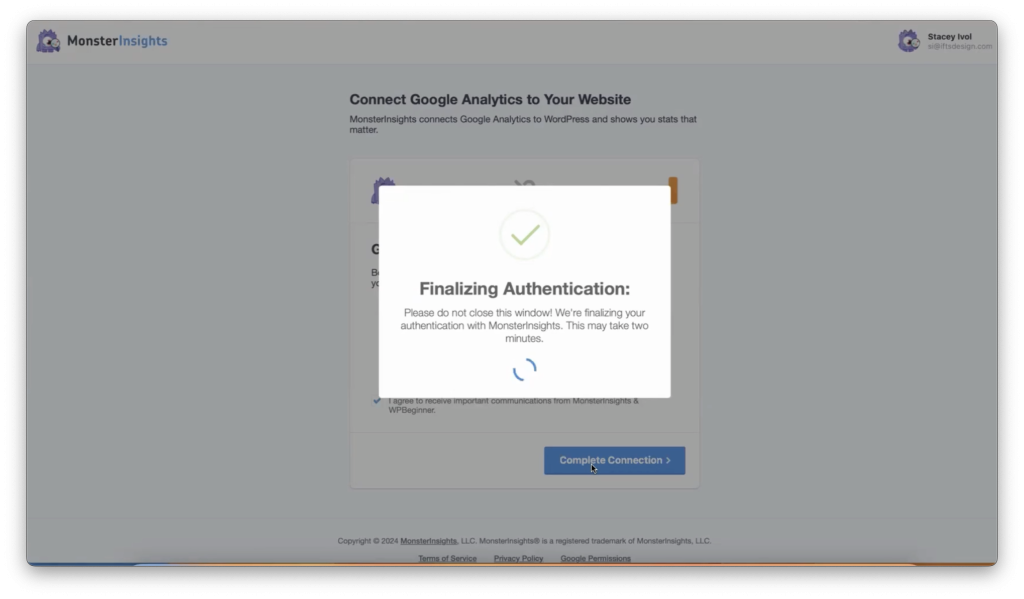
Complete Connection: Click on Complete Connection and save and continue.
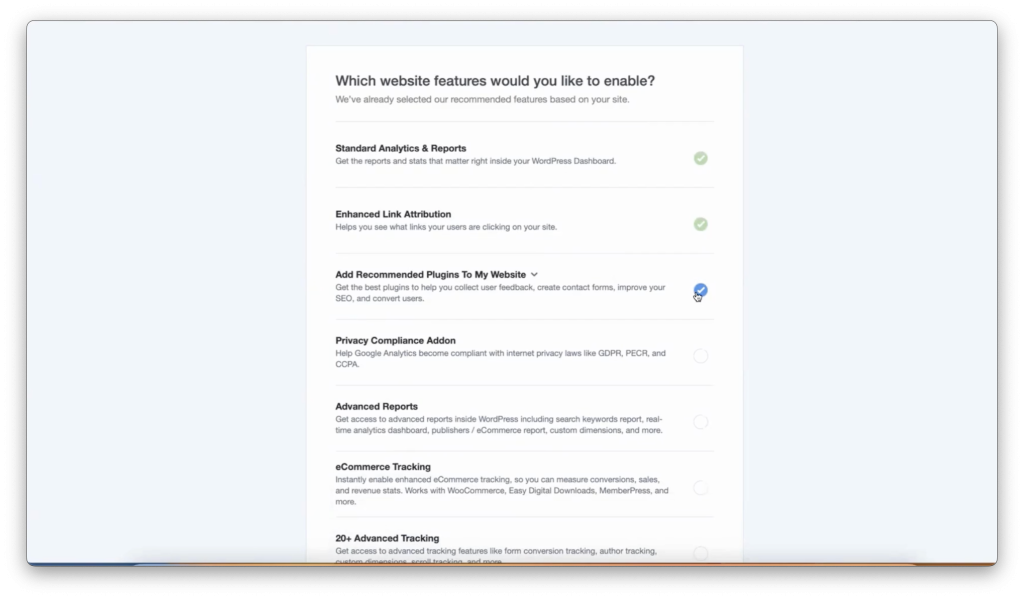
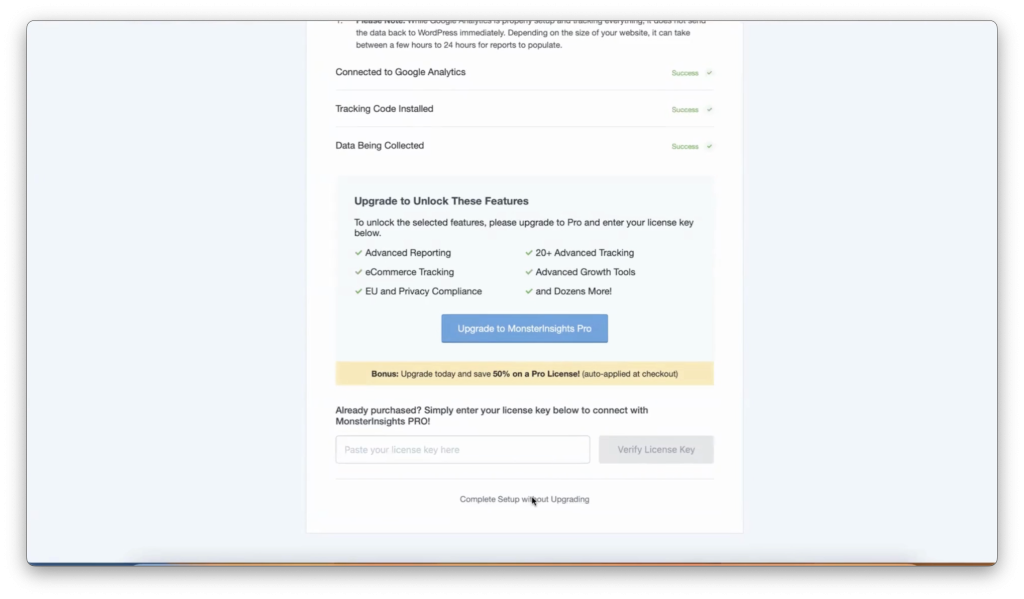
Finalize Setup
Monster Insights will guide you through the final setup steps.
Disable Unwanted Plugins: If you do not want Monster Insights to install recommended plugins, uncheck those options.
Complete Setup: Click on Complete Setup Without Upgrading.
Verify Google Analytics Connection
Finally, let’s make sure everything is connected properly!
Test Installation: Go back to Google Analytics, click on Admin, and navigate to Data Streams under your property. Select your data stream and click Test Installation.
Verify Tag: If the tag is correctly installed, Google Analytics will confirm that it has detected the tag.
And that’s it! Your WordPress site is now connected to Google Analytics, and you can start collecting valuable data to optimize your website. Happy analyzing!
Need more help? Email Stacey Ivol at si@iftsdesign.com or call IFTS, Inc. at 412.715.6266 and I’ll be happy to assist you with any questions!