
When someone submits a form on your site, do you want your website to work for you by contacting that person via automations?
If so, you are in the right place. In part 2 of this article, we’re going to cover:
- how to use a contact form that you created in GoHIghLevel
- how to add a set of email automations that contacts that prospect for you with helpful info about your company.
If you missed part 1 where we created a new form in GoHighLevel and added it to our website, go check it out here:
Now that the form is created and on your website, it’s time to put some email automations behind it. You’ll be using these automated emails to tell the prospect about you and your company, ultimately leading them to choose you in their buying decision.
Let’s get started!
Step 1 – Create Your Automation in GoHighLevel
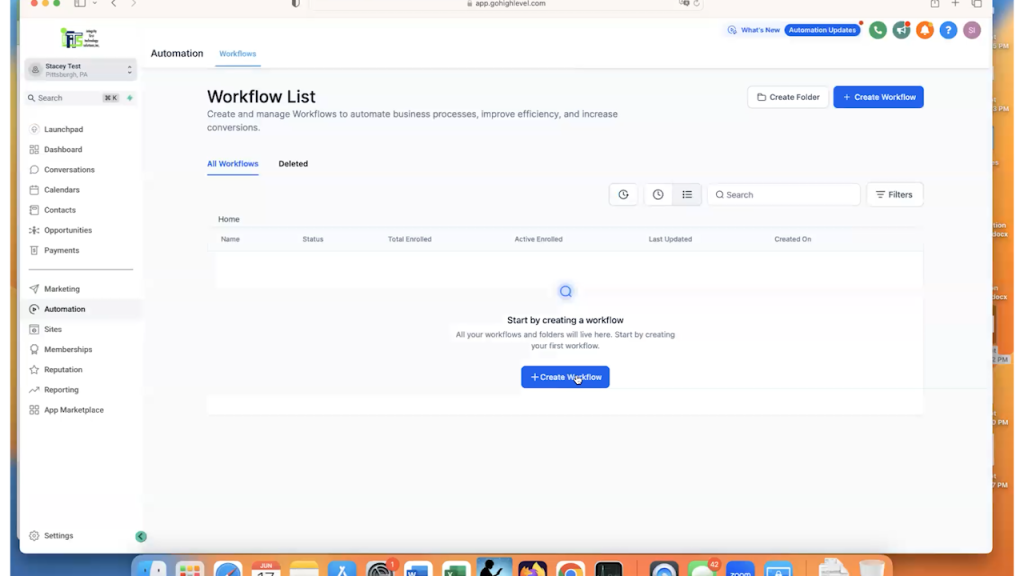
To create an automation, you will want to select “Automation” on the main left-hand menu and click on “Create Workflow”.
A workflow in GoHighLevel is essentially a set of instructions that are to be followed whenever a specific action happens. That action is called a “trigger” by GoHighLevel.
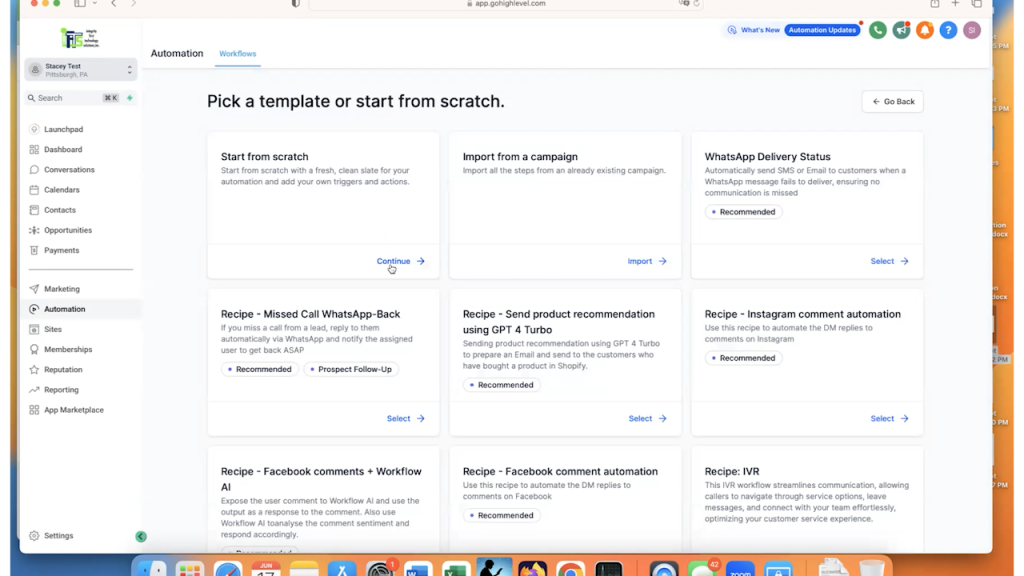
After you select “Create Workflow”, GoHighLevel will give you multiple options for pre-built workflows that they call “Recipes”. Because this is just a simple example where I want to walk you through all of the steps, we are going to select “Start from scratch”.
This pulls up a blank workflow form that is pre-named with some numbers.
The first thing that you will want to do is give your workflow a descriptive name. To do this, just click on the current name to make it editable, then re-name it and click save.
So, as I mentioned before, a trigger is how you start a workflow in GoHighLevel.
Some examples of triggers:
- Form submit
- Contact tagged
- Notes added
- Tasks completed in GHL
- Chat submission
- And more…
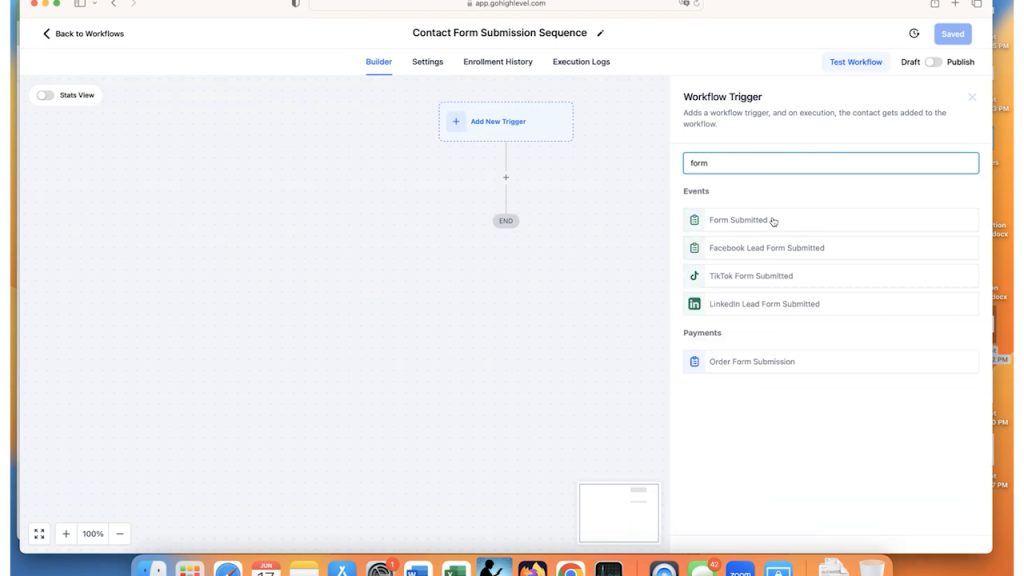
In this case, the trigger that we are selecting is “Form Submitted”.
So, click on the “Add New Trigger” and select the “Form Submitted” choice.
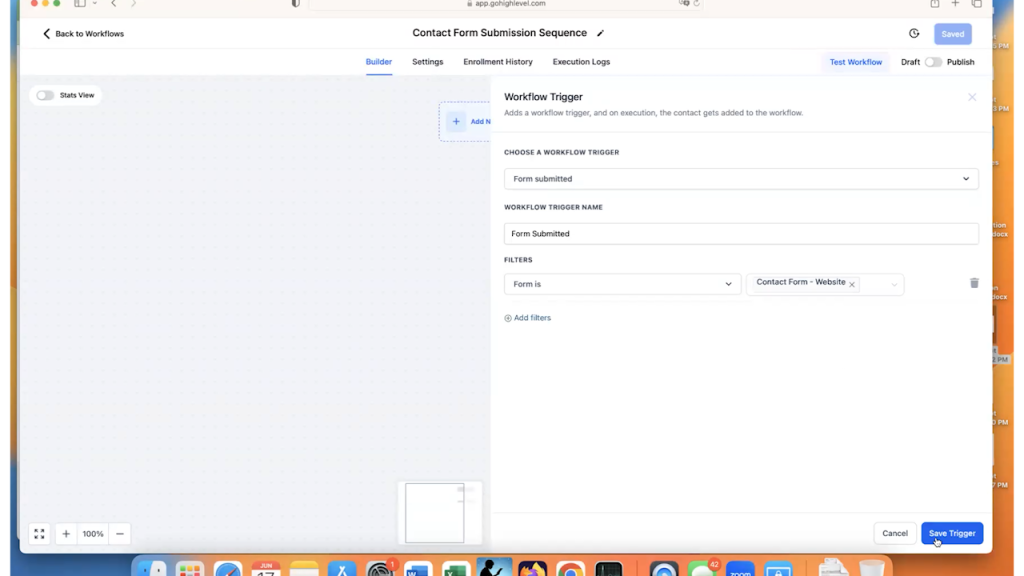
Once you select that option, you will need to specify which form and any other filters that you would like to apply to the workflow.
In the “Filters” section, select “Form Is” and then choose the form that you created in the dropdown. Click “Save Trigger” to finalize your first workflow action.
Now, when someone submits that form, they get entered into the workflow sequence.
Step 2 – How to Tag the New Contact in a GoHighLevel Automation
Typically, in any CRM, you want to know where lead comes from.
Some normal lead sources include:
- Google Search Ads
- Website Contact Form
- Display Ads
- Chamber of Commerce Website
- Etc.
In this case, the website is coming from the website contact form. We will want to add a “tag” to the prospect record so that we know how he or she first contacted us.
You can think of a tag as a label or a category. Tags are very helpful when it comes to sending out marketing materials or looking at what marketing methods are working. This is because you can actually search your GoHighLevel contacts by tag type. So, it you have 5 tagged as from Facebook and 20 tagged as from Google Ads, you will know that your Google Ads are probably working better than your Facebook marketing methods.
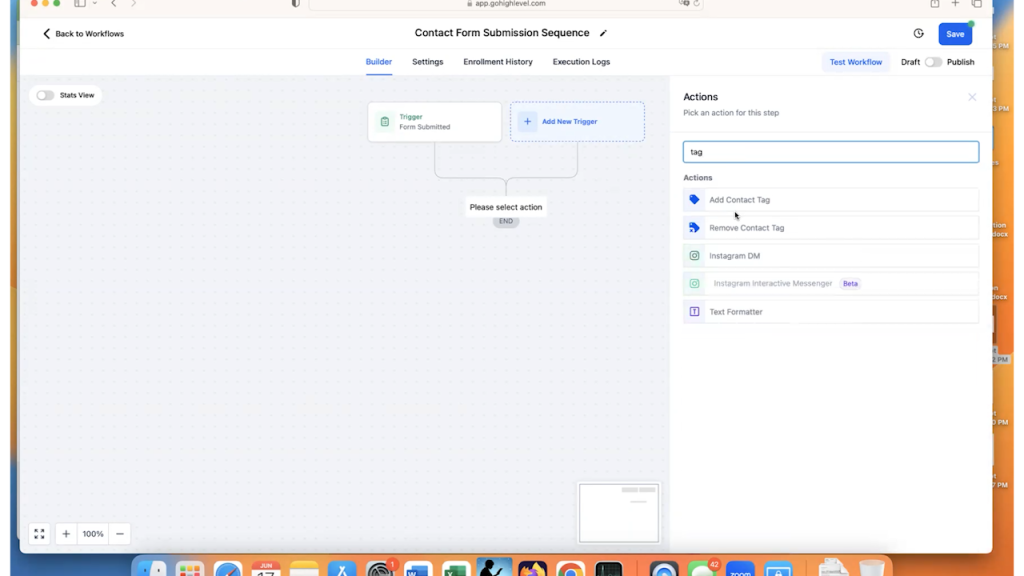
To tag someone using your workflow, you will click on the “+” to add an action, then select the “Add Contact Tag” action option.
If this is the first time adding a tag, you will need to type one in and click on “Add New Tag”. When I create tags, I typically do Name-of-form-submit as the tag, like you can see in the illustration:
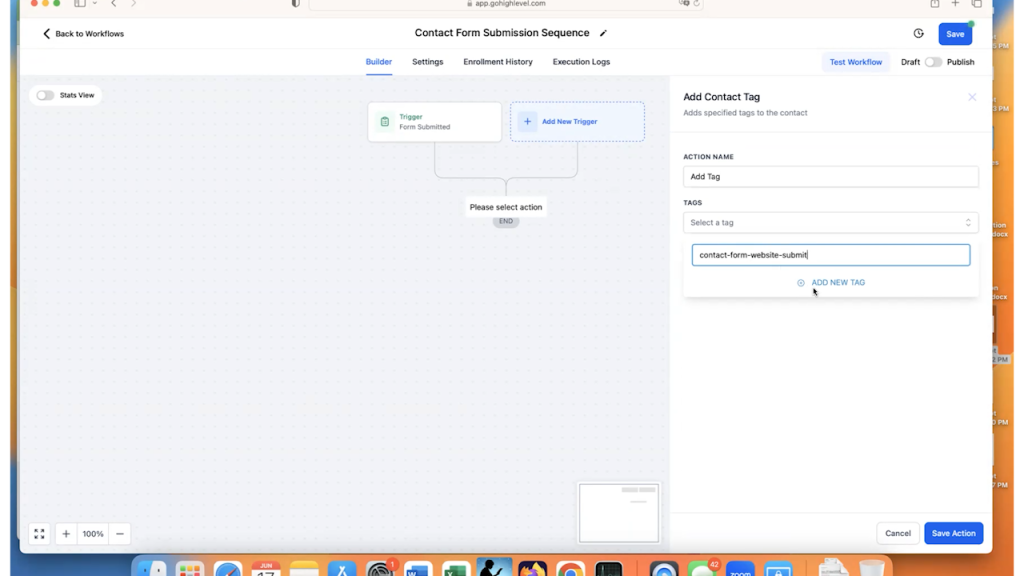
Then, click on “Save Action” to add that step to your workflow.
We now have the workflow setup to start when someone submits the form and to tag them to let us know that they came from the Contact Form on the website.
Next, we need to send them some emails.
Step 3 – How To Create An Email Sequence in GoHighLevel to Send To Prospects From a Form
The first email that they receive should be an email that lets them know that their submission went through and that we will be contacting them shortly.
To do this, we need to click on the “+” button at the bottom of the workflow and then select the “Send Email” action.
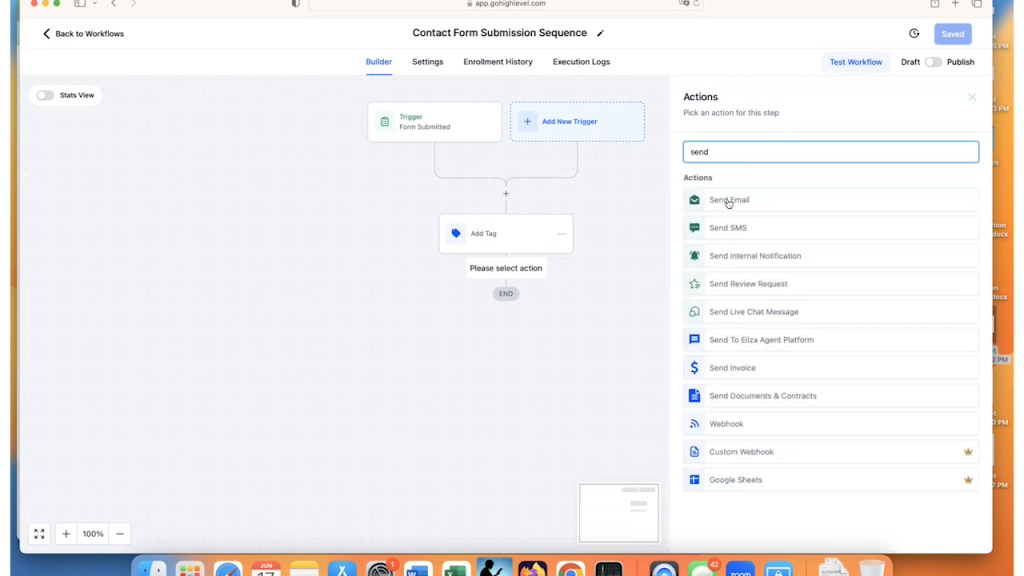
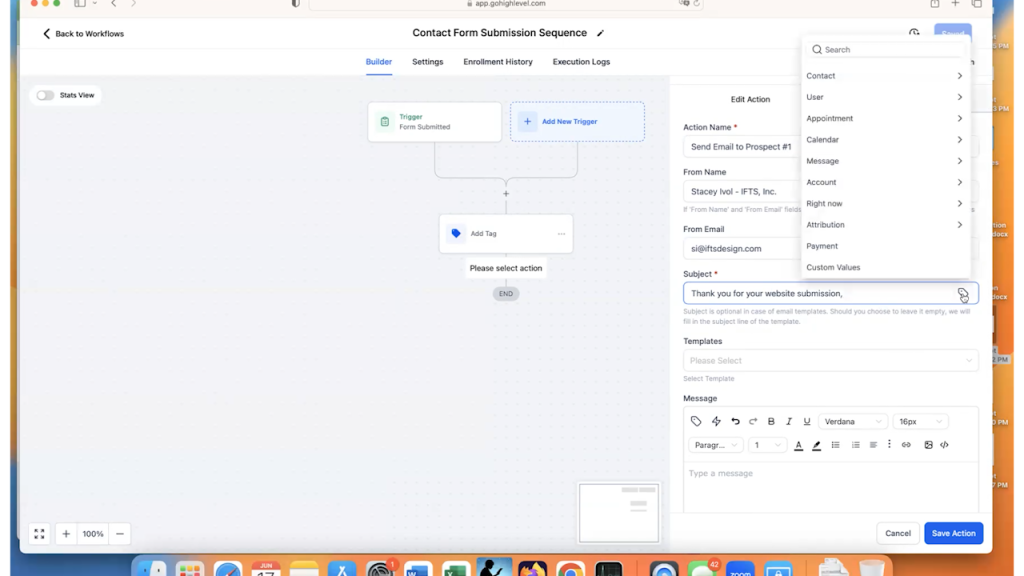
This brings up the default “Send Email” fields on the right-hand side.
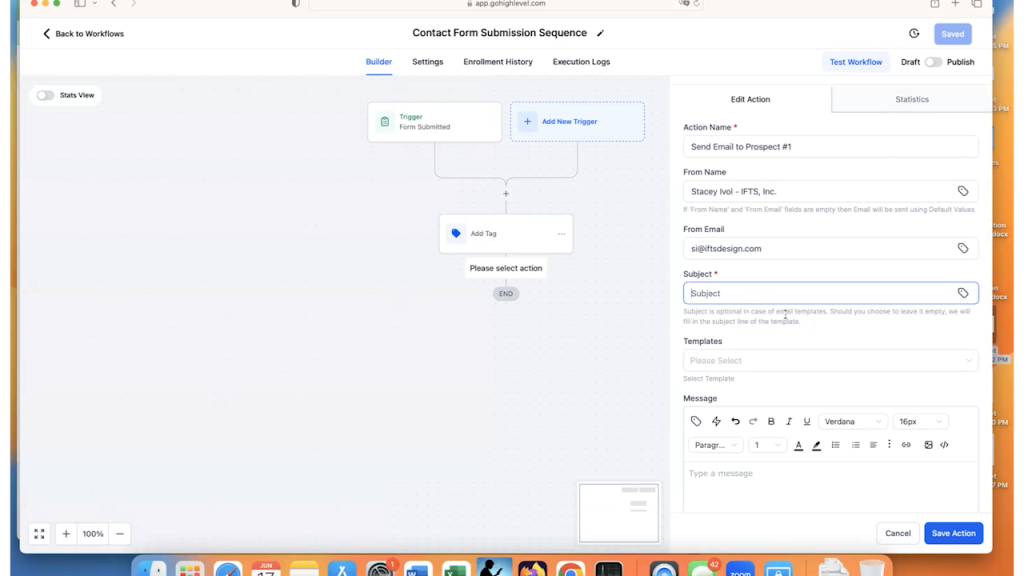
We will want to change 5 things:
- Action Name: Name this action so you don’t get it confused with other emails within the workflow
- From Name: this is the name that will show in the prospect’s email inbox, we typically will do “Full Name – Company” for this
- From Email: this is the email that will show in the prospect’s email inbox, make sure to use your work email and not one from Gmail or Yahoo
- Subject: this is the subject line that they will see
- Message: this is the actual text of the message
Here is an example of the set of fields completely filled out:
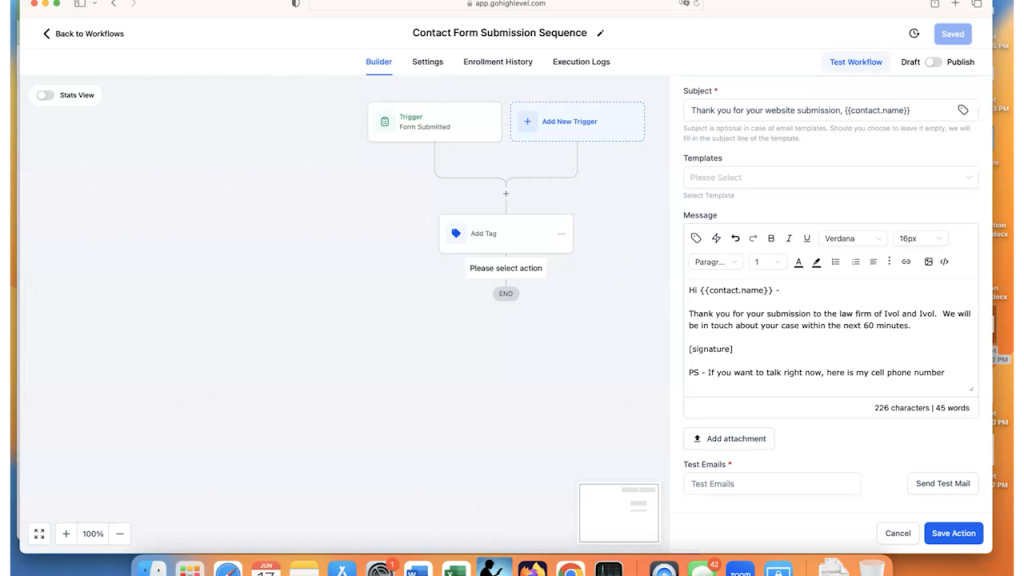
You can see in the subject and in the message that we personalize them with the person’s name.
To add in the name or any other available field from GoHighLevel, click on the “tag” icon in that section and it brings up a dropdown of available fields for you. Select the Contact > Full Name to get the name in the text section.
Then, click on “Save Action” and save the workflow.
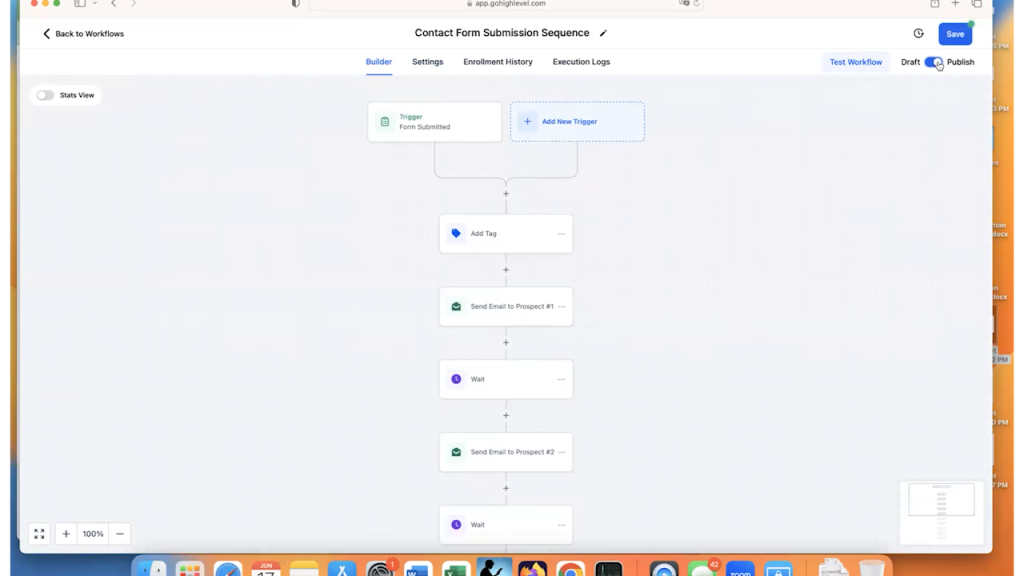
So, we now have the workflow set to:
- Start when the form is submitted
- The prospect is tagged
- An email goes out to the prospect to let them know that you received the submission
When a contact submits via your site, most companies like to send them 3 – 5 emails. This allows your website to become your best salesperson that works 24/7/365.
However, you don’t want to send those emails right away.
This is where the very important “Wait” action will come in.
After the first email goes out, we recommend waiting about one hour to send the second one. This is because you are already top of mind with the prospect and (in a perfect world), you will have already contacted them about their submission.
So, click on the “+” button and select the “Wait” action
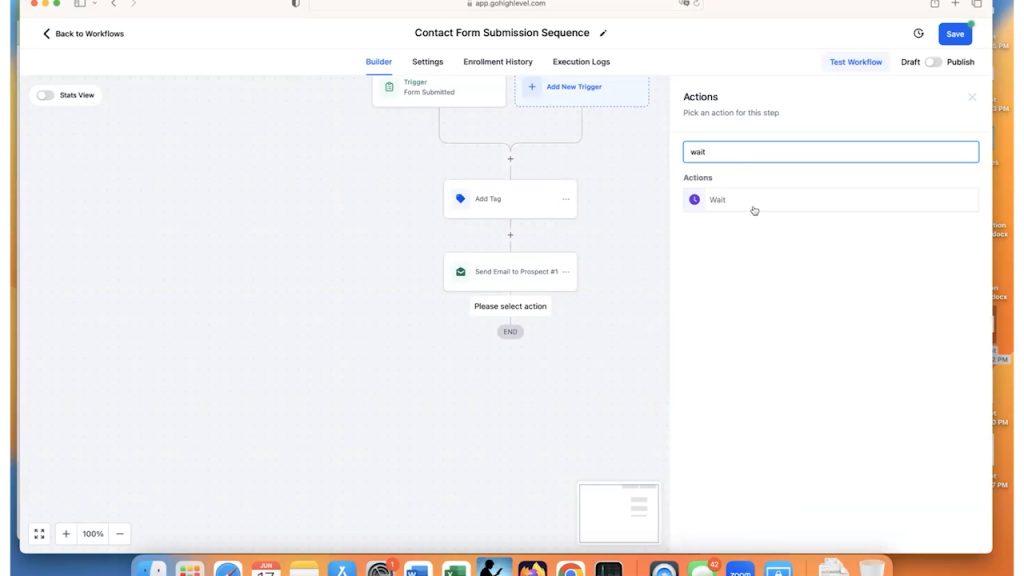
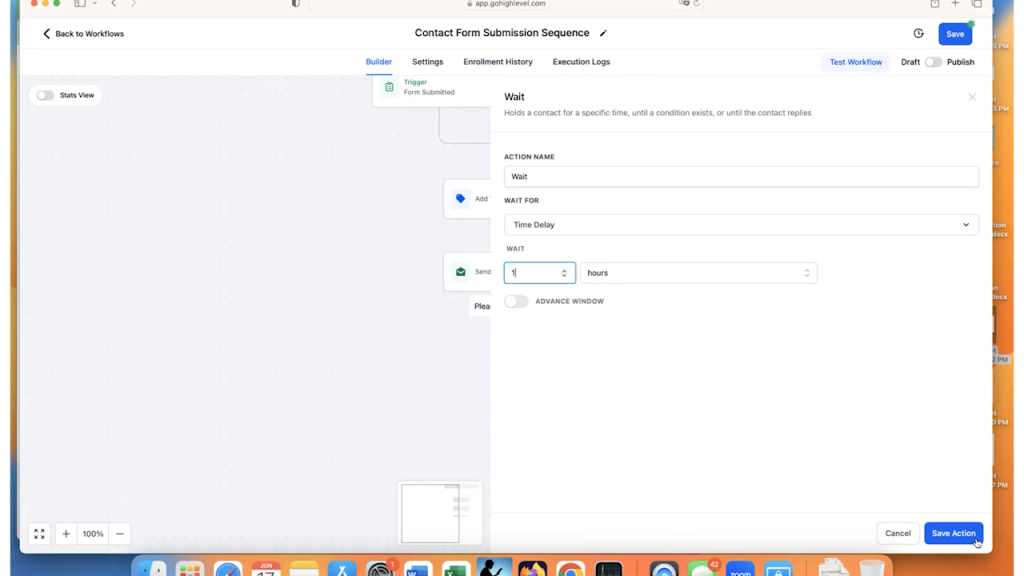
The “Wait” options are very simple.
How long do you want the program to wait before doing the next action in the sequence?
As I mentioned before, one hour is a good option in this case.
So, select “one hour” and save your action and your workflow.
One nice feature of GoHighLevel is that you can copy an action (or a set of actions) within a workflow. This really cuts down on the work needed to create an email sequence because you really only need to change the action name, the subject line and the body of the message.
To make a copy of the email step and the wait step, click on the 3 dots next to the email step. Then select “Copy” and “Copy All Actions From Here”.
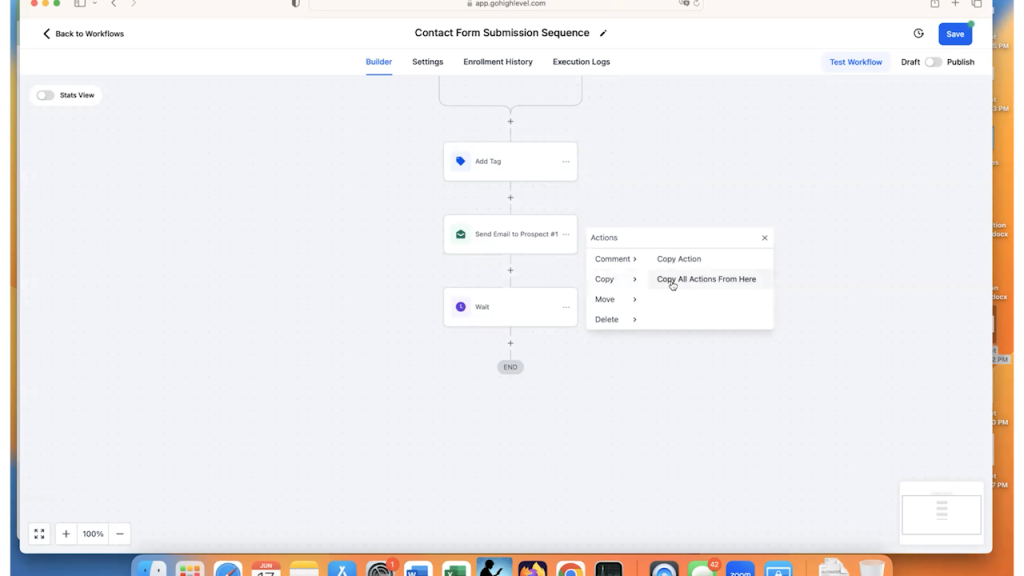
Then, you will be asked where you want those copied steps to go. It’s kind of like copy and paste.
Select the “Copy Here” text at the bottom of the workflow.

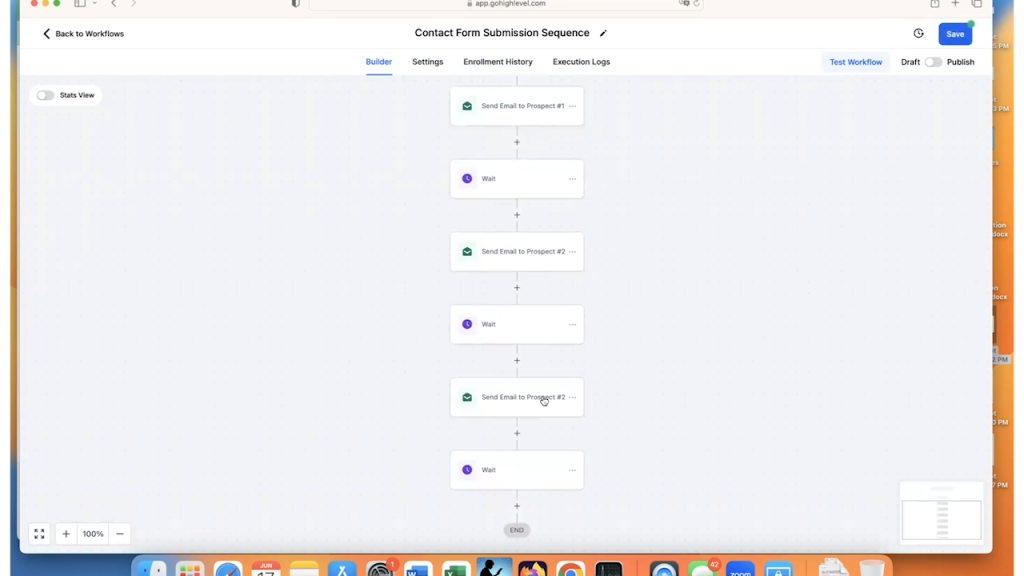
This then “pastes” the copied actions to the end of the workflow.
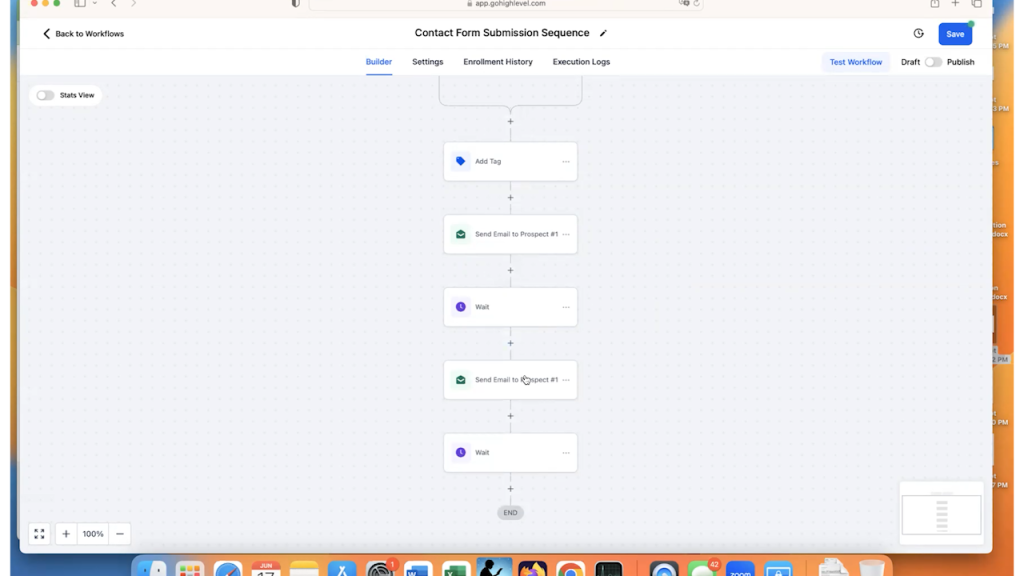
To make changes to these “pasted” actions, you’ll need to click on them to bring up that right-hand menu.
In this example, these are the changes that we made to the second email:

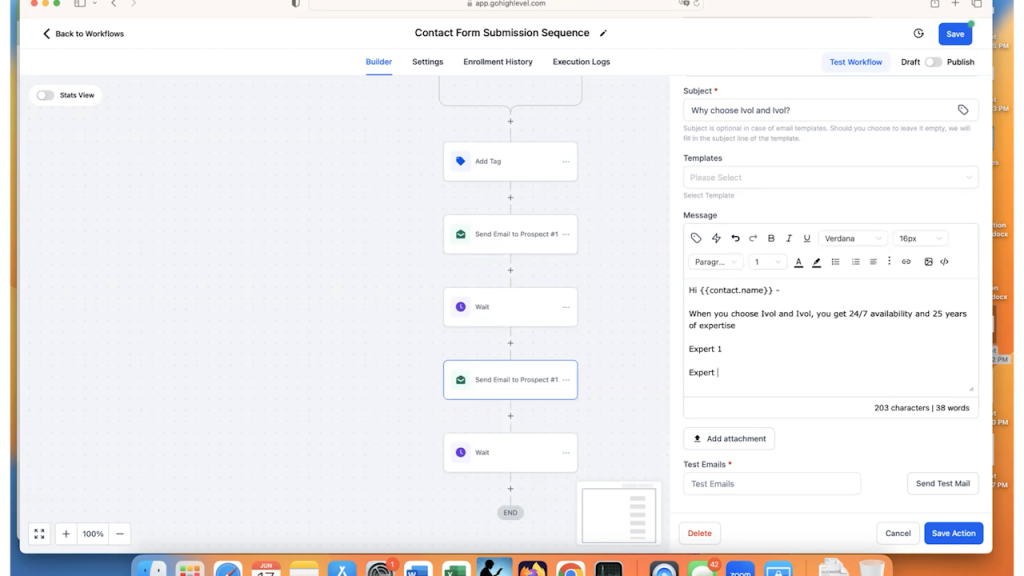
In email 2, we talked about our company and what we specialized in so the prospect would get to know us a little bit.
Once you have made the changes to that email, save the action and save the workflow.
We also will want to change the “Wait” action.
Normally, for the next wait, we recommend one day.
So, go into the “Wait” action and change it from one hour to one day.
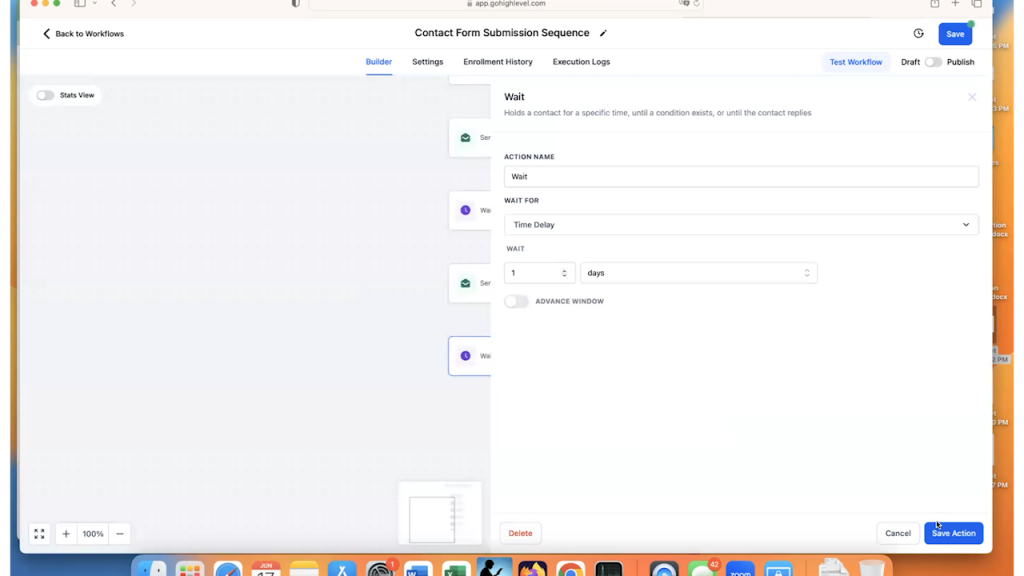
Don’t forget to save the action and save the workflow.
For email 3, you will want to repeat the steps above.
Copy the Email 2 action and the Wait action and paste them at the bottom of the workflow.
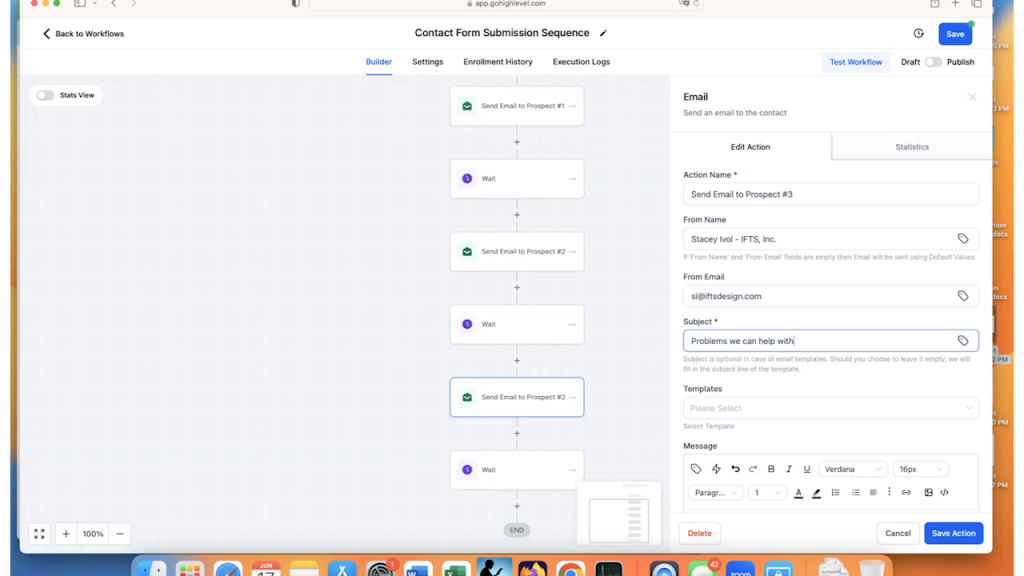
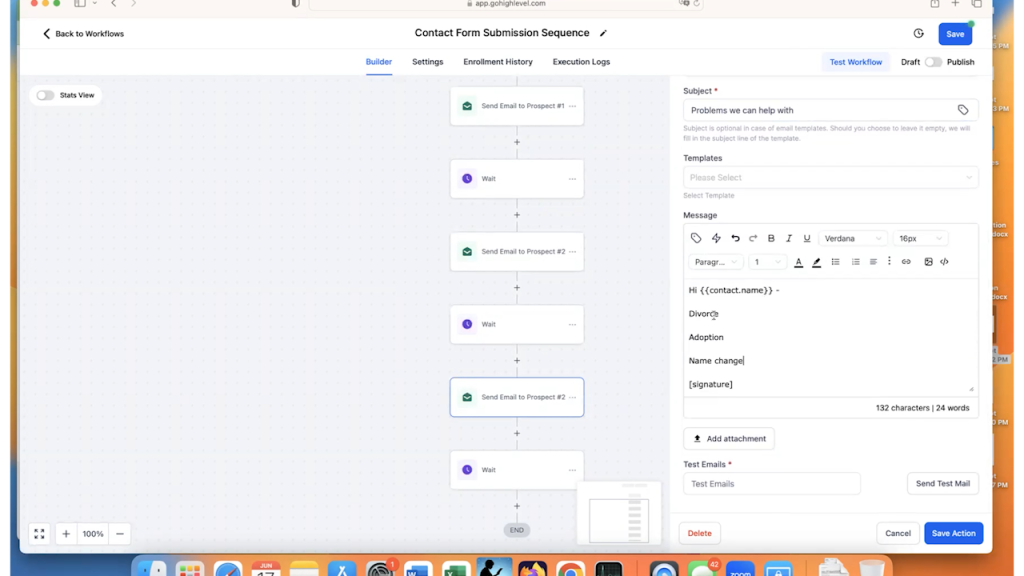
You’ll want to make changes to the name, subject and text of the third email.
This is where you may want to talk about what problems you can solve.
Again, to make changes, click on the email block to bring up the right-hand menu.
Here are the changes that we made in our example:
Save the action and workflow.
Then, you’ll need to change the “Wait” action. Here is where I would change it to two days.
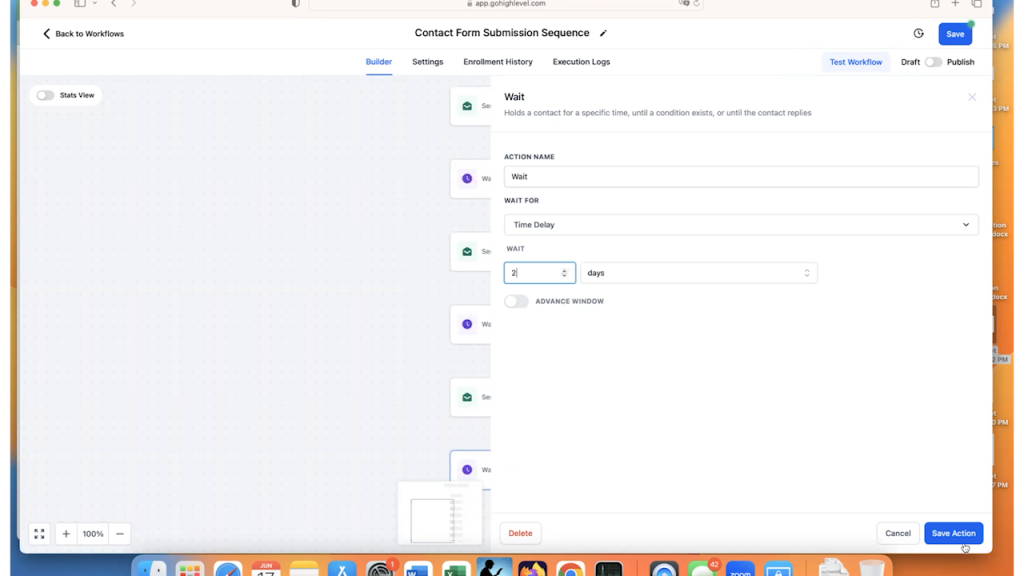
Save the action and workflow.
To create email 4, you’ll copy email 3 and the wait action just as before.
For email 4, you may want to send a few testimonials from Google or Facebook. This lets them know what it is like to work with you and your company. If you have any video testimonials, this is where to use them. Show your prospect smiling, happy people that love you!
For the “wait” action after email 4, I would change it to 3 days.
A commonly recommended sequence for the “wait” actions in an email is derived from the Fibonacci sequence.
Wait 0 (Thank you for your submission email)
Wait 1 (hour)
Wait 1 (day)
Wait 2 (days)
Wait 3 (days)
Wait 5 (days)
Etc.
This sequence is a tried-and-true tested time sequence for sending emails.
Finally, to create email 5, you will copy email 4 this time just like above.
In most sequences, Email 5 should just contain a quick call-to-action (CTA) that is short, sweet and to the point.
Example text for that email could look like this:
Hi [prospect name],
Just wanted to contact you to see if you had any questions or concerns? Let us know!
If not, let’s get started! Give us a call at [number] and you can start in the next 24 hours
[Signature]
Then, save the action and the workflow and you are done implementing the customer email sequence.
Step 4 – Settings to Check in GoHighLevel And How To Publish
There are a few settings that you will want to check in GHL to make sure that everything is going to work the way that you want.
The first thing is that you want people to be able to go through this sequence multiple times. This way, if someone contacts you now and six months from now, they will be re-entered into the workflow.
To turn this on, go to “Settings” in the workflow and make sure that “Allow re-entry” is toggled on.
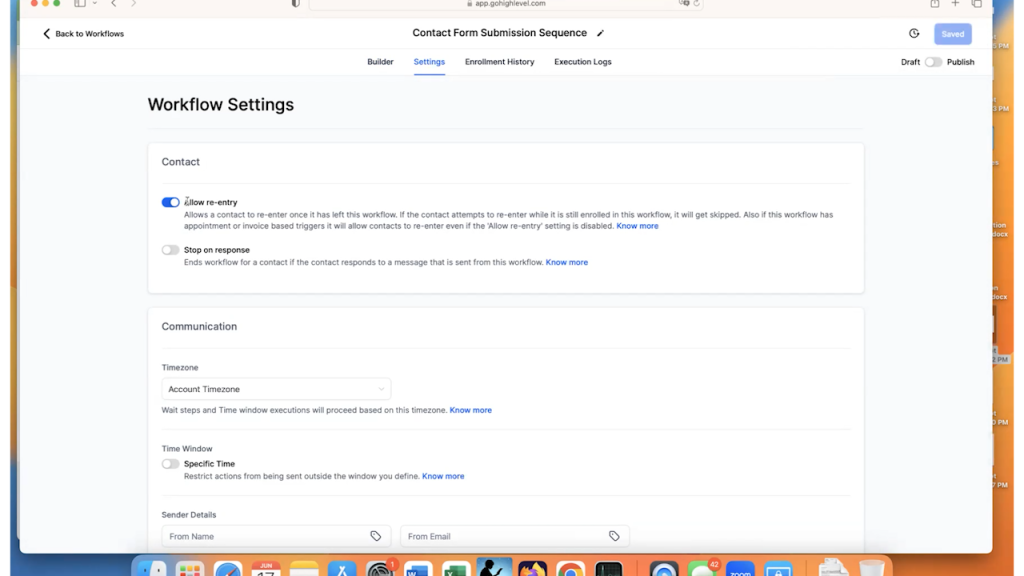
To officially turn on the workflow, toggle on “Publish” from “Draft” (in the upper-right corner) and click on “Save” to finalize that.
You are now LIVE with your workflow in GoHighLevel!
The money is in the follow up. This is why you want your website in your CRM to be your best salesperson. By having these emails sent out automatically, you are on your way to client success.
Step 5 – Run Through A Quick Test of A GoHighLevel Automation
The best way to test the GHL automation is to step through it with a test user.
So, bring up the form and fill it in, then submit.
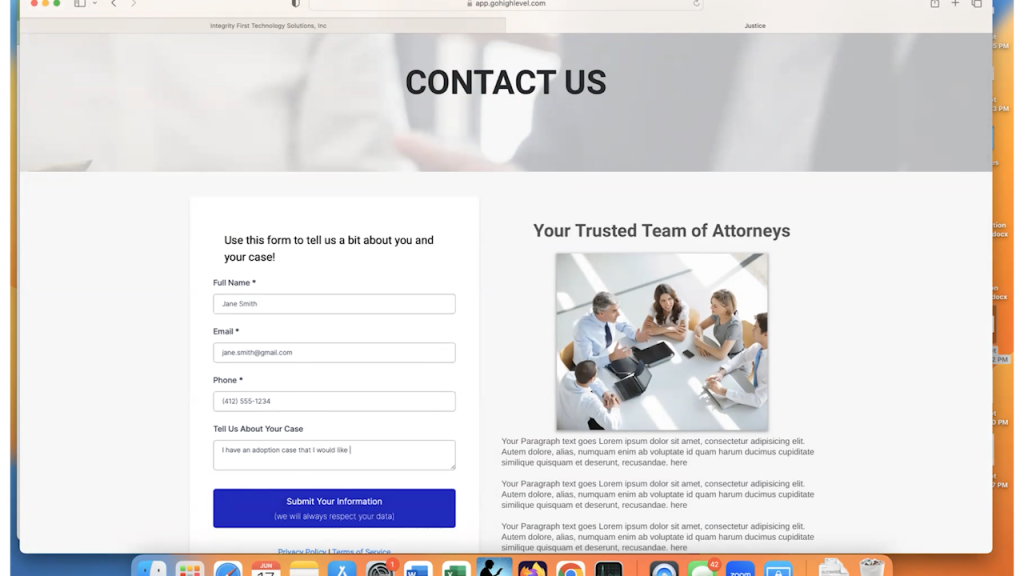
Make sure that the form shows the “Submit Success” message.
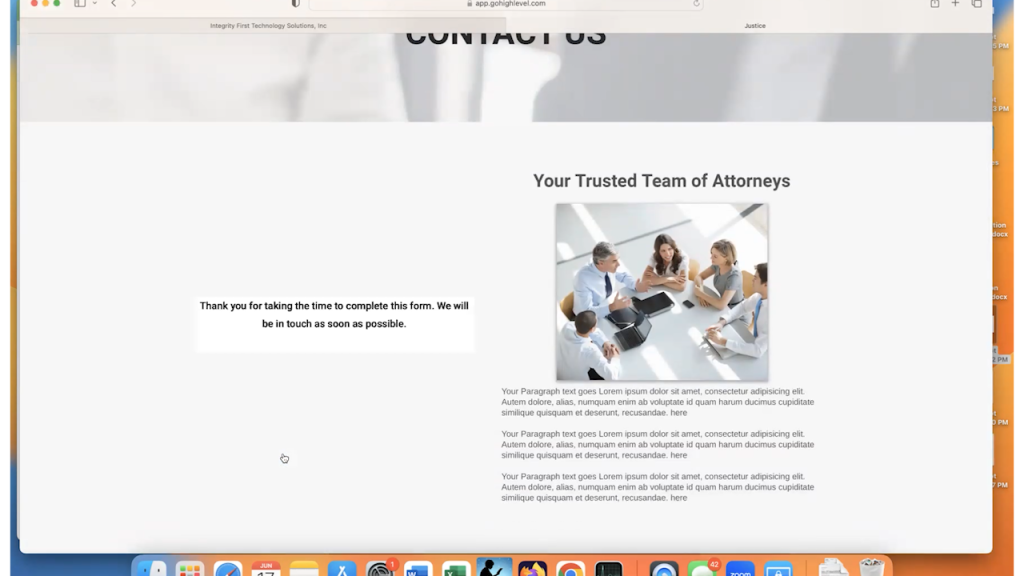
If it doesn’t, you will want to check out part 1 of this blog post here.
Now what happens on the other side in the CRM?
In GoHighLevel, go to the contacts menu and make sure that the person that you entered into the form shows up. In this case, we should see “Jane Smith” in the contacts list.
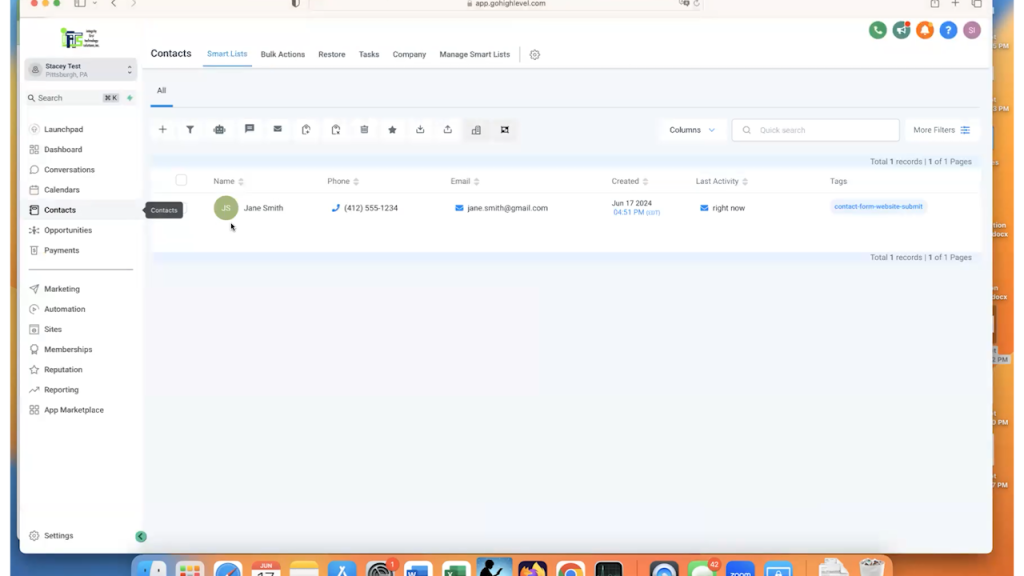
You can see her name, phone number and email that was entered. In addition, you can see that she was tagged correctly, with the “contact-form-website-submit” tag.
To get a little deeper, click on her name to open her record. Then, go down to “Additional Info” to make sure that we see that custom field that we created in Part 1 and that it is filled in.
Final check – look at where she is in the automation workflow.
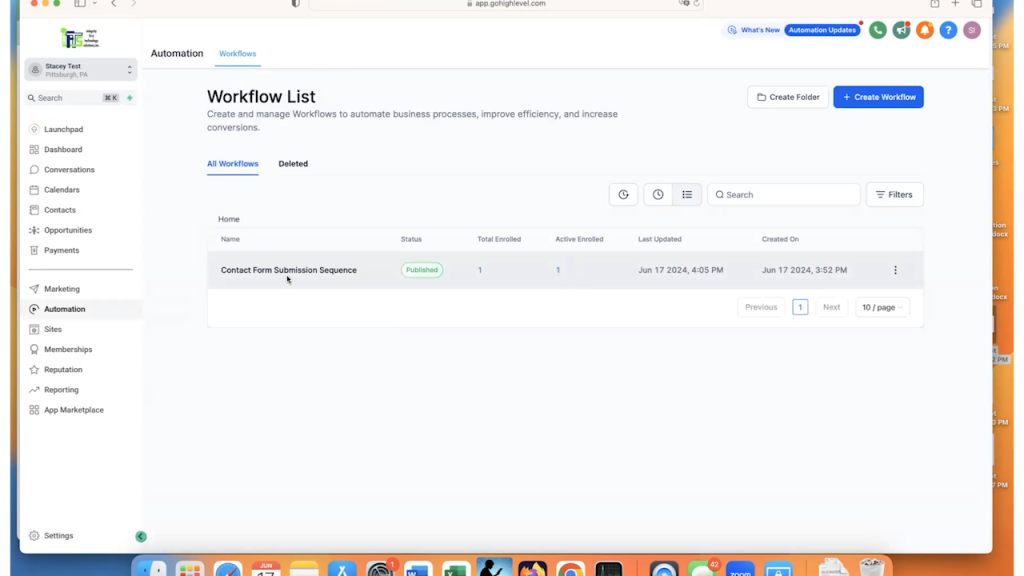
So, go to “Automation” and open your workflow that you created.
You should see one person enrolled and active, which is the test person that you entered in the form. In this case, it will be “Jane Smith”.
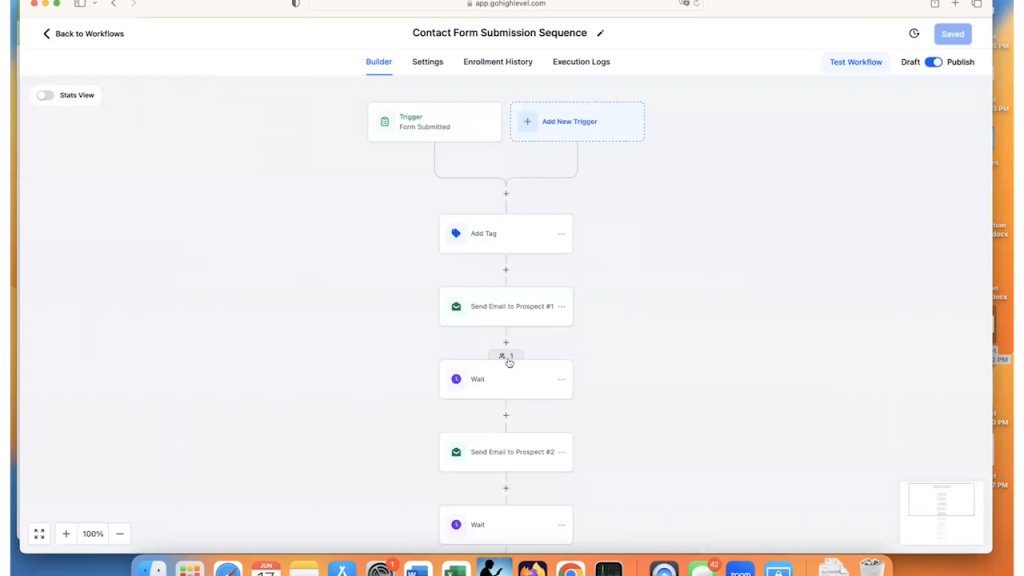
Click into the workflow and you can also see the person that is enrolled sitting at the first “Wait” state.
To check into it more, you can click on “Enrollment History”.
In this tab, you can see everyone who has gone through the workflow in the last 30 days. You’ll see the date that people entered the workflow, the current state that they are in, the current status and the next time they are scheduled to move to a new step in the workflow.
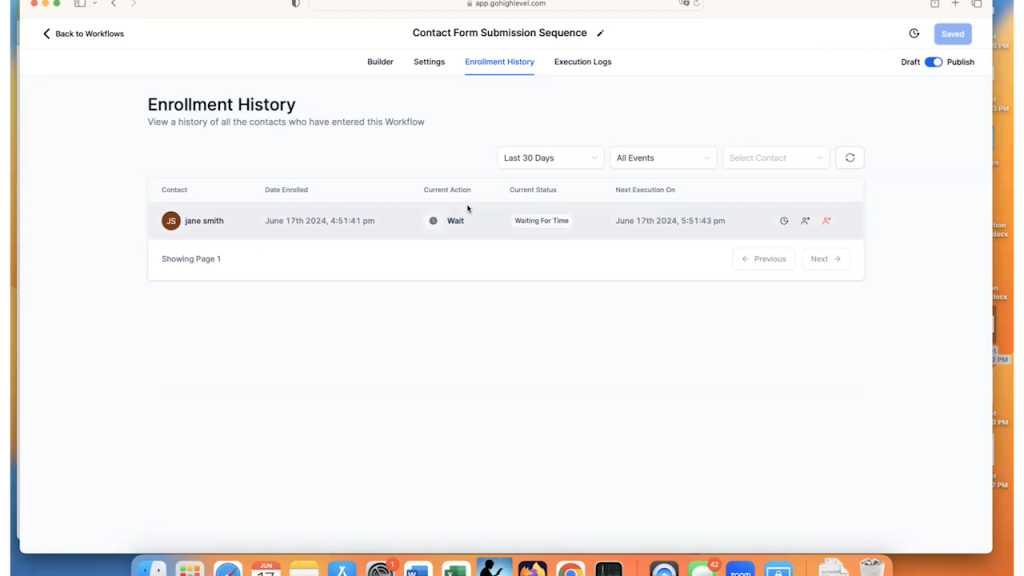
So, any time you want to quickly see where anyone is in your workflow, you can also look at the enrollment history.
The final spot to check is the “Execution Logs”. This is where you can see the tiny details about every action that the automation has taken.
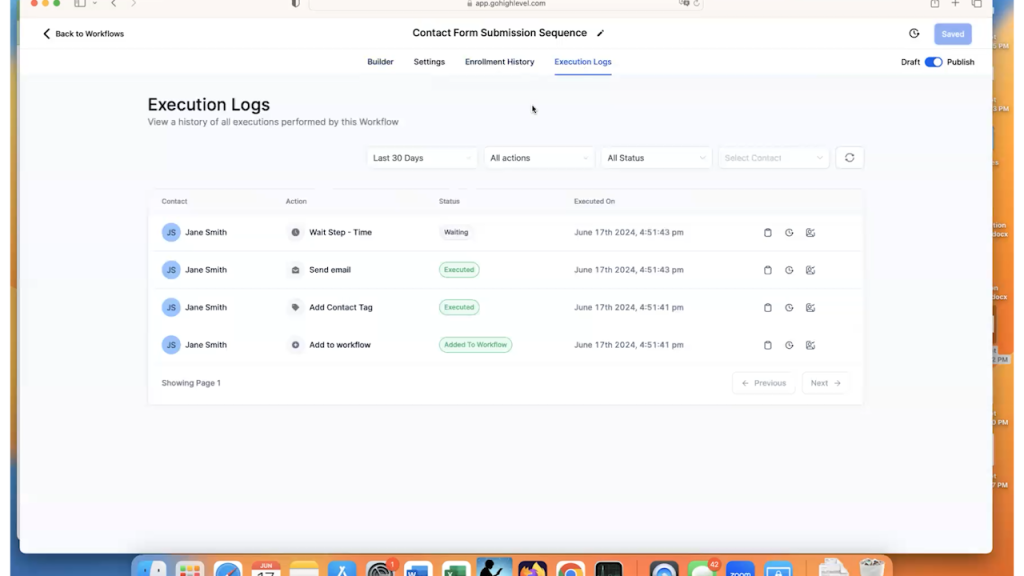
These logs will show you each step that a contact has taken through the automation, when it was taken and if it was successful.
BONUS Step 6 – Send An Internal Notification In GoHighLevel When Someone Enters The Workflow
If you don’t want to monitor your contact list closely all day, every day, you will need to know when someone submits the form.
This is where GoHighLevel’s “Internal Notifications” come in.
When someone triggers the workflow, the first thing that you will want to do is notify yourself.
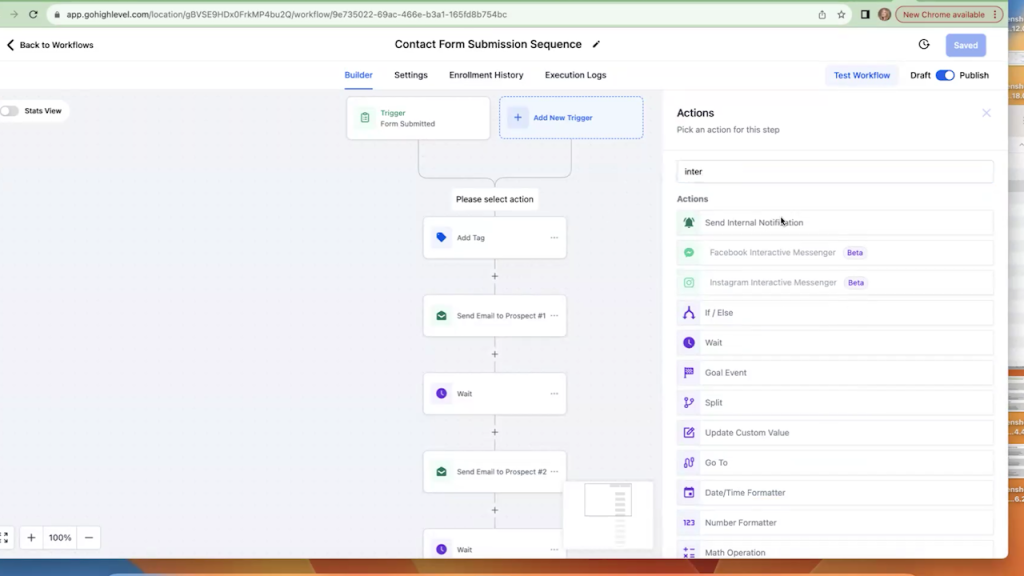
So, go back to your workflow and click on the “+” to add a step directly below the trigger and select the “Send Internal Notification” action from the list.
“Internal Notifications” are different than “Send Email” steps in one very important way. The internal notifications go to you or members of your team. The “Send Email” recipients are always outside of your organization.
You have 3 choices for internal notifications in GoHighLevel:
- Email: This will send an email
- Notification: This will send a notification in the GHL system, so your team needs to be watching for notifications
- SMS: This will send a text message
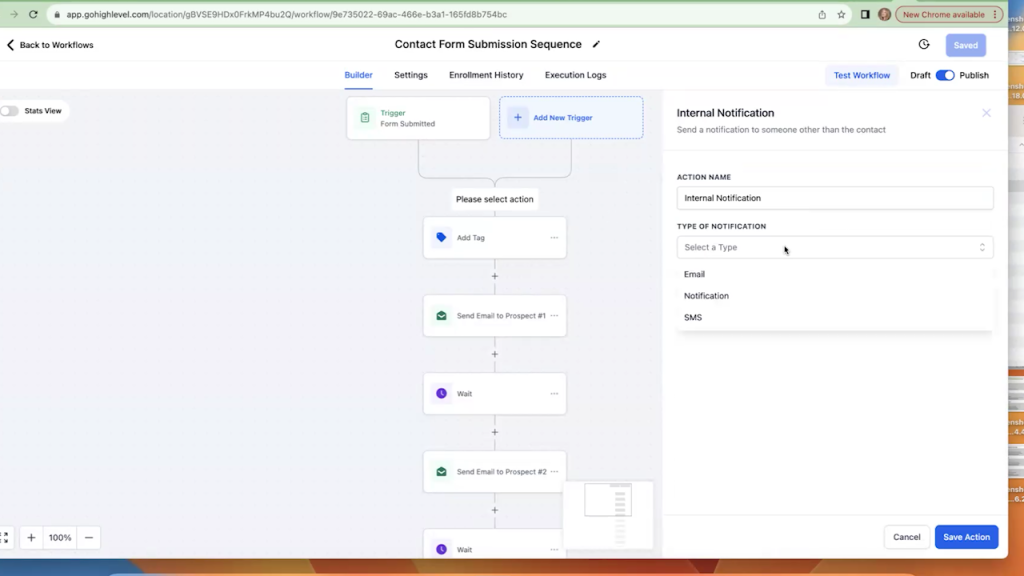
In this example, we are going to choose the easiest one, which is the email.
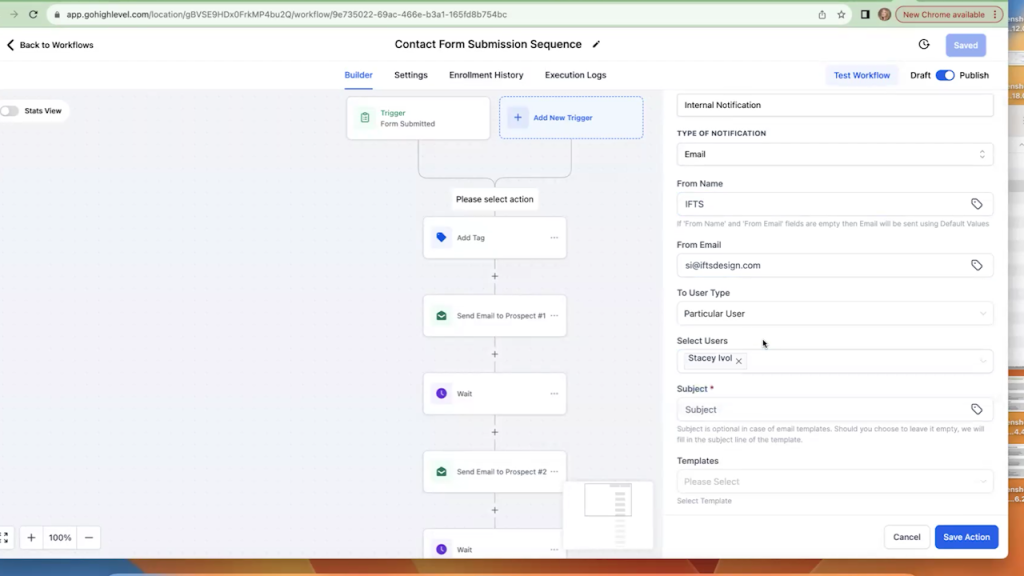
So, once you choose email, you will need to fill out the following fields:
- From Name
- From Email
- To User Type and the Users
- Subject
- Message
Let’s review each of these.
The “From Name” and “From Email” are similar to what they were in the “Send Email” step. This is the sender information that will show up in the email. Most people like to either make this their own email address or a “no-reply” email address.
“To User Type” has 3 options:
- Assigned User: This will send the email to the person in the GoHighLevel system that is assigned to the contact.
- Particular User: This will send the email to the person of your choice that you choose in the “Select Users” field. Your choices will be the team members that you have in GoHighLevel
- Custom Email: This option will allow you to enter an email address
In this example, we are selecting “Particular User”, then we are going to choose our name.
The “Subject” field is the subject that will show up in your email inbox. Typically, I like to add the prospect’s name in the subject line using the custom field ability.
The “Message” field is the body of the email that will be sent to you. You will want to include all of the fields in the form in the text so you have all of a prospect’s information in front of you when you contact that person.
To include the custom text, you will add it just like you did in the “Send Email” section. You will click on the tag, go to Contact and select the field that you want in the text.
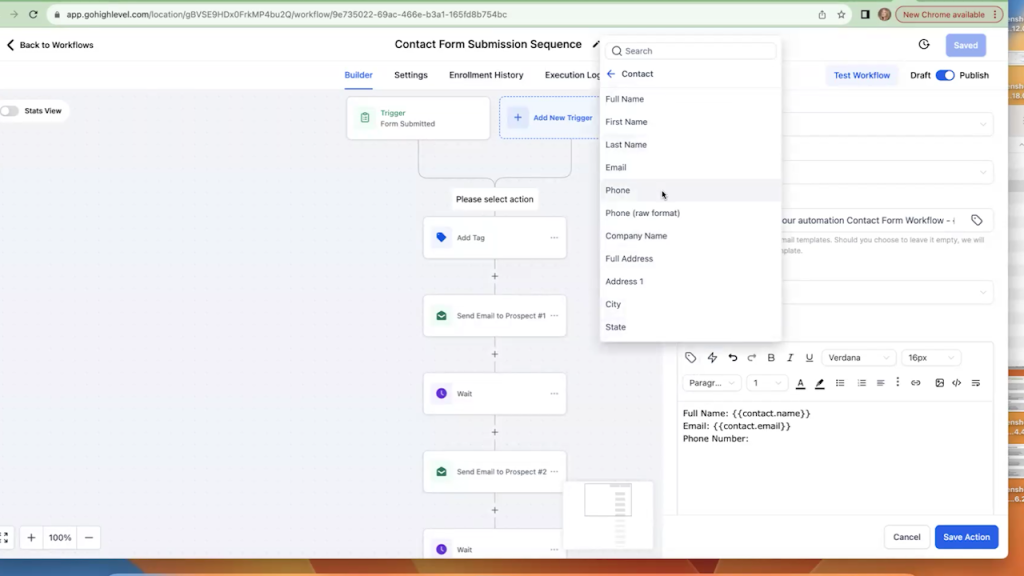
Here is the final example of the subject and the message fields filled out:
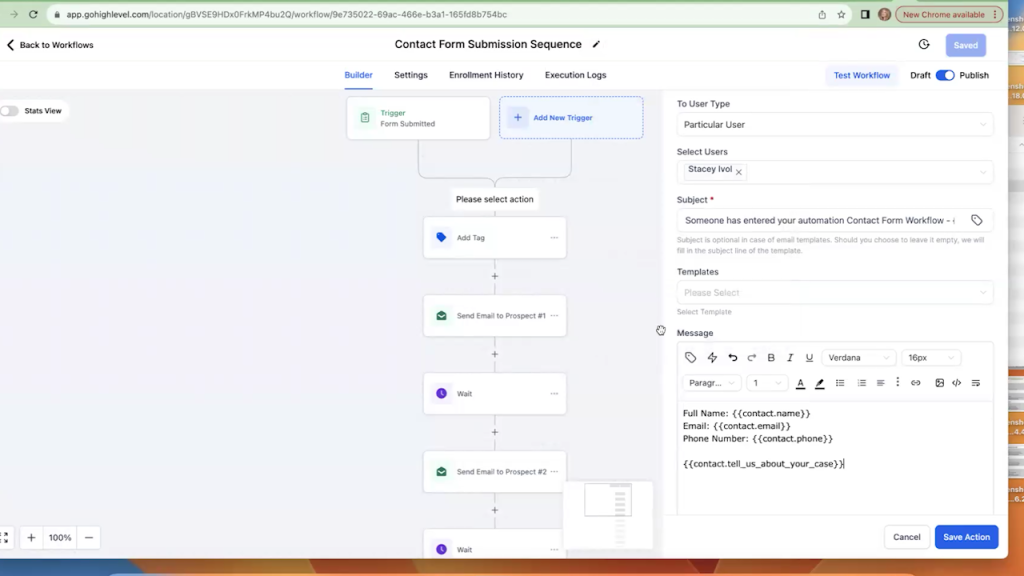
Click on save action and then save the workflow.
You now will be notified as soon as someone submits the form on your website – the automation is complete!
Contact those submissions right away and start getting a ton more clients!
Here’s why implementing all of that automation is so important:
If you contact a new lead within five minutes, you are much more likely to turn them into a client. Studies show that reaching out within this time frame makes you 100 times more likely to talk to the lead and 21 times more likely to qualify them compared to waiting 30 minutes. Plus, 78% of customers buy from the company that contacts them first. So, quickly responding to new leads can greatly boost your chances of making a sale.