
Are you a small business owner who doesn’t have the time or energy to create and design for social media posts?
Do you need ways to make posting quicker and easier?
You’re not alone! With ever-increasing expectations in both reach and quality of content, it can be hard to keep up.
That’s why we’ve gathered some of our favorite social media hacks that will help make creating attractive, professional social media posts quicker and simpler for small businesses like yours.
If you’re a small business looking for easy ways to create social media posts without spending a ton of time or money, then Canva is your go-to tool.
As the leader in DIY design and visual content creation, Canva makes it easier than ever for brands to whip up stunning visuals that engage their customers—all with just one click.
In this article, we’ll go over quick and simple hacks #1–4, the basics of getting started and staying organized in Canva, so you can get busy creating beautiful, eye-catching posts! Read on so you can start benefiting from these shortcuts right away!
Canva basics: the basics of using Canva to create posts for your small business
Canva is a user-friendly graphic design tool that can be used to create professional-looking visuals for your small business. With Canva, you can create custom visuals for your website, social media posts, and marketing materials.
A great thing about Canva is that it’s free to use. You can create basic designs without having to pay a cent. If you are running a small business, however, the “pro” plan that Canva offers is worth it in my humble opinion if you need to create lots of social media posts quickly.
Getting Started With Canva
To get started with Canva, head to the website and create an account. Once you’re logged in, you’ll be taken to the main dashboard. This is where you’ll find all of the tools and features that Canva has to offer.
Have a Social Media Plan for Your Posts
Hack #1: Plan Your Posts
Have a plan for your social media posts before you get started. As we outlined in one of our previous blog posts, creating themes for each day of the week is a great way to get your creative juices flowing.
Take a peek at your competitors’ social media accounts or an account in an industry similar to yours.
Is there a certain type of post that seems to get a lot of engagement from their audience?
Try to come up with your own version.
For example, if you own a painting company, you can do a series of DIY fail posts for a fun look at why your industry is sometimes so desperately needed. Just be sure to credit any photo sources or quotes that aren’t yours.
Once you have your themes in place, create a content calendar. Start by jotting down at least two weeks’ worth of content ideas and post dates. You can even begin drafting in Canva’s Pro Plan scheduling feature (which we will be covering in this article) before you even start designing the actual post!
This will help you keep track of what posts you have coming up and plan ahead to make sure all of your posts are on time and delivered when they need to be. Not only that, but it’s also helpful for making sure your posts are well-thought out and not rushed.
Have Your Brand’s Style, Fonts, Colors, and Logo at Your Fingertips
Hack #2: Create a Brand Kit Using Canva’s Pro Feature
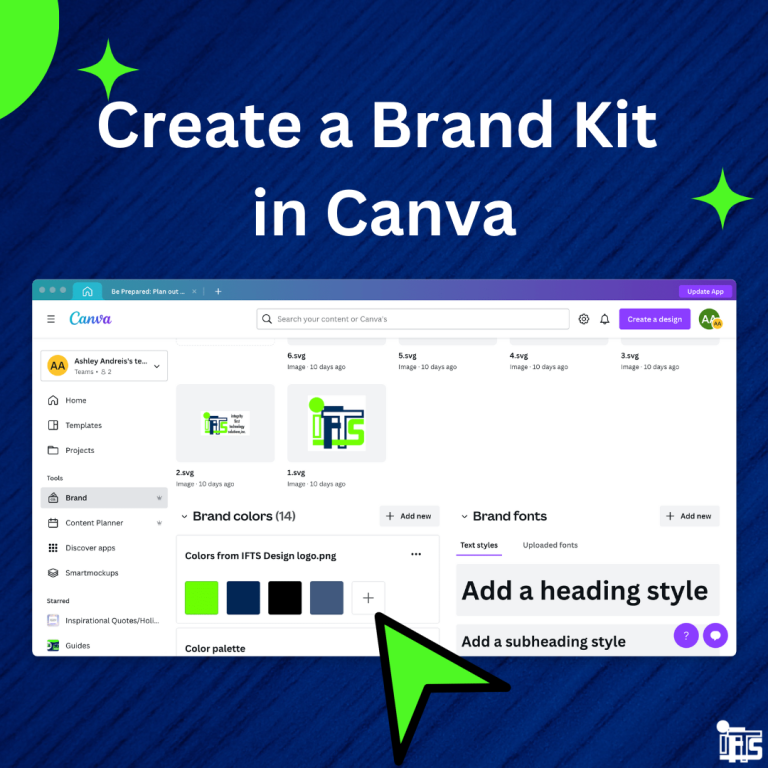
Creating a brand kit using Canva Pro is one quicker and easier way to ensure that all of your branding elements are consistent and look professional in your social media posts. By creating a brand kit, you can control the size, font, and color of your branding elements, which will help create a unified look for your business.
You will need access to all of your text fonts, high resolution, transparent background logo files (preferably SVG, aka Scalable Vector Graphics, which do not lose quality or resolution when resized), and the CYMK #s that represent your company’s brand colors to upload to Canva.
When you are ready to start designing, your brand’s kit is easily accessed from the side menu bar under “styles.”
Canva offers a variety of pre-made templates that you can use as a starting point for your social media post designs.
You can also create your own brand templates from scratch by starting with a blank canvas and using your brand kit as your guide, or simply change the background colors and logos on any of the pre-made templates by clicking the small color box in the top left corner of the design screen. Your company’s colors will automatically show up in the color selection menu on the left side of the screen.
When designing the graphics for your brand, it’s important to keep in mind the overall tone and message of your business. For example, if you want to project an image of professionalism and sophistication, you’ll want to use sleek fonts and rich, neutral colors. If you want to create a more playful or whimsical brand identity, then you might want to use fun fonts and brighter, bolder colors.
You can also easily use your own fonts instead of the ones that come with Canva’s templates by clicking the text button in the sidebar menu.
Make sure that all of your branding elements are the same size and shape. For example, if you have a series of posts with a border, make sure it’s the same size in each post. Your logo icon and company name should also be consistently placed throughout your designs.
After you’ve chosen a template or designed your own, it’s time to start filling in the details of your social media posts. Canva offers a range of tools and features for adding 2D and 3D images and illustrations, animations, graphs, borders, photos, shapes, and lines, as well as textures and filters, to give your social media a totally custom look.
Canva’s Filter Feature
Hack #3: Use the Filter Tab to Find Your Ideal Graphic Quickly
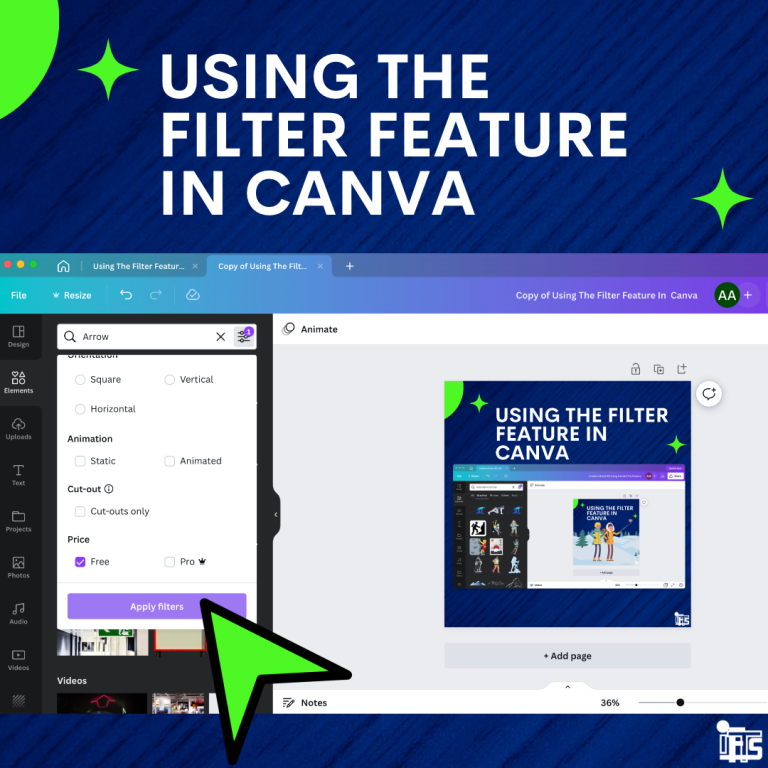
Canva’s filter feature is great for finding the perfect graphic or image quickly without having to scroll through endless clip art options.
The filter tab icon shows up in the top right corner of the search bar when you are in the elements section of the design screen. The filter allows you to search by keyword, color scheme, size, and whether you need a free or pro element.
So if you need a vector illustration of an office chair that’s green with white stripes, no problem! Just type in those keywords and let Canva do the rest.
Canva also offers a library of royalty-free stock images and photos that you can use in your designs. You can search the library using keywords, or you can scroll through the available images to find what works best for your post. Plus, if there’s something specific that you need, you can upload your own pre-made graphics and photos.
Once you’ve created a few templates for your brand, it’s important to save them so that you can use them again and again throughout the year. Canva allows you to save both individual designs as well as entire folders of templates, which brings us to hack #4.
Save Your Designs for Faster Creation
Hack #4: Save Your Designs to a Folder
When you save your newly designed social media posts, you can easily and quickly copy the layout, elements, and style you worked so hard on into your future social media designs.
The easiest way to do this in Canva is by creating folders. You can create folders to save different types of images, such as logos, product shots, or blog graphics. You can also create a folder for each client or project you’re working on.
This will help you stay organized and save you valuable time by making it easy to find the images you need when you’re working on your designs.
When creating folders in Canva, be sure to name them clearly so you can easily find them later. You may also want to create sub-folders within your main folders if you have a lot of images. This can help keep you even more organized.
When you are ready to create a new social media post, select a folder and then click the “add new” design button on the top right portion of the screen. Once you are directed to the editing screen, you can scroll down the toolbar on your left to the tab labeled “Projects” and select one of your saved folders or designs.
Your previously saved project can then be added as a new page. Then, you can easily change the background color, images, and text to your liking while keeping some elements, like the border and logo placement, the same.
There you have it. Follow our first 4 simple hacks so you are organized and ready to start designing social media posts in Canva.
Next time, we’ll go over 6 more hacks that will explain the most efficient ways to use Canva’s design tools so you can get busy creating!
And if you need any more help, contact our social media experts at IFTS, and we will get the job done for you! Give us a call today at 412-715-6266, and we’ll get you started on creating visuals that will take your business to the next level.