

If you want to take your podcast to the next level, you might be wondering if you should start putting videos on YouTube.
Video is one of the most popular types of content on the internet, and it can be a great way to reach more people. But before you start filming yourself talking into a microphone, there are a few things you should know.
In this article, we’ll show you how to turn your podcast into a professional-looking YouTube video that keeps people interested and helps you grow your audience. We’ll also tell you how to choose pictures that go with your audio and how to make your video work best on YouTube.
So, if you want more people to listen to your podcast, keep reading to find out how to turn it into a YouTube video.
Why turn your podcast into a YouTube video?
You might think that YouTube is just for watching videos, but more people listen to audio on YouTube than anywhere else!
According to the Music Consumer Insight Report, 47 percent of the time people spend streaming music around the world is on YouTube. In fact, YouTube even beat Spotify to become the biggest platform for listening to podcasts in the US.
People don’t seem to mind staring at a screen that doesn’t change while they listen to something they like. So yes, you can be successful even without a video on YouTube! Many are happy to just sit there and listen without watching while they go for a walk, work out, or fold some laundry.
Adding some visual interest, though, will grab viewers’ attention and keep them interested when they aren’t just listening. It also lets you add more information that might not be possible in an audio-only format.
Your podcast’s online presence could be more than doubled if you upload it to YouTube! It potentially gets you in front of billions of Youtube users every day, and it’s a great way to make your content available to your audience no matter where they are.
So before you record that next episode, it’s worth brainstorming ideas about how you can turn your podcast into a YouTube video.
Steps to Getting Started with Youtube
Step 1: Decide what type of video you want to create
There are a few different ways you can go about creating a video version of your podcast. The first is to simply take a video of yourself while recording your podcast. This is the easiest way to create a video, but it can be a little boring for your audience if they’re just watching you sit and talk.
You could also record your podcast on your webcam. You don’t need to buy any fancy equipment to do this. Simply plug your microphone into your computer, use the built-in camera, and use Zoom or QuickTime to record yourself while you speak. Make sure that your podcast microphone is being used instead of the computer’s built-in microphone in your audio settings.
If you decide not to film yourself, add pictures and short video clips to your audio for visual interest. This is a great way to keep people watching, and it lets you easily add extra information that might not be possible with just sound.
It’s important to choose high-quality images that fit your brand’s style and aren’t a distraction, so make sure they relate to your topic and add value
Step 2: Record your audio
Once you’ve decided what type of video you want to create, it’s time to start recording. When recording your audio, it’s important to speak clearly and at a consistent volume. You also want to avoid any background noise that might be distracting to viewers.
Your sound file alone is an MP3 type of file, which can’t be uploaded to Youtube. Because the video site requires MP4 video files, you will have to have some type of video to go along with your podcast, even if it’s just one image, so that it “plays” and uploads to the site like a video would.
Step 3: Converting your audio file into a video
If you want to spend even less time uploading your podcast to YouTube, keep reading.
Create a background image first by using free graphic design software such as Canva or Envato Elements. Both already have YouTube video templates, so you’re not starting from scratch. Adding your logo and changing the colors is pretty simple, and there are thousands of graphics available to really customize your video.
What should be included in that graphic?
Your company’s logo, name or host, website URL, and any other relevant information. YouTube recommends images with a resolution of 2560x2240px for the best results on all devices. When you upload the MP3 audio file of your podcast to a software app like Canva, you can easily add and switch from one image to another with a wide range of customizable effects to go along with the sound.
Be sure to include a call to action page at the end so that people know what to do next.
You can also add links to your website or other social media and encourage people to like, share, and subscribe to your channel.
Finally, you now have an MP4 file to upload to YouTube!
Step 4: Optimize your video for YouTube
After you’ve added your designs and recorded the sound, you need to make sure your podcast is ready for YouTube. It’s important to use keywords that are related to the content when optimizing it. You should also think about adding captions and/or subtitles.
YouTube says that videos with closed captions get 12 percent more views than videos that don’t. Some polls even show that people are more likely to finish watching videos until the end if there are captions. This is perfect for those times when people might find it easier to watch video content without the sound on.
Don’t worry, YouTube has its own built-in AI that captions your videos for free once they are uploaded. It may not always be 100% accurate, so remember that the higher the audio quality you provide, the better the AI-generated transcription will be.
Once you have your Youtube channel with your uploaded videos, you can access and edit the closed captions. Click on the Subtitles section and select the icon below.
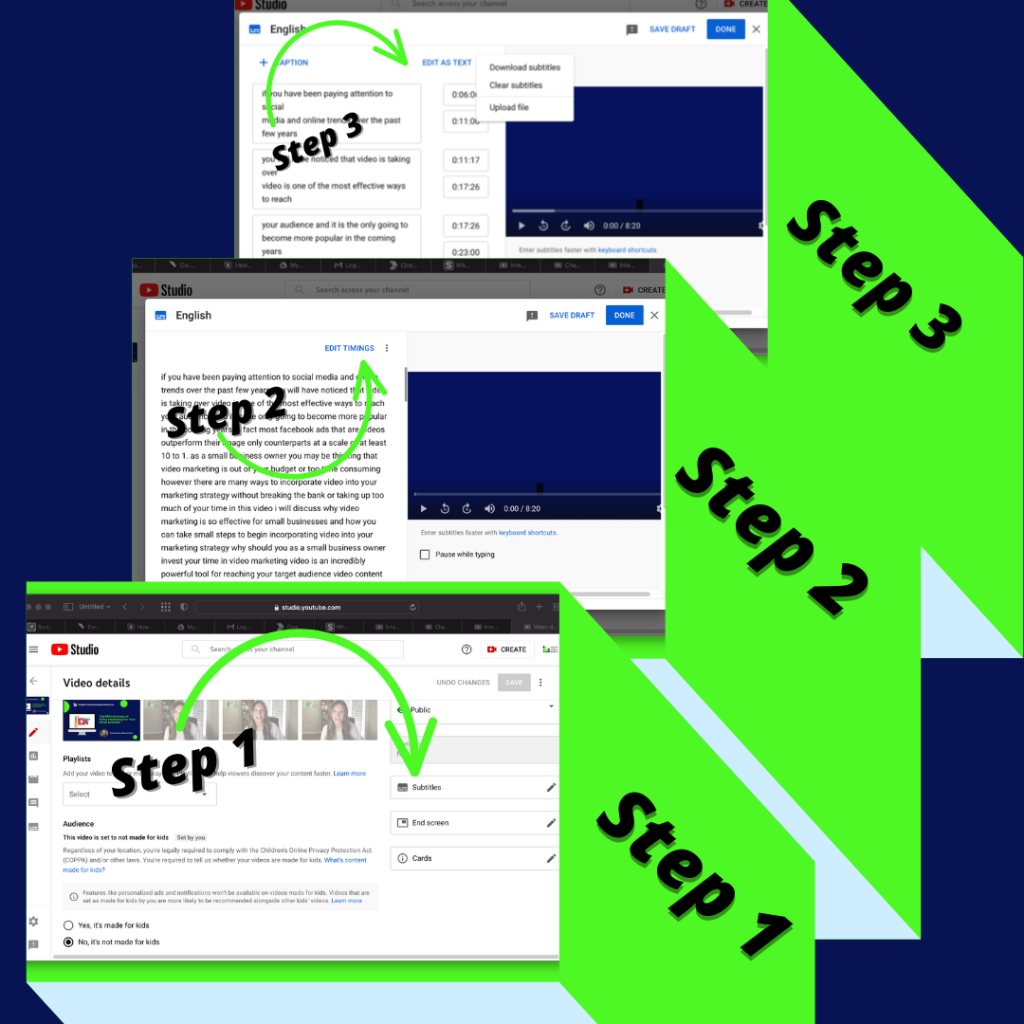
You can either edit your subtitles directly within YouTube or upload your audio subtitles using a site like https://otter.ai/home, which will ensure your audio text is indexed and searchable on the internet. This will help your videos rank higher in search engines by turning every word that is captioned into metadata and making it more likely that your videos will show up in Google searches.
Shorter Podcast Clips, Are They Still Worth it?
As we covered in our last blog post, video marketing is definitely worth your time.
Because YouTube has such a large audience, it’s one of the best places to put podcasts and other types of content. People enjoy YouTube because it’s popular and it’s what they know.
But what if you don’t have the time right now to post full episodes of your podcast on YouTube?
That’s okay! You can still promote it by posting shorter clips from each episode.
This is great for several reasons. Listeners are more likely to download the whole episode on their favorite podcast app, which could mean more endorsements. Also, people are more likely to share a short video than an entire episode that lasts 45 minutes. And finally, they are perfect for sharing on social media.
With a little effort, you too can turn your podcast into a YouTube full length video or short video clip that will help you reach a wider audience!
If you are looking for help in this area, our team at IFTS is here for you. We are committed to your success and will take the stress out of creating marketing content! Contact us today for a free one hour consultation at 412-715-6266.