In this guide, we’ll walk you through the steps to create a new Google Analytics property and integrate it with Go HighLevel. Follow these steps to ensure accurate tracking and data collection for your website.
Step 1: Sign In to Google Analytics
Begin by signing into your Google Analytics account. Once logged in, navigate to your admin settings.
Step 2: Create a New Account
In the admin settings, click on “Create” and then select “Account.” Here, you will create a new account for your client or project.
Account Name: Enter your client’s name or the name of the project.
Data Sharing Settings: Choose whether to share data. For this example, we will opt out of data sharing but you can adjust these settings later.
Step 3: Set Up Property Details
Next, you will need to provide details for the new property.
Property Name: Enter your client’s name again for the property name.
Time Zone: Select the appropriate time zone (e.g., Eastern Standard Time for New York).
Currency: Choose the relevant currency (e.g., US Dollar).
Click “Next” to proceed.
Step 4: Business Details
Provide information about the business.
Business Category: Select the category that best describes your client’s business.
Business Size: Specify the size of the business.
Business Objectives: Choose the primary objectives for using Google Analytics. For this example, we will select “Examine the user behavior.”
Click “Create” to finalize the setup.
Step 5: Accept Terms of Service
Review and accept the Google Analytics Terms of Service to proceed.
Step 6: Choose a Platform
To start collecting data, select the platform you will be using. For this guide, we will focus on setting up a property for the web.
Platform: Choose “Web.”
Website URL: Obtain the URL of your client’s homepage from Go HighLevel. Navigate to Sites > Websites, and copy the homepage URL.
Remove the “https://” prefix and paste the URL into the provided field. Name the property using your client’s name plus the word “website.”
Enhanced Measurements: Leave this option enabled.
Click “Create and Continue” to proceed.
Step 7: Install Tracking Code Manually
You have two options for installing the tracking code: manually or via Google Tag Manager. For this guide, we will install it manually.
Copy Tracking Code: Click “Copy” to copy the tracking code to your clipboard.
Go to Go HighLevel: Navigate to your client’s website settings in Go HighLevel.
Paste Tracking Code: In the main website settings, paste the tracking code into the “Head Tracking Code” section.
Save Changes: Click “Save” to apply the changes.
Step 8: Verify Installation
To ensure the tracking code is correctly installed, follow these steps:
Refresh Website: Go to your client’s website and refresh the page.
Test Installation: Return to Google Analytics and click on “Test Installation.” Google Analytics should confirm that the tracking code was detected on the website.
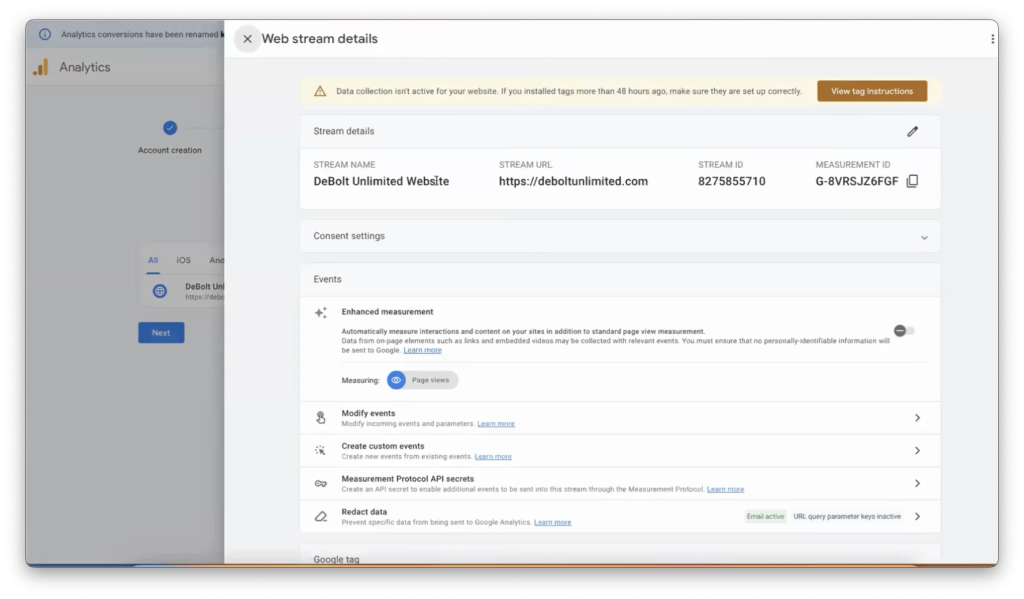
Step 9: Wait for Data Collection
Initially, you may see a message indicating that data collection is inactive. This is normal and should resolve within 48 hours. After this period, Google Analytics will start tracking visitor activity, including metrics such as bounce rate and session duration.
Bonus: Adding Users to Your Google Analytics Property
As a bonus, here’s how to add team members to the newly created Google Analytics property so they can access the data and make changes.
Open the Property: Go to the newly created property in Google Analytics.
Admin Settings: Click on your admin settings.
Account Access Management: Within the admin settings, click on “Account Access Management.”
Add Users: Click on the plus sign (+) and then select “Add Users.”
Enter User Details: Enter the email address of the team member you want to add. Make sure they get the notification by email.
Assign Roles: Choose the role for the new user. For example, you can assign the “Admin” role if the person needs full access.
Data Restrictions: If necessary, set data restrictions for the user.
Click Add: Finally, click “Add.”
The new user will receive an email notification and can then accept the invitation to access the Google Analytics property.
Setting up a Google Analytics property and integrating it with Go HighLevel is straightforward. By following these steps, you can ensure that your client’s website is properly tracked, providing valuable insights into user behavior and site performance.