In the ever-evolving digital landscape, business owners often find themselves asking:
Where should I spend my advertising budget to get the most bang for my buck?
With Google reigning supreme as the most popular search engine and Facebook maintaining its position as the largest social media platform, both offer compelling opportunities for advertising. However, the choice between them depends on several key factors.
Whether you’re an experienced pay-per-click (PPC) advertiser or just starting, this article will help you navigate the crucial differences between Google Ads and Facebook Ads in 2024 and determine which platform aligns best with your business goals.
The Main Differences Between Facebook Ads and Google Ads
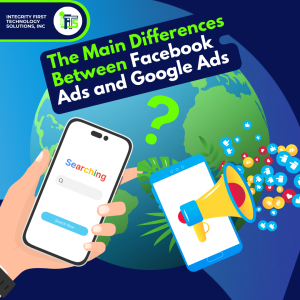
Before diving into the specifics of each platform, let’s break down their core distinctions.
Google Ads = Paid Search
Google Ads operates on a pay-per-click (PPC) model, where ads appear in search results above organic listings, giving advertisers significant visibility. Every time a user clicks on an ad, the advertiser pays a fee. This platform primarily focuses on targeting specific keywords that advertisers bid on, hoping their ads will appear on the search engine results page (SERP) when users search for those terms.
Facebook Ads = Paid Social
Facebook Ads, on the other hand, fall under the category of paid social advertising. With over 2.9 billion active monthly users as of 2024, Facebook enables businesses to connect with users based on their online behaviors and interests. Unlike Google Ads, Facebook Ads do not rely on keyword searches but rather on detailed user profiles and activity patterns.
Choosing Between Google Ads and Facebook Ads
Now that we’ve outlined their primary differences, let’s explore how each platform can be used effectively depending on your advertising goals.
Targeting Users
Google Ads: Target users based on specific keywords related to their search queries. Through comprehensive keyword research, you can identify what users are searching for and tailor your ads accordingly.
Tools like Google Keyword Planner can help you find relevant keywords and estimate their search volumes and competition levels. Additionally, Google’s machine learning capabilities have improved ad targeting by analyzing user behavior and search patterns to deliver more relevant ads.
Facebook Ads: Target users based on their online behavior, demographics, interests, and past interactions. Despite users not searching for products directly on Facebook, the platform’s advanced targeting options allow you to reach your audience effectively. You can create custom audiences based on your customer data or use lookalike audiences to find new users similar to your existing customers.
Facebook’s retargeting feature is particularly valuable, enabling you to reconnect with users who have previously interacted with your business. This could include users who have visited your website, engaged with your Facebook or Instagram page, watched your videos, or interacted with your app.
Keep in mind, with privacy updates like Apple’s iOS 14.3 requiring users to opt-in for data tracking, retargeting strategies may need adjustment.
Ad Placement and User Intent
Google Ads: Ads are displayed based on keywords users actively search for, indicating a higher intent to purchase. Users are often further along in the buying process when they click on these ads.
Google Ads also offers various ad formats, such as search ads, display ads, shopping ads, and video ads, allowing you to choose the best format for your goals. For example, shopping ads can showcase your products with images and prices, making them highly effective for e-commerce businesses.
Facebook Ads: Ads appear in users’ feeds while they browse social media, making it essential to capture their interest with engaging content. These users may not be actively seeking your product, so the goal is to build awareness and interest over time.
Facebook Ads support multiple ad formats, including image ads, video ads, carousel ads, slideshow ads, and collection ads, enabling you to create visually appealing and interactive campaigns. Video ads, in particular, have become increasingly popular on Facebook, with short, engaging videos capturing users’ attention effectively.
Ad Goals
Google Ads: Aim to drive immediate sales by targeting users who know what they’re looking for. The intent-driven nature of Google searches means these users are more likely to convert quickly.
Google Ads also offers robust conversion tracking and integration with Google Analytics, providing detailed insights into your campaign performance and user behavior. This data can help you optimize your ads, adjust your bids, and improve your return on investment (ROI).
Facebook Ads: Focus on building brand awareness and engagement. By targeting users based on their interests and behaviors, you can nurture potential customers through the buying journey.
Facebook’s powerful analytics tools, such as Facebook Insights and Ads Manager, allow you to monitor your ad performance, track key metrics, and make data-driven decisions. Additionally, Facebook offers various campaign objectives, such as brand awareness, reach, traffic, engagement, app installs, video views, lead generation, and conversions, allowing you to tailor your campaigns to your specific goals.
When to Use Google Ads in 2024
Immediate Results and High Intent Searches
Google Ads is ideal for businesses looking to achieve immediate results from users with high purchase intent. When users search for specific products or services, they are often ready to make a purchase. By targeting these keywords, your ads can appear at the top of search results, driving qualified traffic to your website.
Local Businesses
For local businesses, Google Ads offers features like location targeting and local search ads, which can help you reach potential customers in your area. This is particularly beneficial for businesses with physical locations, such as restaurants, retail stores, or service providers.
E-Commerce and Direct Sales
Google Shopping ads are highly effective for e-commerce businesses, allowing you to showcase your products with images, prices, and reviews directly in the search results. This can increase visibility and drive more traffic to your product pages, ultimately boosting sales.
When to Use Facebook Ads in 2024
Brand Awareness and Engagement
Facebook Ads are excellent for building brand awareness and engaging with your audience. By targeting users based on their interests and behaviors, you can introduce your brand to potential customers and create a connection with them. This is especially useful for businesses in industries like fashion, lifestyle, and entertainment, where visual appeal and brand personality play a significant role.
Content Promotion
If you have valuable content, such as blog posts, videos, or webinars, Facebook Ads can help you promote this content to a wider audience. By driving traffic to your content, you can increase brand visibility, generate leads, and establish your authority in your industry.
Lead Generation
Facebook offers lead generation ads, which allow users to submit their contact information directly within the ad without leaving the platform. This can simplify the lead capture process and increase conversion rates. Lead generation ads are particularly useful for businesses offering services, educational programs, or high-ticket items that require a longer sales cycle.
Best Practices for Google Ads and Facebook Ads
To maximize the effectiveness of your Google Ads and Facebook Ads campaigns, follow these best practices:
Google Ads:
- Conduct Thorough Keyword Research: Identify relevant keywords with high search volumes and low competition. Use tools like Google Keyword Planner and SEMrush to find keyword opportunities.
- Write Compelling Ad Copy: Craft clear, concise, and persuasive ad copy that highlights the benefits of your products or services. Include a strong call-to-action (CTA) to encourage clicks.
- Optimize Landing Pages: Ensure your landing pages are relevant to your ads, load quickly, and provide a seamless user experience. A well-designed landing page can significantly improve your conversion rates.
- Utilize Ad Extensions: Take advantage of ad extensions, such as site link extensions, call extensions, and location extensions, to provide additional information and increase your ad’s visibility.
- Monitor and Adjust Bids: Continuously monitor your ad performance and adjust your bids based on your campaign goals and budget. Use automated bidding strategies, such as target CPA (cost per acquisition) or target ROAS (return on ad spend), to optimize your bids.
Facebook Ads:
- Define Your Target Audience: Use Facebook’s detailed targeting options to create custom audiences based on demographics, interests, and behaviors. Consider using lookalike audiences to expand your reach.
- Create Engaging Visuals: Design visually appealing ads that capture attention and convey your message effectively. Use high-quality images or videos that align with your brand identity.
- Test Different Ad Formats: Experiment with various ad formats, such as carousel ads, video ads, and collection ads, to see which performs best with your audience. A/B testing can help you identify the most effective creatives.
- Utilize Facebook Pixel: Install the Facebook Pixel on your website to track user interactions, measure ad performance, and optimize your campaigns. The Pixel can also help you create custom audiences for retargeting.
- Set Clear Objectives: Choose the appropriate campaign objective based on your goals, whether it’s brand awareness, traffic, engagement, or conversions. Align your ad creative and targeting with your objective.
Conclusion: Should You Choose Google Ads or Facebook Ads For Your Business Advertising?
Ultimately, one platform is not inherently better than the other. Both Google Ads and Facebook Ads offer unique benefits:
Benefits of Google Ads:
– Reach users ready to purchase
– Choose from a variety of ad formats
– Analyze your ads with Google Analytics
– Achieve immediate results with high-intent searches
– Utilize advanced targeting options for local businesses and e-commerce
Benefits of Facebook Ads:
– Massive audience reach
– Granular targeting options
– Visually engaging ad formats
– Build brand awareness and engagement
– Promote valuable content and generate leads
For the most effective strategy, consider leveraging both platforms.
This dual approach allows you to capture high-intent users through Google while building awareness and engagement on Facebook.
Ready to elevate your advertising game? Let us guide you. Email Stacey Ivol at si@iftsdesign.com or call IFTS, Inc. at 412.715.6266


