
Are you a small business owner who doesn’t have the time or energy to create and design for social media posts?
Do you need ways to make posting quicker and easier?
You’re not alone! With ever-increasing expectations in both reach and quality of content, it can be hard to keep up.
That’s why we’ve gathered some of our favorite social media hacks that will help make creating attractive, professional social media posts quicker and simpler for small businesses like yours.
If you’re a small business looking for easy ways to create social media posts without spending a ton of time or money, then Canva is your go-to tool.
As the leader in DIY design and visual content creation, Canva makes it easier than ever for brands to whip up stunning visuals that engage their customers—all with just one click.
Last time, we covered 4 hacks for getting started in Canva–we talked about what Canva is, how to get your business set up quickly, and how to keep your files organized for maximum efficiency when using Canva. If you missed Part 1, check it out here.
In Part 2, we’ll go over the easiest ways to use Canva’s design tools so you can start posting professional looking social media designs right away!
There's More to Getting Started in Canva
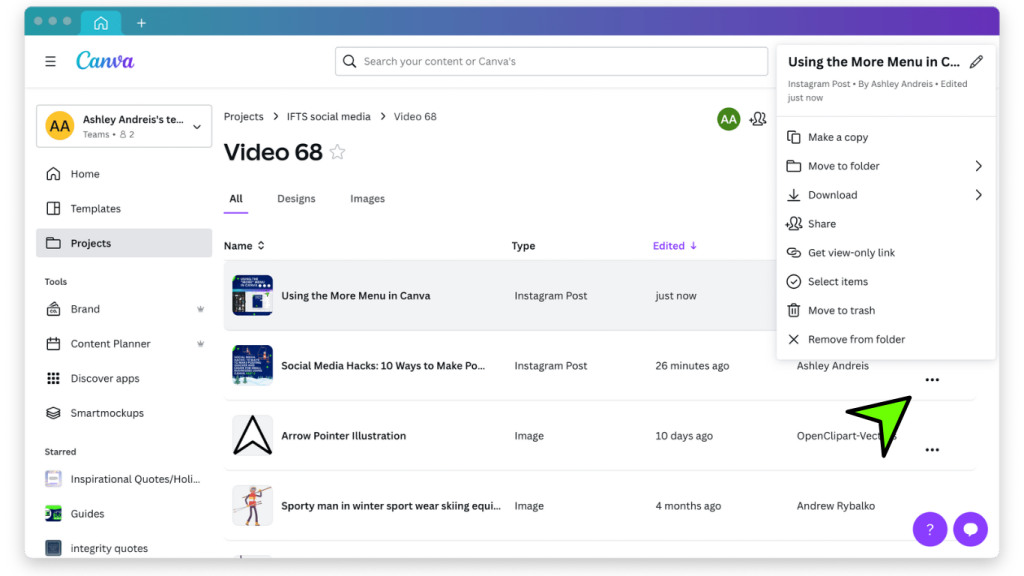
Hack #5: Using the "MORE" Menu Tab
In Canva, more is more. Whenever you see a three-dot tab in a toolbar, that means there are even more options for your design!
This can be information overload if you’re not used to Canva. But, if you click the “more” tab, you’ll find a ton of features that will help make your social media designs even more unique and on-brand.
For example, in the More tab, you can copy an entire design or an entire folder, make subtle changes, rename it, and then save it again as a brand new design.
No more starting from scratch, and it’s super easy!
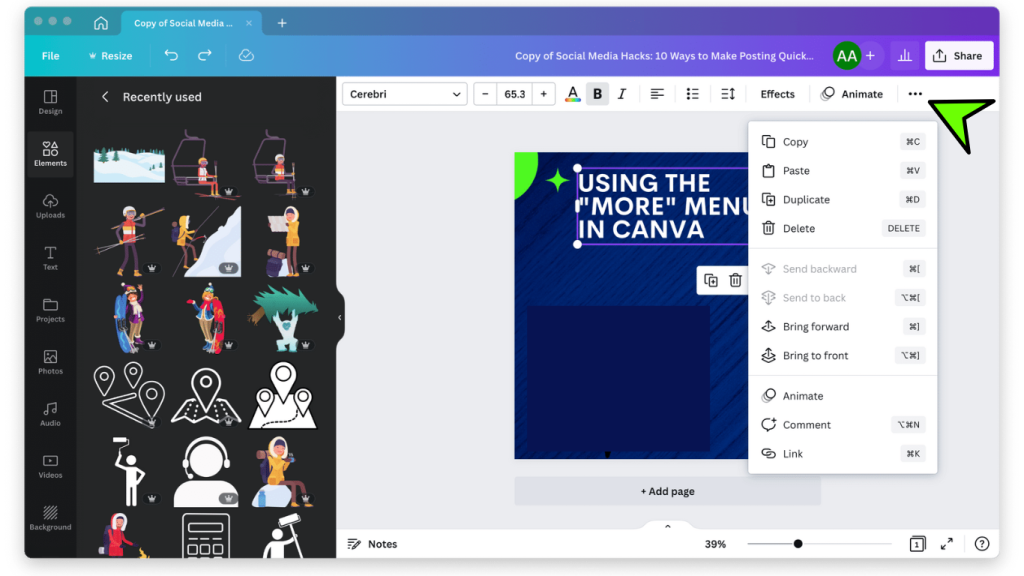
The More tab also allows you to add special effects such as blur or vignette to draw attention to specific elements of your design. You can also access features like adding links or adjusting the transparency of page elements, graphics, and overlays.
In addition, the “More” tab gives you access to options for layers, which can help you separate different parts of your design so you can change them even more.
This is especially useful if you want to make certain graphics stand out at the front of the page and appear “on top” of other graphics to create a multi-layered look.
Quick keyboard “command” shortcuts are also listed out for you in the more tab, making it easy to select, copy, and paste anything on your page with the click of a button.
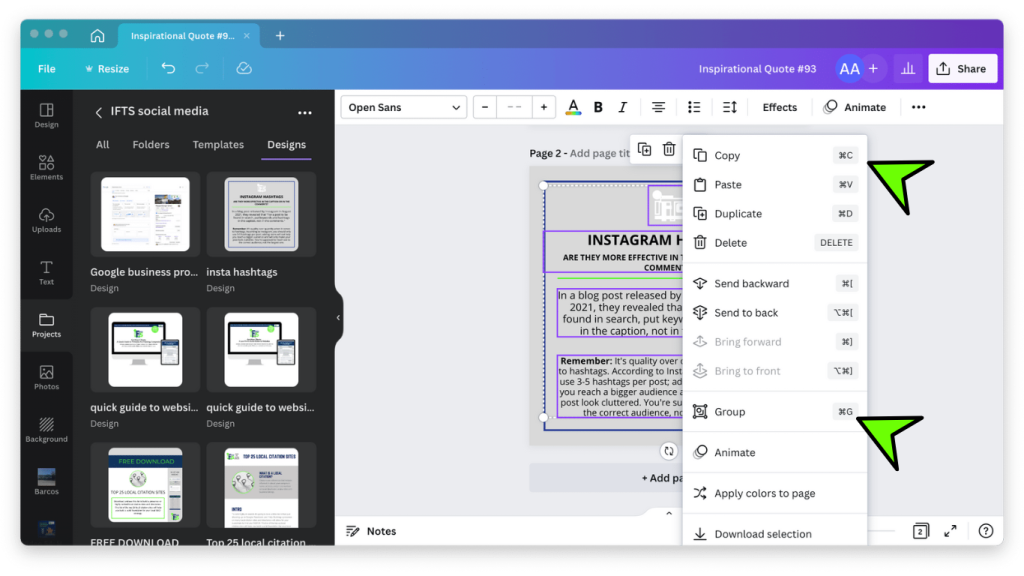
Select a group of multiple elements, like a box of text and a logo icon from your page, by holding down the “shift” key as you select each item, and then click “group” in the more menu.
You can then copy and paste that entire group of icons, text, etc. to a new page while keeping the size and spacing the same from one post to the next.
The Quickest and Simplest Canva Tool for Beginners
Hack #6: Use Canva's Quick Create Tool
Canva’s Quick Create tool is a great way to create social media posts that are both eye-catching and on-brand.
Quick Create has a small library of templates that automatically add your company’s logo, colors, and preferred fonts to pre-formatted social media designs.
You can literally create polished posts in minutes. Best of all, you don’t need any design experience at all to use it, and it’s free. This is a great option if you’re just getting started and do not want to make too many design choices.
If you like having a more customized look for your social media posts, this may not be the best option for you. It is a nice starting point, though, because you can still customize these designs as much as you’d like after they are saved in Canva.
To use the Quick Create tool, just log in to your account and select the social media icon button located at the middle of the home page. The Quick Create tab is listed in the “popular” section and should be the first option you can choose.
You will be prompted to pick the social media formats you will need, the text you’d like to add, and the style you like the most out of Canva’s pre-selected design templates.
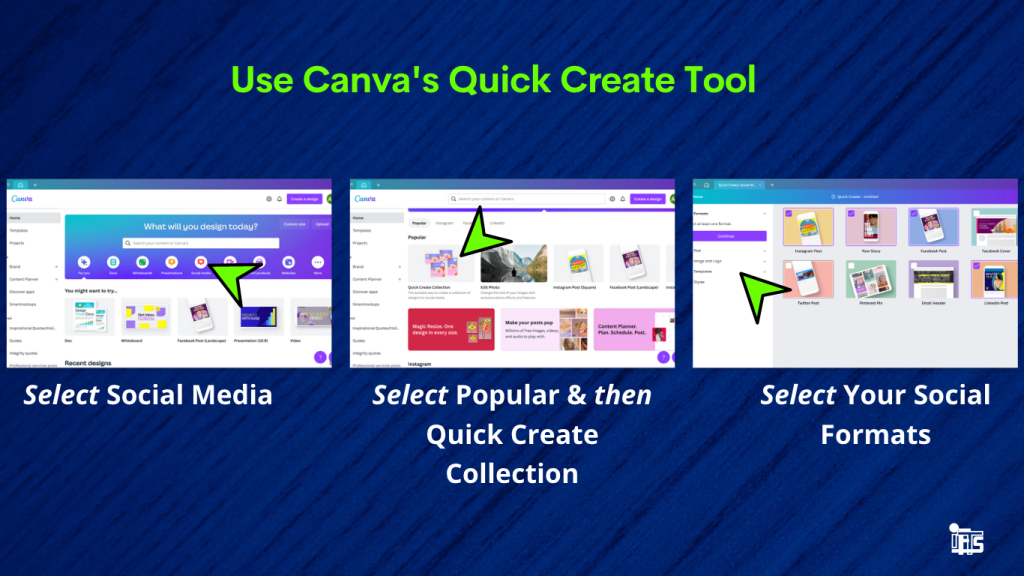
There are only 5 steps to complete before your social posts are ready to go!
Right now, video formats are not supported in Canva’s Quick Create tool, but you can save the Quick Create designs and use them to make a video in a new design later.
It’s really that easy!
Let's Get Moving
Hack #7: Quickly and Simply Animate Your Social Media Posts in Canva
Now, you might not be ready yet to make an entire video using Canva, which we will cover more in depth in a future blog post, and you may not even want to make a short video clip, but adding one of Canva’s pre-made animated graphics to your post is the easiest way to add some movement and interest to your social media posts.
Simply choose a design element and select the “animated” option under the filtered search tab. This will bring up some animated stickers and icons to add to your post.
You can also click on the “animate” tab in your design screen’s toolbar, which will allow you to choose from a number of motion effects that can be applied to the text, entire page, or graphics.
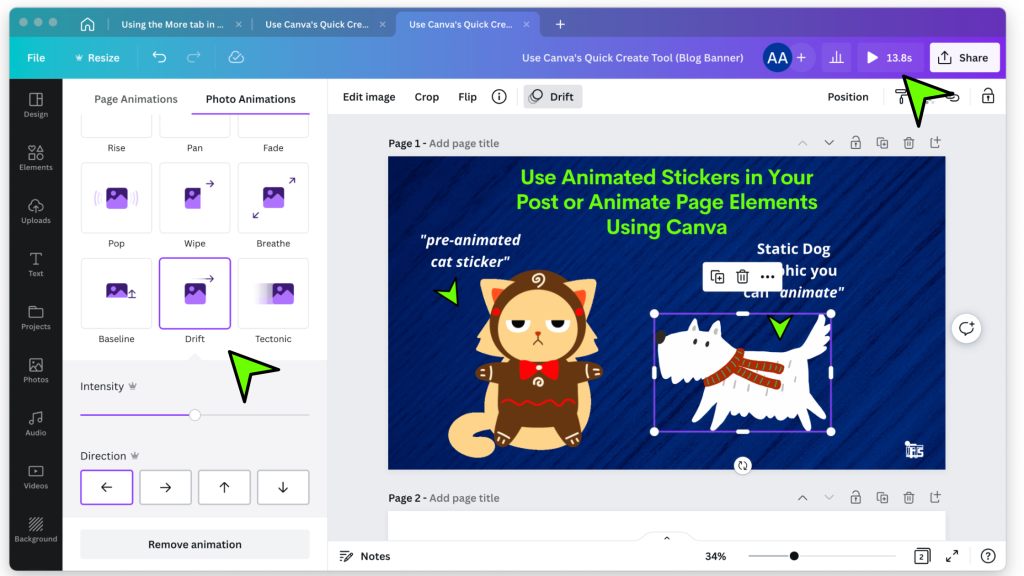
Then, just hit the play button at the top right corner of your screen, and you’ll see the animated graphic start to move.
With Canva’s Pro feature, you can even speed up or reverse the direction of certain types of animation.
When you’re done, click “share” and choose the option to download as an MP4 or GIF file (just remember that a GIF can’t be downloaded with sound but will play on auto-loop).
Check out one of our previous articles on how to film a video on your smartphone and turn it into a social media post.
Can You Hear Me Now?
Hack #8: Quickly and Simply Add Audio to Your Social Media Posts in Canva
So you’ve made an animated design in Canva, but something’s missing. What could it be?
Yes, Sound! You can add music or sound effects to your social media posts with Canva.
Just like the animated graphics, you can find a number of audio files from inside the design screen by clicking on the “audio” tab in the toolbar and selecting from one of their available options.
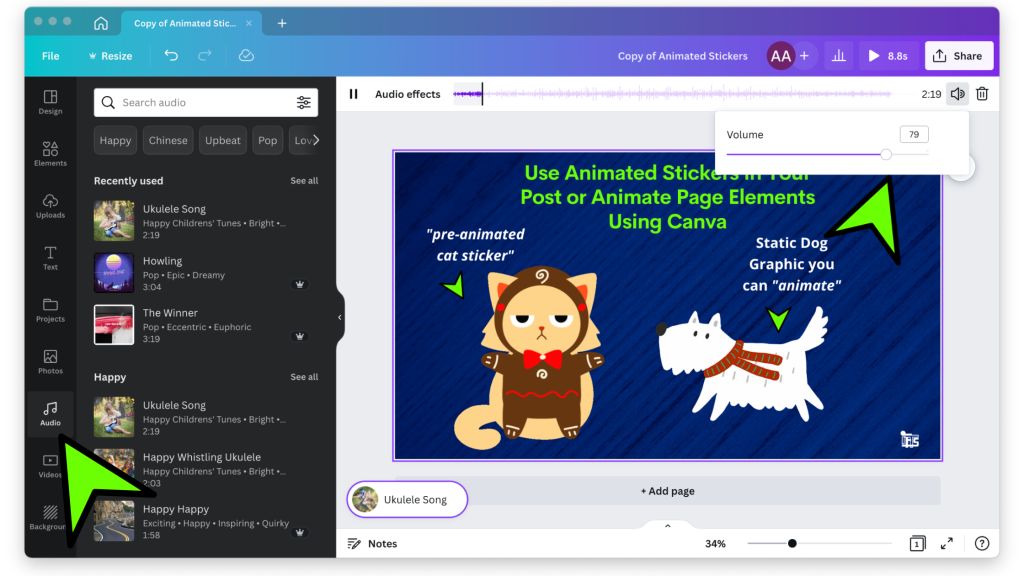
Here, you’ll find a variety of royalty-free soundtracks and sound effects that can easily be added to any post.
You can also upload your own music if you have a purchased track or sound file that you want to use.
Once you’ve uploaded the music, you can change the volume and add fade-in and fade-out effects right in Canva’s editor.
The Lowdown on Downloading
Hack #9: Quickly and Simply Download Your Social Media Posts
When it comes to sharing your creations online, Canva makes it easy to export your designs directly from the platform. Just click the “Share” button at the top of the page and select how you want to share it. You can then copy the link or download your design as a PDF, JPEG, PNG, etc.
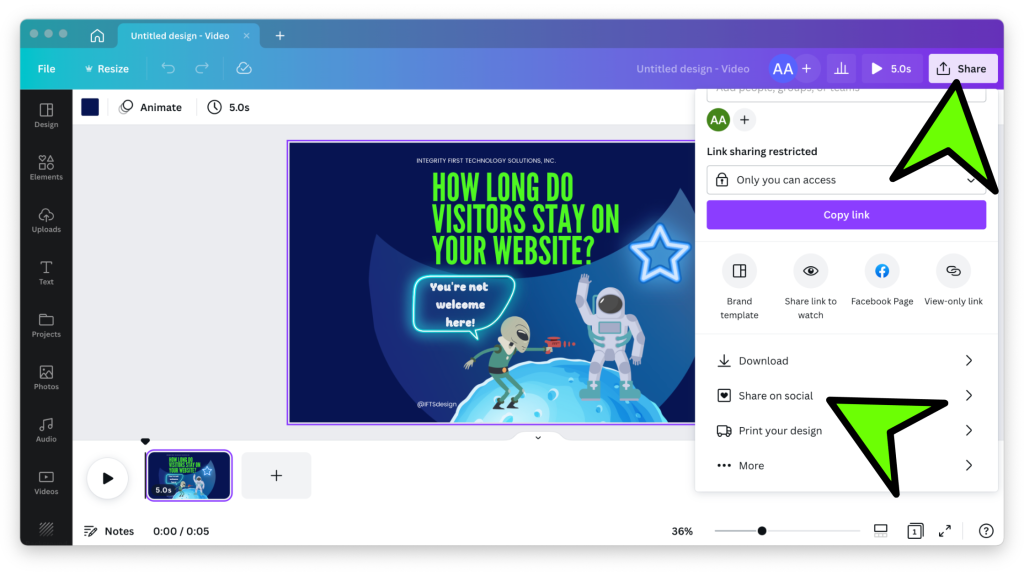
Image Size Guide for Social Media Posts
Social media platforms are constantly changing their size and dimensions for images, which means that creating posts with consistent sizing can be tricky. To make sure your social media posts look great on any platform, here is a handy image size guide:
Facebook Landscape Post: 940 x 788 pixels
Twitter: 1600 x 900 pixels
Instagram: 1080 x 1080 pixels
Pinterest: 1000 x 1500 pixels
LinkedIn: 1200 x 1200 pixels
YouTube Thumbnail: 1280 x 720 pixels
No matter which platform you’re using, make sure to keep your images optimized for the best quality.
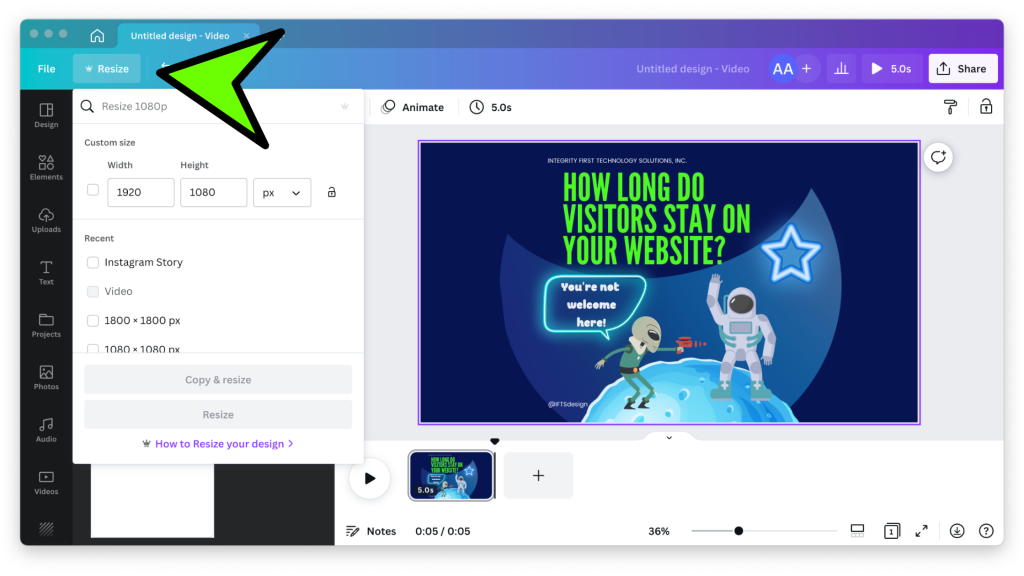
Canva makes it easy to resize and crop images so that they fit within the recommended dimensions of each platform, and it will automatically give you their suggested format for your download.
Canva’s Pro feature even allows you to copy and resize your design using the “resize” tab near the top left corner of the screen.
Sharing and Scheduling
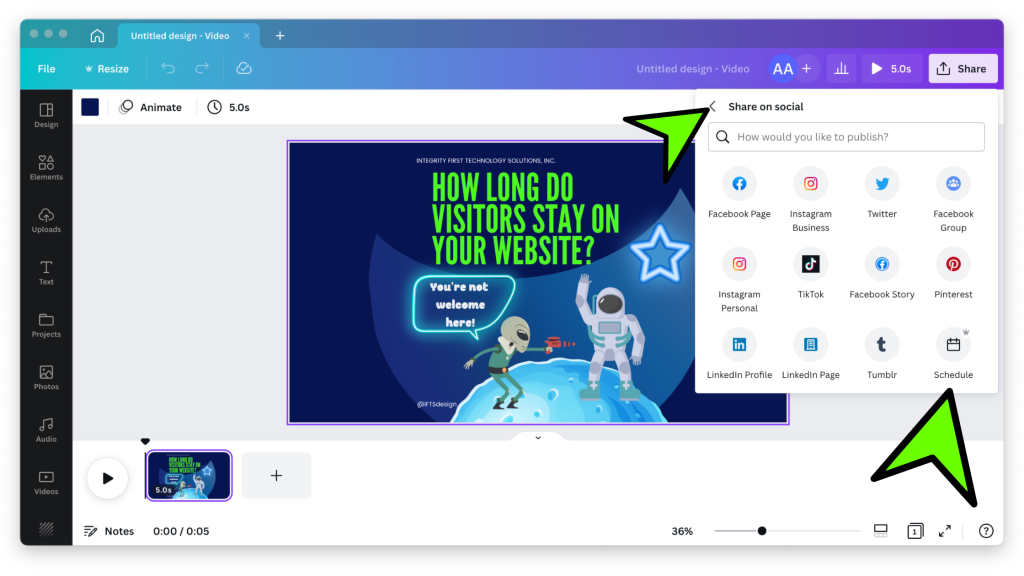
Hack #10: Quickly and Simply Share Your Social Media Posts
Last but not least, automating social media posts is one of the best ways to save time on posting content for your business. There are plenty of platforms out there that offer scheduling capabilities, so you can set up all your posts ahead of time and never worry about rushing through them again.
Canva has recently launched its own scheduling feature for Pro users, which lets you quickly and easily post your designs to your social media accounts. You can even schedule posts for specific days and times so that your content is tailored to the right audience at the right time.
With this new feature, you don’t have to worry about manually posting your content every day. Just schedule it and let Canva do the rest!
Canva’s free plan allows you to share to multiple social media channels, but you cannot schedule them in advance.
By following these simple hacks, you can now use Canva to make beautiful social media posts with ease!
Think of your designs as stories that help build relationships with your customers; use images and animations to really bring them to life. And finally, use the scheduling feature to save time and make sure your posts are shared on a regular basis.
Good luck, and happy designing!
And if you need any more help, contact our social media experts at IFTS, and we will get the job done for you! Give us a call today at 412-715-6266, and we’ll get you started on creating visuals that will take your business to the next level.