Setting Up Google Analytics in WordPress

Are you ready to jump into the world of data-driven insights for your WordPress website?

Google Analytics is an essential tool that helps you understand your audience and optimize your site. Today, we’ll walk you through the process of setting up Google Analytics on your WordPress site using the Monster Insights plugin. Let’s get started!

Step 1: Sign In to Google Analytics​

Head over to Google Analytics and sign in with your Google account.

Step 2: Create a New Account

In the admin settings, click on “Create” and then select “Account.” Here, you will create a new account for your client or project.

Fill in the account name. You can name it after your website or client. Decide whether to share data with Google by checking or unchecking the options. For this example, we will opt out of data sharing but you can adjust these settings later.

Step 3: Set Up Property Details

Next, you will need to provide details for the new property.

  1. Property Name: Enter your client’s name again for the property name.
  2. Time Zone: Select the appropriate time zone (e.g., Eastern Standard Time for New York).
  3. Currency: Choose the relevant currency (e.g., US Dollar).

Click “Next” to proceed.

Step 4: Business Details

Provide information about the business.

  1. Business Category: Select the category that best describes your client’s business.
  2. Business Size: Specify the size of the business.

Business Objectives: Choose the primary objectives for using Google Analytics. For this example, we will select “Examine the user behavior.”

Click “Create” to finalize the setup.

Step 5: Accept Terms of Service

Review and accept the Google Analytics Terms of Service to proceed.

Step 6: Choose a Platform

To start collecting data, select the platform you will be using. For this guide, we will focus on setting up a property for the web.

For the platform, choose “Web.”

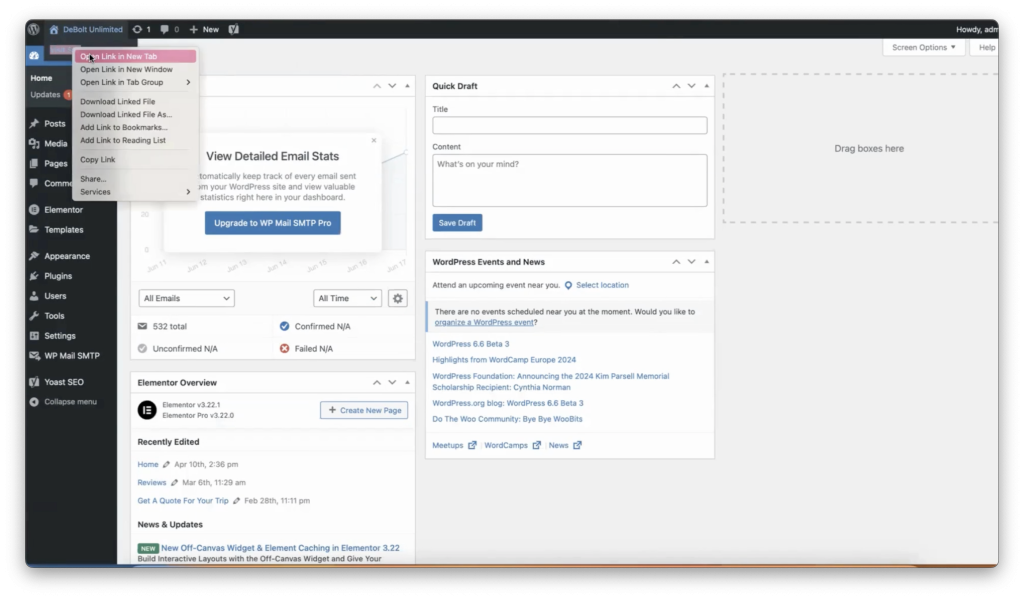
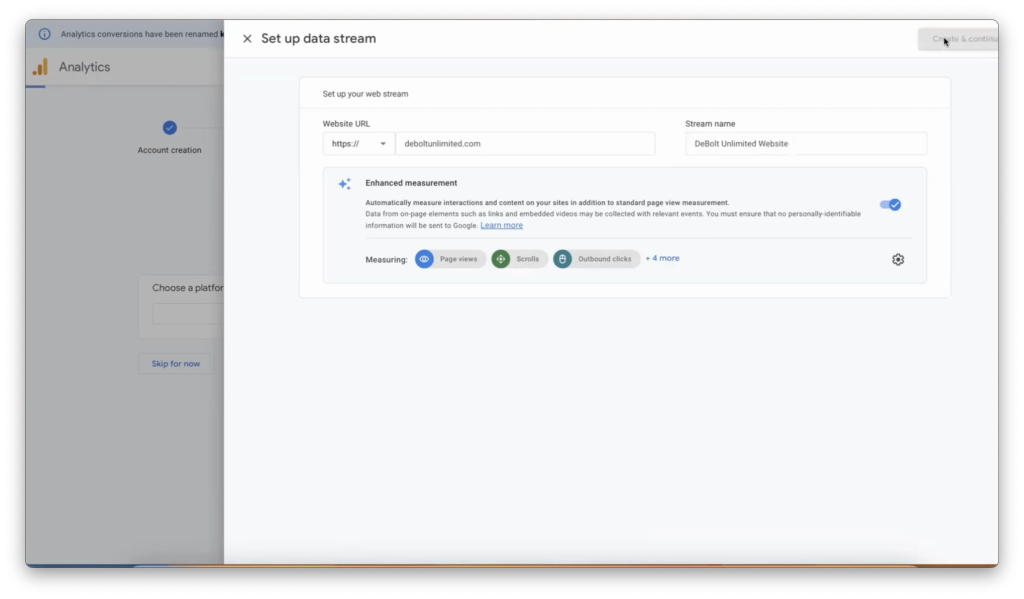
Open your WordPress site in a new tab, copy the homepage URL, and paste it into the setup form in Google Analytics. Make sure to remove the “http://” or “https://”.

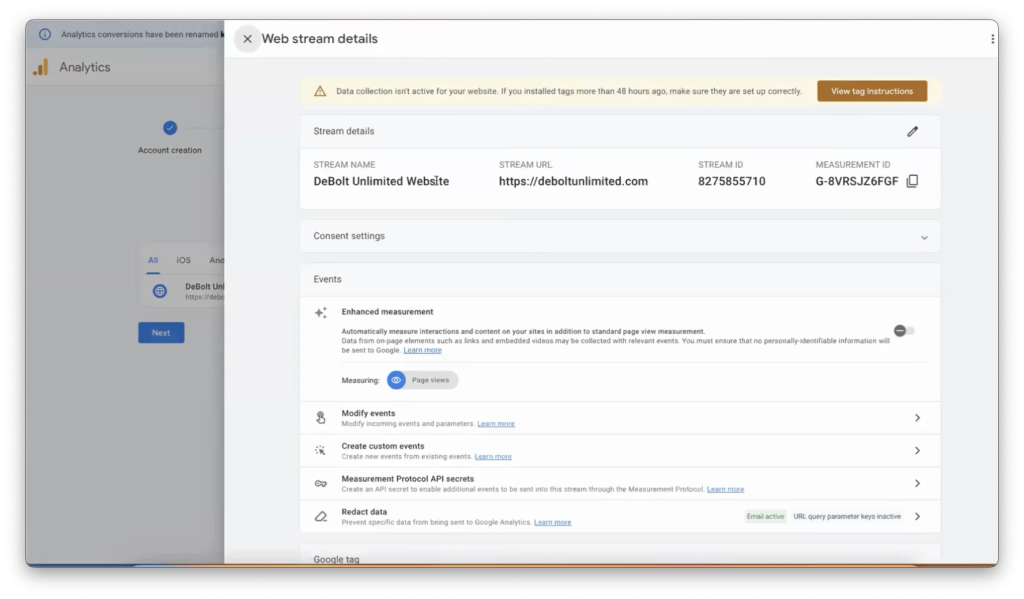
Name your data stream “client name” and then “website.”

Click on Create Stream and continue.

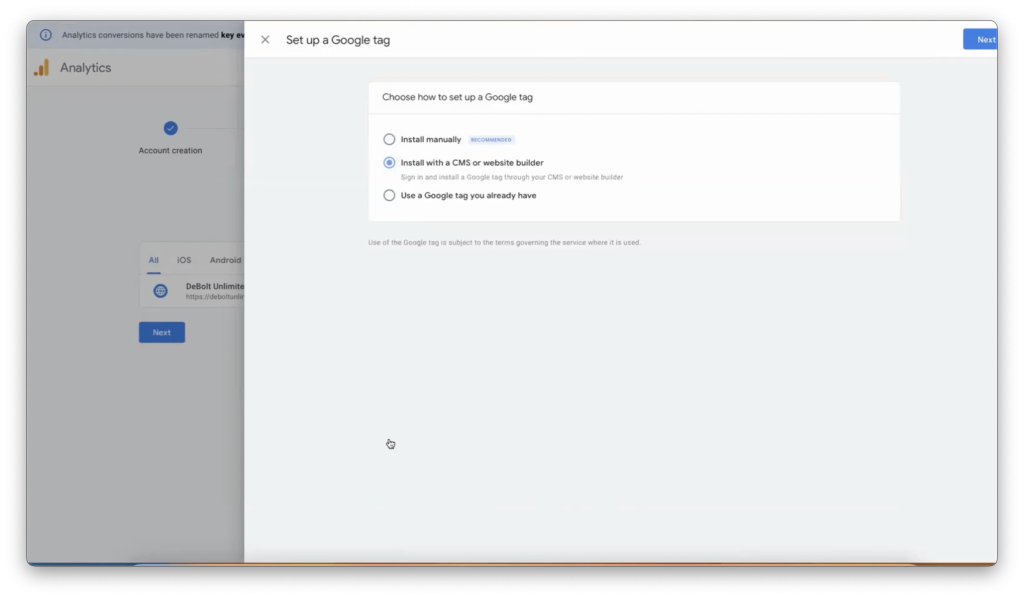
If you click on show more options, you can select install with a CMS or website builder and then click next.

Install Monster Insights Plugin

To easily connect Google Analytics to your WordPress site, we’ll use the Monster Insights plugin. 

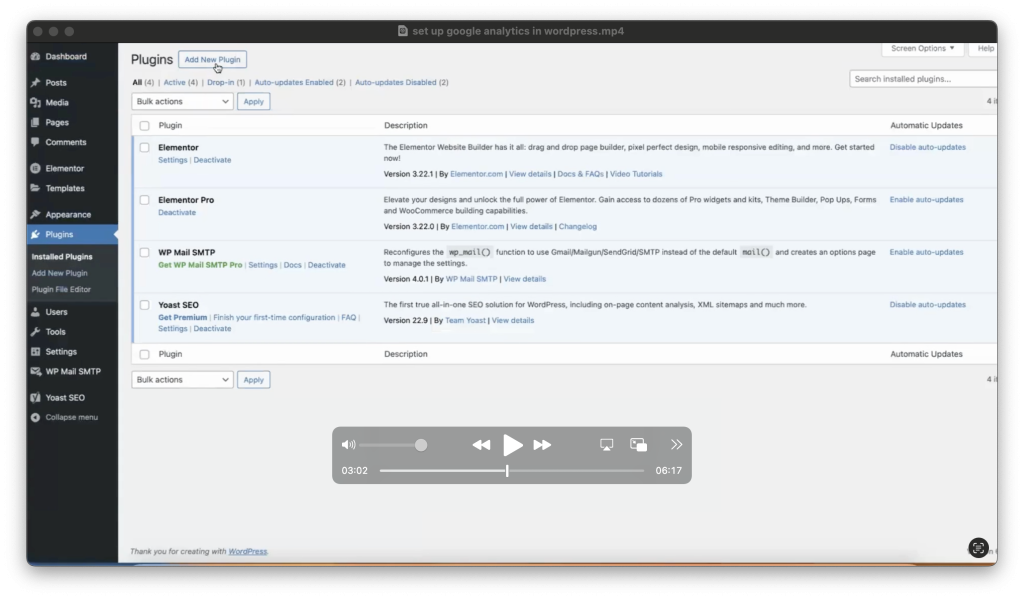
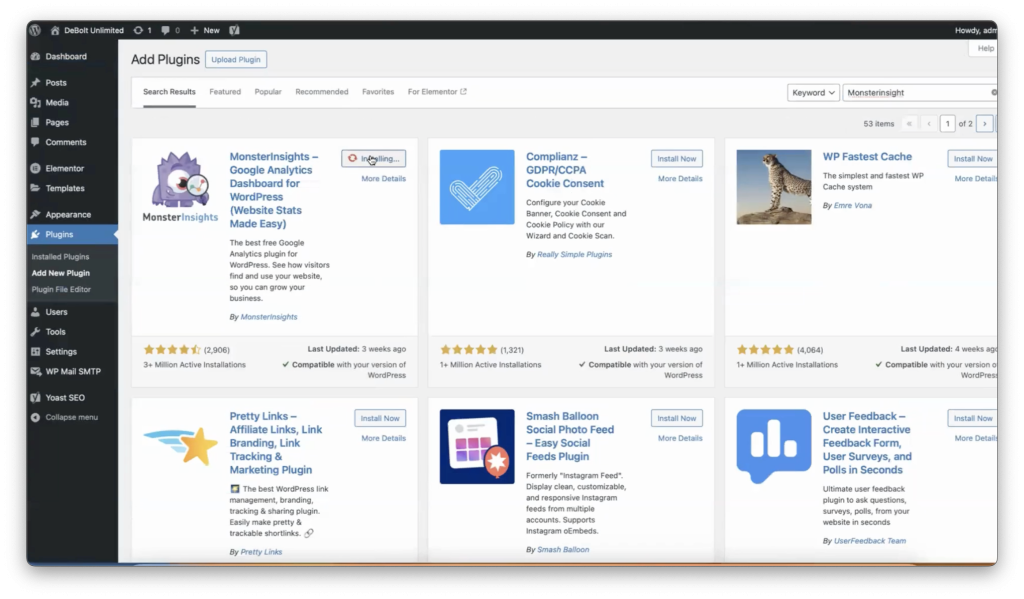
In your WordPress dashboard, go to Plugins > Add New. 

Search for “Monster Insights” and install the plugin.

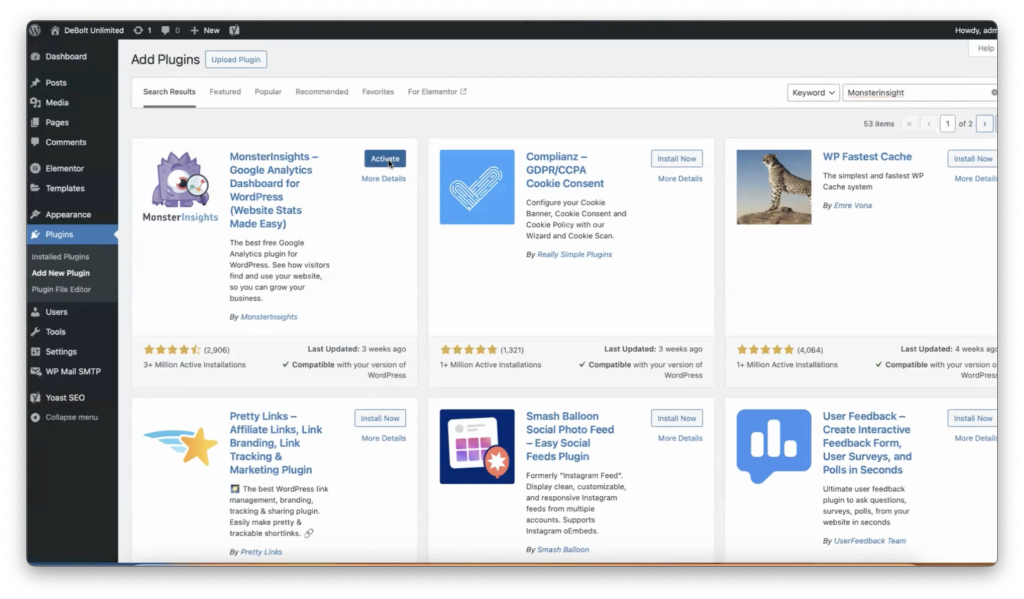
Once installed, click on Activate.

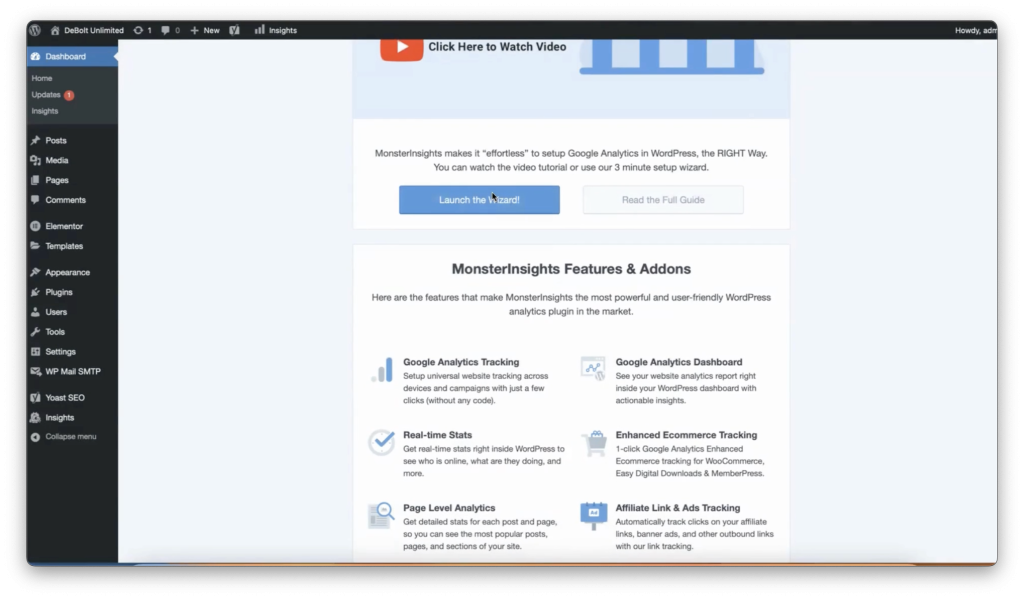
After activation, click on Launch Setup Wizard to start the setup process.

Connect Monster Insights to Google Analytics

Choose Website Category: Select the category that best describes your website (e.g., Business).

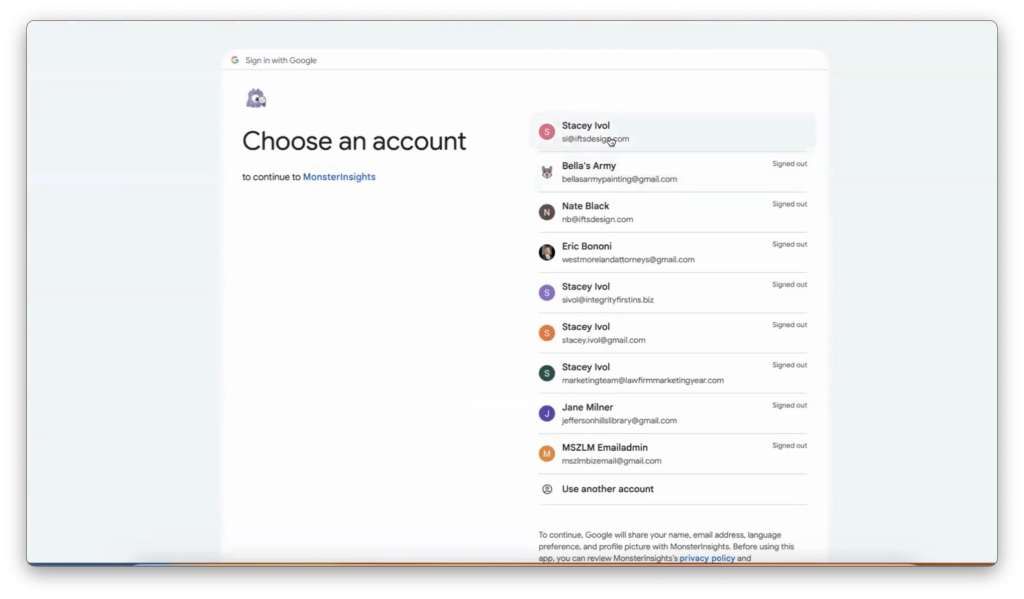
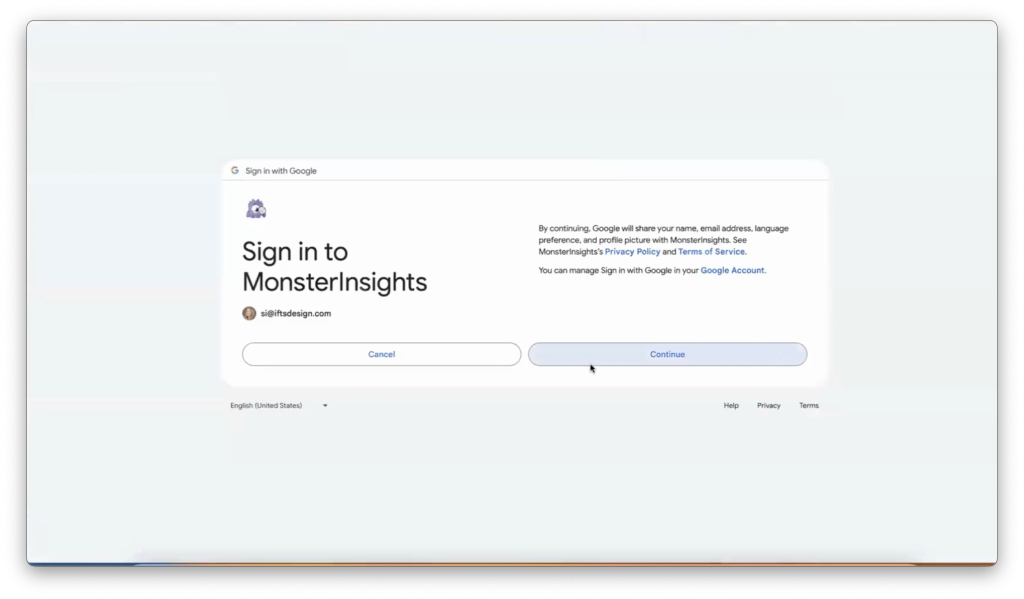
Connect to Google: Click on Connect Monster Insights and sign in with your Google account.

Allow Access: Allow Monster Insights to access your Google Analytics data.

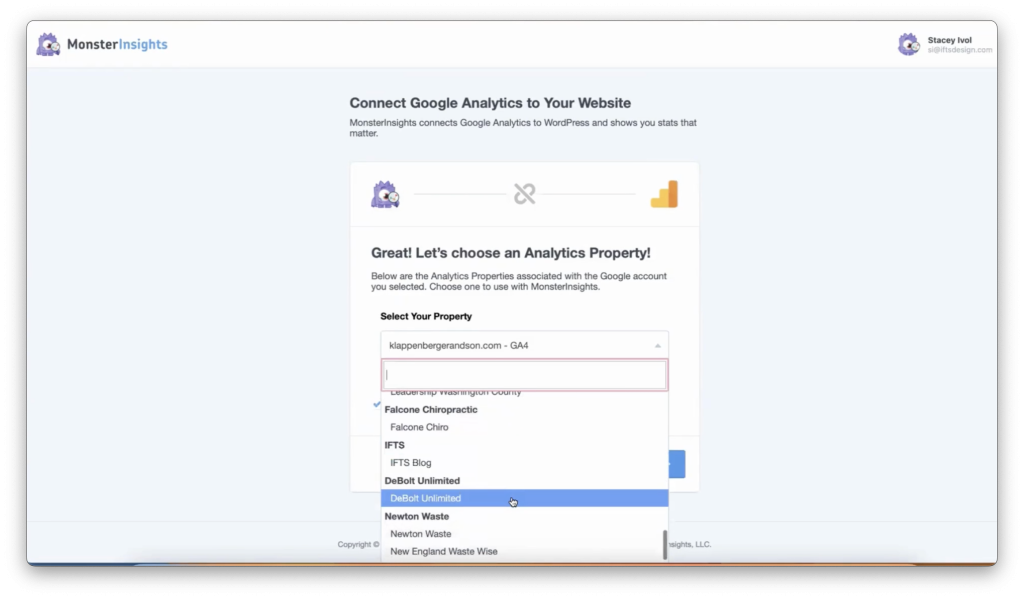
Select Property: Choose the Google Analytics property you created earlier.

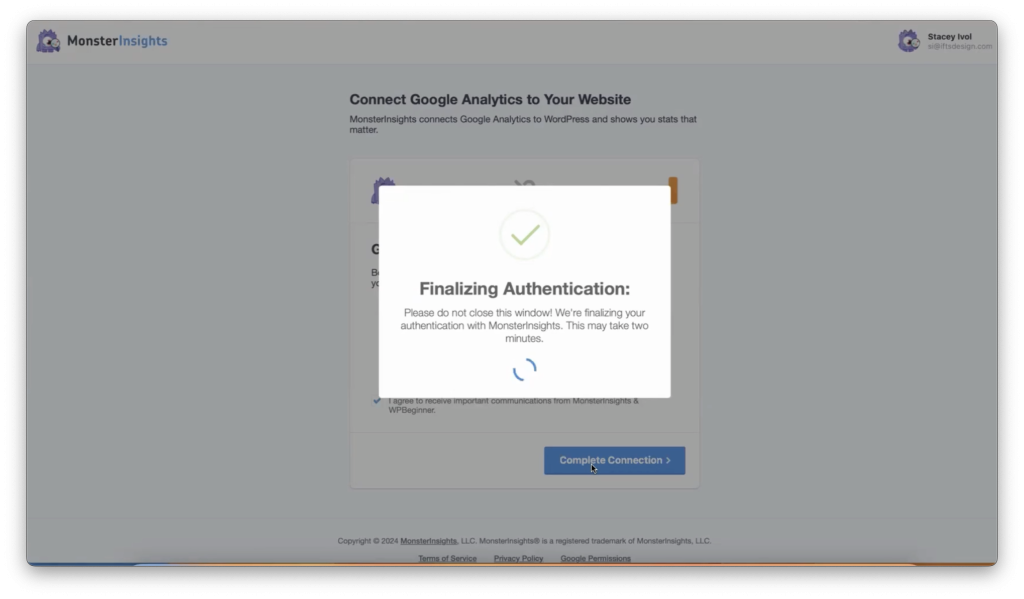
Complete Connection: Click on Complete Connection and save and continue.

Finalize Setup

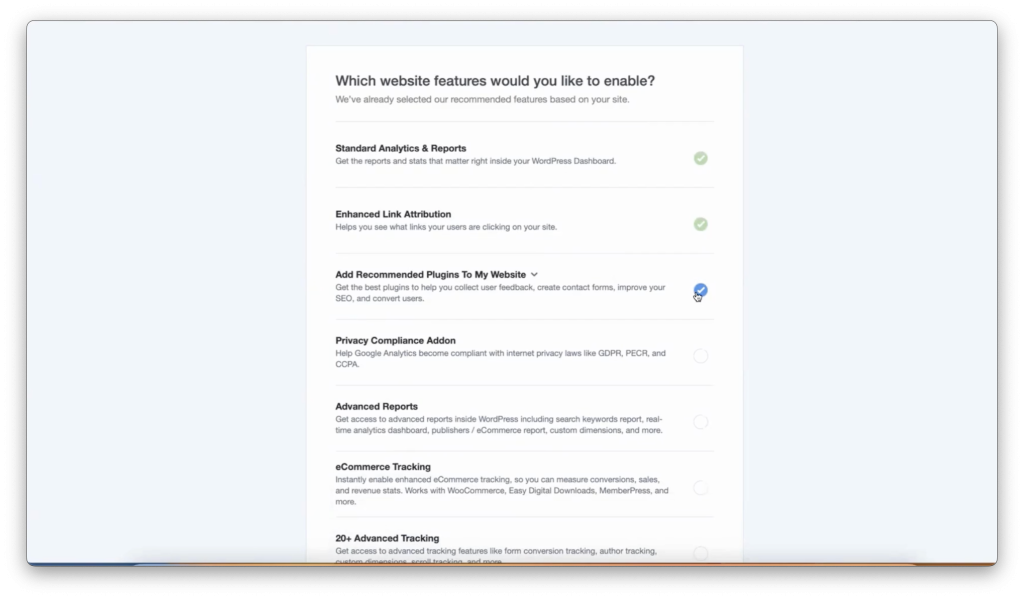
Monster Insights will guide you through the final setup steps.

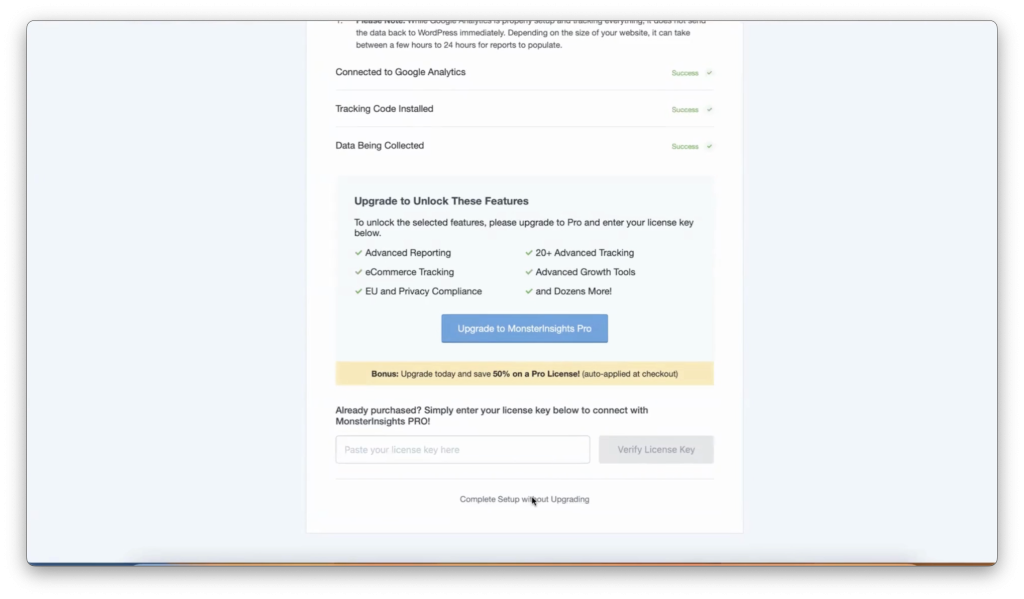
Disable Unwanted Plugins: If you do not want Monster Insights to install recommended plugins, uncheck those options.

Complete Setup: Click on Complete Setup Without Upgrading.

Verify Google Analytics Connection

Finally, let’s make sure everything is connected properly!

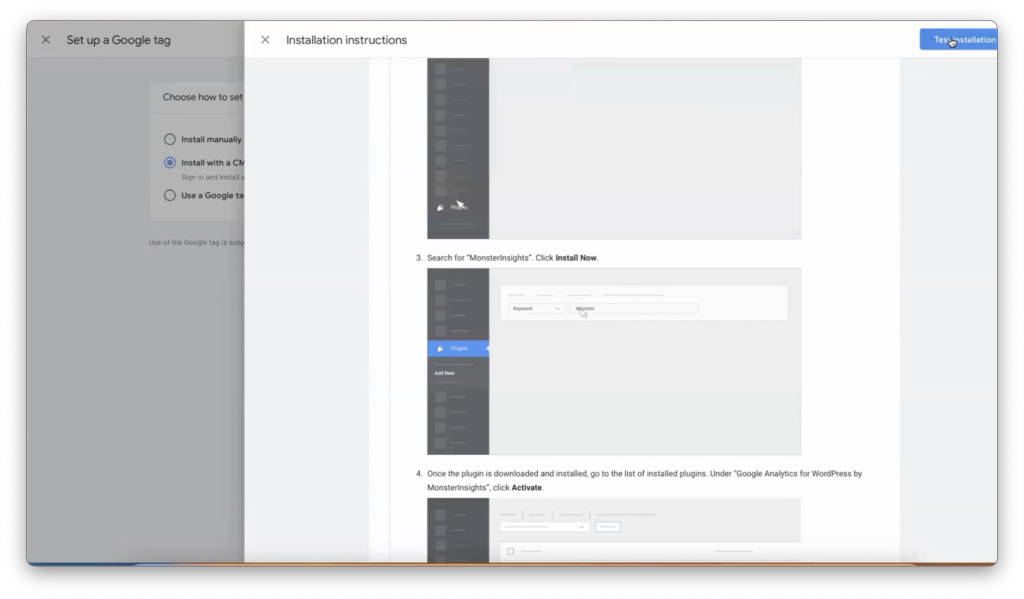
Test Installation: Go back to Google Analytics, click on Admin, and navigate to Data Streams under your property. Select your data stream and click Test Installation.

Verify Tag: If the tag is correctly installed, Google Analytics will confirm that it has detected the tag.

And that’s it! Your WordPress site is now connected to Google Analytics, and you can start collecting valuable data to optimize your website. Happy analyzing!

Need more help? Email Stacey Ivol at si@iftsdesign.com or call IFTS, Inc. at 412.715.6266 and I’ll be happy to assist you with any questions!

How To Set Up Google Analytics With GHL

In this guide, we’ll walk you through the steps to create a new Google Analytics property and integrate it with Go HighLevel. Follow these steps to ensure accurate tracking and data collection for your website.

Step 1: Sign In to Google Analytics

Begin by signing into your Google Analytics account. Once logged in, navigate to your admin settings.

Step 2: Create a New Account

In the admin settings, click on “Create” and then select “Account.” Here, you will create a new account for your client or project.

Account Name: Enter your client’s name or the name of the project.

Data Sharing Settings: Choose whether to share data. For this example, we will opt out of data sharing but you can adjust these settings later.

Step 3: Set Up Property Details

Next, you will need to provide details for the new property.

  1. Property Name: Enter your client’s name again for the property name.
  2. Time Zone: Select the appropriate time zone (e.g., Eastern Standard Time for New York).
  3. Currency: Choose the relevant currency (e.g., US Dollar).

Click “Next” to proceed.

Step 4: Business Details

Provide information about the business.

  1. Business Category: Select the category that best describes your client’s business.
  2. Business Size: Specify the size of the business.

Business Objectives: Choose the primary objectives for using Google Analytics. For this example, we will select “Examine the user behavior.”

Click “Create” to finalize the setup.

Step 5: Accept Terms of Service

Review and accept the Google Analytics Terms of Service to proceed.

Step 6: Choose a Platform

To start collecting data, select the platform you will be using. For this guide, we will focus on setting up a property for the web.

  1. Platform: Choose “Web.”
  2. Website URL: Obtain the URL of your client’s homepage from Go HighLevel. Navigate to Sites > Websites, and copy the homepage URL.

Remove the “https://” prefix and paste the URL into the provided field. Name the property using your client’s name plus the word “website.”

Enhanced Measurements: Leave this option enabled.

Click “Create and Continue” to proceed.

Step 7: Install Tracking Code Manually

You have two options for installing the tracking code: manually or via Google Tag Manager. For this guide, we will install it manually.

Copy Tracking Code: Click “Copy” to copy the tracking code to your clipboard.

  1. Go to Go HighLevel: Navigate to your client’s website settings in Go HighLevel.
  2. Paste Tracking Code: In the main website settings, paste the tracking code into the “Head Tracking Code” section.
  3. Save Changes: Click “Save” to apply the changes.

Step 8: Verify Installation

To ensure the tracking code is correctly installed, follow these steps:

  1. Refresh Website: Go to your client’s website and refresh the page.
  2. Test Installation: Return to Google Analytics and click on “Test Installation.” Google Analytics should confirm that the tracking code was detected on the website.

Step 9: Wait for Data Collection

Initially, you may see a message indicating that data collection is inactive. This is normal and should resolve within 48 hours. After this period, Google Analytics will start tracking visitor activity, including metrics such as bounce rate and session duration.

Bonus: Adding Users to Your Google Analytics Property

As a bonus, here’s how to add team members to the newly created Google Analytics property so they can access the data and make changes.

  1. Open the Property: Go to the newly created property in Google Analytics.
  2. Admin Settings: Click on your admin settings.
  3. Account Access Management: Within the admin settings, click on “Account Access Management.”
  4. Add Users: Click on the plus sign (+) and then select “Add Users.”
  5. Enter User Details: Enter the email address of the team member you want to add. Make sure they get the notification by email.
  6. Assign Roles: Choose the role for the new user. For example, you can assign the “Admin” role if the person needs full access.
  7. Data Restrictions: If necessary, set data restrictions for the user.
  8. Click Add: Finally, click “Add.”

The new user will receive an email notification and can then accept the invitation to access the Google Analytics property.

Setting up a Google Analytics property and integrating it with Go HighLevel is straightforward. By following these steps, you can ensure that your client’s website is properly tracked, providing valuable insights into user behavior and site performance.

Mastering Marketing Terminology: A Guide to Key Concepts for Business Success

Navigating the world of digital marketing can be daunting, especially with the plethora of terms and acronyms that are frequently used. 

Whether you’re a seasoned professional or working with an agency in the industry, understanding these key concepts is crucial for optimizing your marketing strategies. 

This guide will break down essential marketing terms that you will encounter on our website, in our case studies and throughout our social posts, providing clear definitions and practical examples for working with us or any marketing agency.

ROI (Return on Investment)

Definition: ROI measures the profitability of an investment. It’s calculated by dividing the net profit from an investment by the cost of the investment.

Example: If you spend $1,000 on a marketing campaign and generate $2,000 in sales, your ROI is 100%. This means you’ve doubled your investment.

Retention

Definition: Retention refers to the ability of a company to keep its customers over time.

Example: A subscription service that maintains 95% of its subscribers each month has a high retention rate, indicating customer satisfaction and loyalty.  This also indicates that they lose 5% of their subscribers every month.

Churn

Definition: Churn is the rate at which customers stop doing business with a company.

Example: If a company has 100 customers at the start of the month and loses 17 by the end, the churn rate is 17%. 

High churn rates suggest there are issues that need to be addressed to improve customer satisfaction.

Conversions

Definition: A conversion occurs when a user completes a desired action, such as making a purchase or filling out a form.  You frequently have to define conversions for Google Ads and Google Analytics.

Example: If an e-commerce site gets 600 visitors and 30 of them make a purchase, the conversion rate is 5%.

Call To Action (CTA)

Definition: A CTA is a prompt on a website or ad that encourages the user to take a specific action.  It should be simple, direct and easy to understand.  It should also be something that stands out, like a brightly colored button.

Example: “Get a Free Quote” or “Sign Up Now” are common CTAs that guide users toward a desired action, such as filling out a form or making a purchase. 

Landing Page

Definition: A landing page is a standalone web page created specifically for a marketing or advertising campaign.  This is the page that you send ads to, not the home page.  Everything on this page has one purpose – get the site visitor to buy your product or service.

Example: A page designed solely to promote a special discount on a product, with a clear CTA to “Buy Now,” serves as a good landing page .

SEO (Search Engine Optimization)

Definition: SEO is the practice of optimizing a website to rank higher in search engine results organically.

Example: Using relevant keywords, creating quality content, and obtaining backlinks are strategies to improve SEO and drive more organic traffic to your website.

Backlink

Definition: A backlink is a link from one website to another, which is important for SEO.  For a more in-depth look at backlinks, check out this article from IFTS.

Example: If a popular blog in your space links to your business website, that backlink can improve your site’s authority and search engine ranking.

Citation

Definition: In SEO, a citation is a mention of your business’s name, address, and phone number (NAP) on other websites.

Example: Listings on directories like Yelp or Yellow Pages include citations that can help boost your local SEO by making your business more discoverable in search engines.

NAP (Name, Address, Phone Number)

Definition: NAP consistency refers to having the same business name, address, and phone number across all online platforms.  Tools like Yext can help you maintain this easily.

Example: Ensuring your business’s NAP information is identical on your website, social media profiles, and directory listings helps improve local SEO.

Bounce Rate

Definition: The bounce rate is the percentage of visitors who leave a website after viewing only one page.

Example: If 1,000 people visit your website and 500 leave after only viewing the homepage, the bounce rate is 50%. 

A high bounce rate may indicate that visitors aren’t finding what they’re looking for on your website.

SEM (Search Engine Marketing)

Definition: SEM involves using paid advertising to increase a website’s visibility on search engines.

Example: Running a Google Ads campaign or a Google Local Services Ad to appear at the top of search results when users search for “best local coffee shop” is an example of SEM.

PPC (Pay Per Click)

Definition: PPC is an advertising model where advertisers pay a fee each time one of their ads is clicked.  This is most typically used when referring to a Google Ads campaign.

Example: A business runs a Google Ads campaign and pays $0.55 for each click. If their ad gets 1,000 clicks, they spend $550 in total on the PPC campaign.

Target Audience

Definition: The target audience is the specific group of people most likely to be interested in your product or service.  You will want to think about age, location, psychographics, etc when defining your target audience

Example: For an Orlando-based wedding photography business, the target audience would be engaged couples planning their weddings in the Orlando area.

Understanding these fundamental marketing terms will empower you to make informed decisions and effectively communicate your needs and goals.

For more detailed explanations and examples, feel free to reach out to our team or explore our other resources.

Get the Top 3 Social Media Post Templates for Painting Companies to Grow Your Following and Get New Clients

Engage with prospects and save time with your FREE Canva template kit. This kit features the top 3 social media posts for painting companies and directions on how to brand them for your own business in 5 minutes or less.

Enter your email below and get the templates sent directly to your inbox along with an instructional video on how to make personalized edits.