The Importance of Online Reviews in Today's Legal Market
Picture this:
We have a potential client sitting at their kitchen table, laptop open, searching for a lawyer to handle their case. They type in “[Your City] law firm” and several names pop up.
Maybe your firm is one of them…will they click on your entry?
Before they pick up the phone, they do what most people do in today’s digital world—they check the reviews…how do your reviews stand up to your competitors?
Now, let’s imagine they find no reviews for your firm, or worse, a couple of lukewarm comments from years ago.
What do you think happens next?
They hit the back button and move on to the next firm—the one with glowing reviews that all have taken place within the last 3 months.
In a matter of seconds, you’ve lost a potential $4,000+ client, not because of your skills or experience, but because your online presence didn’t inspire confidence…your Google Business Profile is the first impression that you make on potential clients, so it better be good.
For law firms, especially those with two or more attorneys trying to manage marketing in-house or with a less-than-stellar agency, this scenario is all too common. You’re putting in the effort—the website is up, you’re dabbling in social media, maybe even running some ads—but the results aren’t what you expected.
One crucial piece of the puzzle you might be overlooking?
The power of online reviews.
In this article, we’ll explore:
why reviews matter more than ever,
how they can build trust,
simple effective ways to ask for them without feeling awkward
By the end, you’ll have a roadmap to not only attract more clients but also establish a solid, online reputation that speaks for itself.
Think of online reviews as the modern-day equivalent of word-of-mouth referrals—but on steroids. Back in the day, if someone needed a lawyer, they’d ask friends or family for recommendations. Today, they turn to Google, Yelp, and even platforms like Avvo.
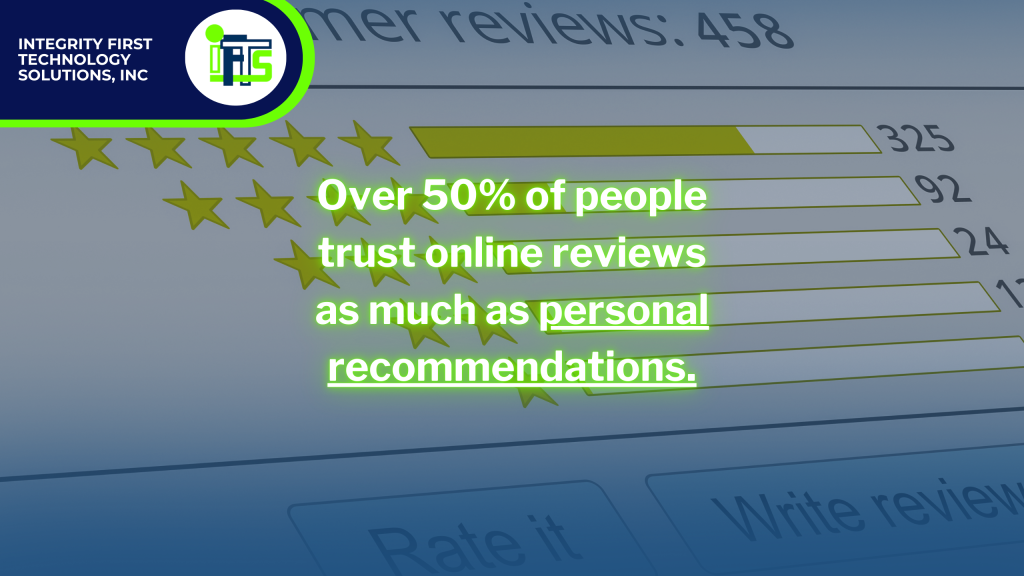
In fact, studies show that over 50% of people trust online reviews as much as personal recommendations. That’s a huge statistic, especially in a field where trust is everything.
So, why are reviews so powerful?
1.Trust and Credibility:
Imagine walking into a courtroom with no prior case history—the judge and jury don’t know your track record. That’s how potential clients feel when they see a law firm with little to no online presence.
Reviews act as your digital reputation, offering social proof that you’re capable, reliable, and trustworthy. A firm with multiple positive reviews feels like a safer bet, even if the potential client has never met you.
2. SEO Benefits:
Here’s where it gets even more interesting. Google loves new, positive reviews. The more reviews your firm has—especially on your Google Business Profile — the higher chance you have of ranking in local search results and showing on the Google map pack.
Think of it like this: reviews are like votes of confidence in the eyes of search engines like Google and Bing. The more ‘votes’ you get, the more visibility you have. This means that even if your website isn’t the flashiest or your social media isn’t going viral, reviews can still help you get more prospects to your website or calling your office.
According to BrightLocal’s 2023 Local Consumer Review Survey, 85% of consumers believe that reviews older than 3 months are no longer relevant. This highlights the importance of continuously gathering fresh reviews to maintain credibility and improve SEO rankings.

3. Decision-Making Impact:
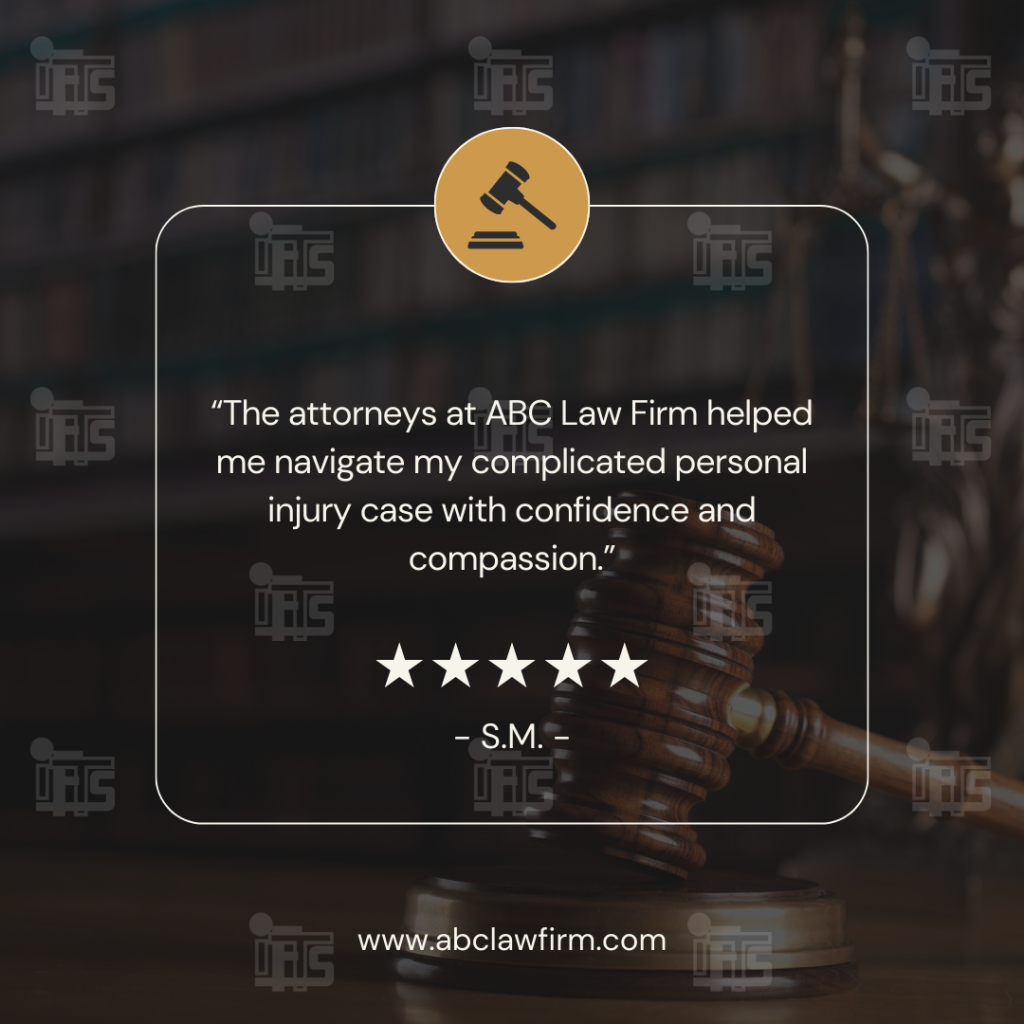
They’re likely overwhelmed, stressed, and unsure of who to trust with their legal issues. When they see a law firm with a bunch of five-star reviews detailing successful cases and positive experiences – it’s like a sigh of relief. They’re more confident in contacting you, knowing others have had good outcomes with your firm.
The takeaway?
Reviews aren’t just a “nice-to-have”—they’re a game-changer in today’s competitive legal landscape.
Why Do Law Firms Struggle to Get Reviews?
You might be thinking, “This all sounds great, but getting reviews isn’t exactly easy.”
And you’re right.
A ton of law firms face real challenges when it comes to collecting client reviews—but those challenges can be overcome with the right strategies.
Ethical Concerns & Solutions:
The legal field is bound by strict confidentiality and ethical guidelines, which can make asking for reviews feel like navigating a minefield. You might worry about violating client privacy or appearing unprofessional.
But here’s the truth: there are ethical ways to request feedback without crossing any lines. For example, you can ask clients to focus on their overall experience—how they felt about your communication, professionalism, and service—without discussing case specifics.
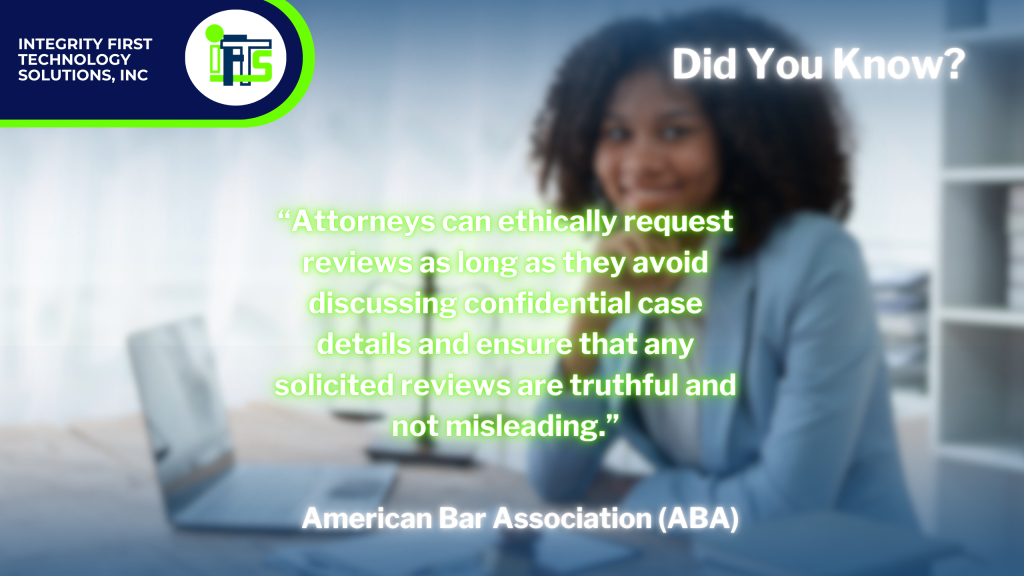
According to the American Bar Association (ABA), attorneys can ethically request reviews as long as they avoid discussing confidential case details and ensure that any solicited reviews are truthful and not misleading.
The ABA emphasizes that lawyers should not offer incentives in exchange for reviews and must comply with advertising rules set forth by their respective state bar associations. You can read more about this in the ABA’s Law Practice Magazine here.
Timing and Comfort:
Knowing when to ask for a review is half the battle for most attorneys. If you ask too soon, it may seem inappropriate. If you wait too long, you risk the client forgetting the details of their positive experience.
So what is the sweet spot?
Right after a successful case resolution or a positive milestone.
Picture it like this: your client just won their case, they’re feeling relieved and grateful—that’s the perfect moment to kindly ask for a review. You did something nice for them, so they will want to do something nice for you.
Tech Challenges:
Let’s face it—not all law firms are tech-savvy, and that’s okay. But relying solely on word-of-mouth or expecting clients to leave reviews without prompting won’t cut it in today’s digital age.
Automating the review request process can take the pressure off your team and make it easier for clients to leave feedback. Simple tools that send follow-up emails or text messages can dramatically increase your review count with minimal effort.
The bottom line here?
The hurdles to getting reviews are real, but they’re not insurmountable. With a thoughtful approach, your firm can start building the kind of online reputation that attracts high-value clients and sets you apart from the competition. If your competitors can do it, so can you.
How to Effectively Ask For Reviews (Without Being Awkard)
Now that we have covered why reviews matter and how they can be a bit tricky to receive, let’s talk about the “how.”
Asking for reviews doesn’t have to feel like cross-examining a hostile witness—in fact, with the right approach, it can be a natural part of your client relationship.
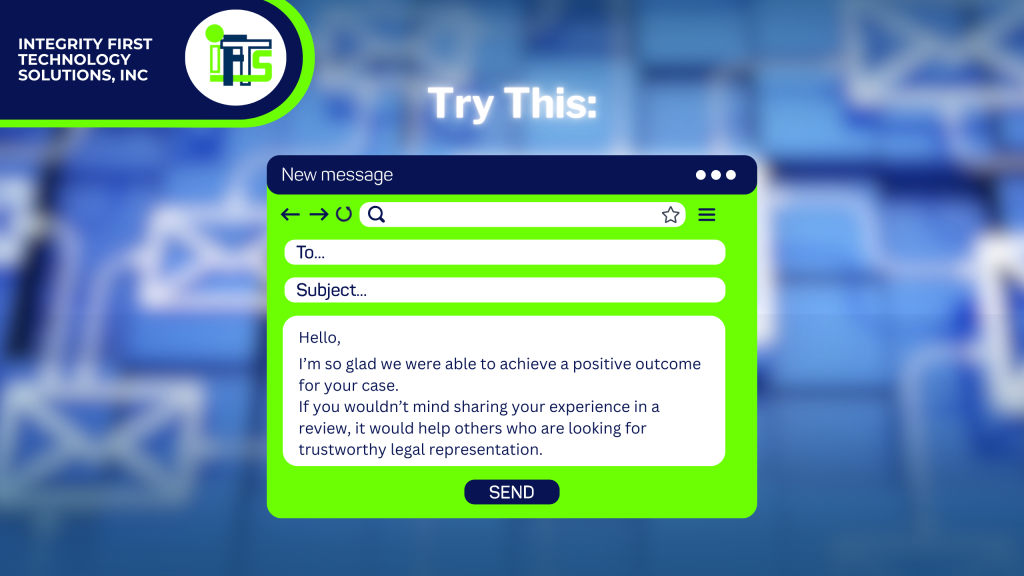
1. Personalized Requests
Think about the moments when your client feels most satisfied—perhaps after winning a case, finalizing a settlement, or receiving excellent legal advice. These are the times when clients are most likely to leave positive feedback.
A simple, heartfelt request can go a long way. For example:
2. Automated Systems
Technology can and should be your best friend here. Use automated tools to send out review requests via email or SMS shortly after a case is resolved. This keeps the process consistent and hassle-free. Tools like Clio Grow, Zapier or GoHighLevel integrate seamlessly with your existing systems, allowing you to request reviews without adding to your workload.
You could also use a QR code on your invoice that leads them right to your Google Business Profile review section.
3. Incentivizing Without Violating Ethics
While offering gifts or discounts in exchange for reviews is a big no-no in the legal world, you can still encourage feedback by emphasizing the impact it has. People like to help people.
Let clients know that their reviews help others find the legal support they need. This creates a sense of community and purpose without crossing any ethical boundaries.
4. Think Outside the Box for Your Firm
Check out our article on 10 Proven Ways to Get More Positive Online Reviews for Your Business
The best part?
This process can be completely hands-off for your busy legal team, freeing them up to focus on what they do best—practicing law.
Where to Focus On Getting Reviews For Your Law Firm: Platforms That Matter
Not all review platforms are the same. While it may be tempting to just ask for reviews everywhere, focusing your efforts on the right platforms will help your business grow quickly.
1. Google Business Profile (Formerly Known as Google My Business)
This is the main review platform that you want to receive reviews on. When potential clients search for legal services in your area, Google is usually their first stop.
Reviews on Google not only influence your credibility but also directly impact your local search rankings. By consistently gathering positive reviews on Google, you can dramatically increase your firm’s visibility in your area.
2. Avvo and Yelp
While Google reigns supreme, platforms like Avvo are crucial for attorneys, as they cater specifically to legal professionals. Avvo allows clients to rate and review lawyers, and many potential clients turn here for more detailed insights.
Yelp, on the other hand, can help broaden your reach and increase your website’s SEO by being a third-party review platform source.
3. Managing and Responding to Reviews
You can’t just get the reviews—how you reply to them matters just as much. Responding to both positive and negative feedback shows that you value client input and are committed to continuous improvement.
For positive reviews, a simple “Thank you for your kind words” goes a long way. For negative reviews, address concerns professionally and offer to resolve the issue offline. For a whole walkthrough on responding to reviews, check out this article.
The takeaway?
Quality and platform focus matter more than sheer quantity. Concentrate on the platforms that your potential clients trust the most, and you’ll see the results.
Turn Your Reviews into Marketing Gold Today
Getting reviews is just the beginning.
To truly maximize their impact, use them in multiple places to expand on their broader marketing strategy.
1. Showcasing Testimonials on Your Website
Your website is often the first point of contact for potential clients. Adding a dedicated testimonial page or integrating glowing reviews throughout your site can build immediate trust.
This is where video testimonials really shine. Highlight client experiences that showcase your firm’s strengths and professionalism.
2. Leveraging Reviews in Social Media and Ad
You shouldn’t just let 5-star reviews sit idle on your Google or Avvo profiles. Repurpose them into eye-catching social media posts, or use them as powerful testimonials in your paid advertising campaigns! A compelling client quote in a Facebook ad can significantly boost engagement and click-through rates. To see how this could work and to download templates to implement this, look at #2 in this article.
Get the Top 3 Social Media Post Templates for Law Firms to Grow Your Following and Get New Clients
Engage with prospects and save time with your FREE Canva template kit. This kit features the top 3 social media posts for law firms and directions on how to brand them for your own firm in 5 minutes or less.

Enter your email below and get the templates sent directly to your inbox along with an instructional video on how to make personalized edits.
3. SEO Boost from Review Content
Fresh, regularly updated review content does wonders for your local SEO. By highlighting new testimonials and client feedback on your website and other platforms, you signal to search engines that your firm is active, relevant, and trusted by clients.
You should also embed reviews from at least one third-party site, like Yelp, to help your SEO with ranking higher.
The takeaway?
Reviews aren’t just for attracting clients—they’re a versatile tool that can enhance every aspect of your marketing strategy.
Have We Convinced You That Your Law Firm Needs More Reviews?
Online reviews aren’t just a modern convenience—they are a fundamental component of a successful legal marketing strategy. By leveraging the power of reviews, law firms can build trust, improve visibility, and attract high-value clients in an increasingly competitive market.
Remember, reviews do more than just enhance your online reputation. They can:
influence client decisions,
boost your local SEO,
and differentiate your firm from the competition.
Whether you’re a seasoned attorney or part of a growing legal team, prioritizing reviews can drive meaningful growth for your firm.
Start today by assessing your current review strategy. Identify the gaps, implement ethical and effective review collection methods, and focus on the platforms that matter most.
Your future clients are reading reviews—make sure they find the story you want to tell.
Want help with getting more reviews? Fill out the form below and IFTS will help you implement a plan that integrates seamlessly with your current systems.