fbpx

Boost Your Business: Easy Steps to Get More Google Reviews

Are you looking to skyrocket your company’s reputation with minimal effort?

It’s a no-brainer that glowing reviews can significantly elevate your business’s online presence and credibility. But the big question remains:

How do you effortlessly encourage clients to leave those much-coveted reviews?

This comprehensive guide is your golden ticket to amassing an impressive collection of Google reviews, ensuring your business shines brighter than the rest.

Simplify the Business Review Process

The secret sauce to racking up reviews lies in making the process as straightforward as possible for your clients. Whether you’re a painter leaving a fresh coat of paint on a client’s walls or you’re an attorney that has just successfully navigated them through a complex legal battle, the satisfaction of a job well done is your prime moment to request a review.

Here’s how to harness that moment to your advantage:

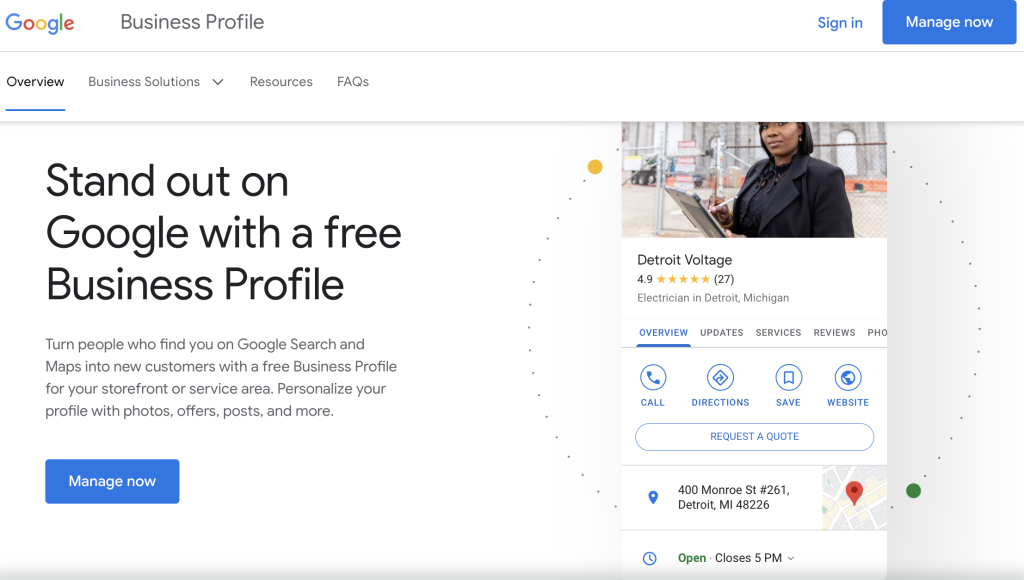
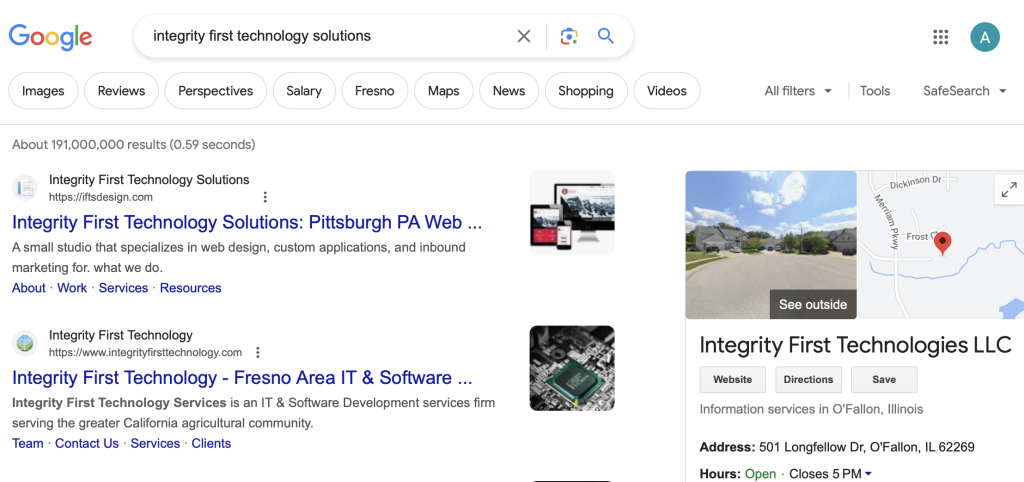
Step 1 - Navigate to Your Company’s Google Business Profile

Start by accessing your Google Business Profile. You can do this by entering business.google.com in your browser or simply googling the name of your business.
Step 2 - Locate Your Direct Review Request Link

Once on your profile, look for the “Ask for Reviews” option.
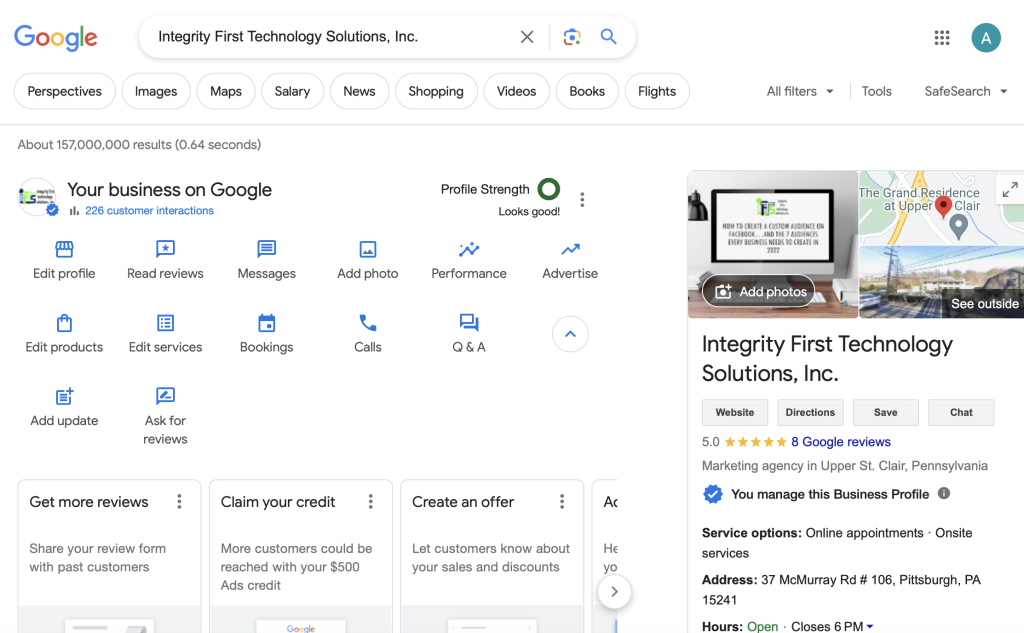
This is where the magic happens.

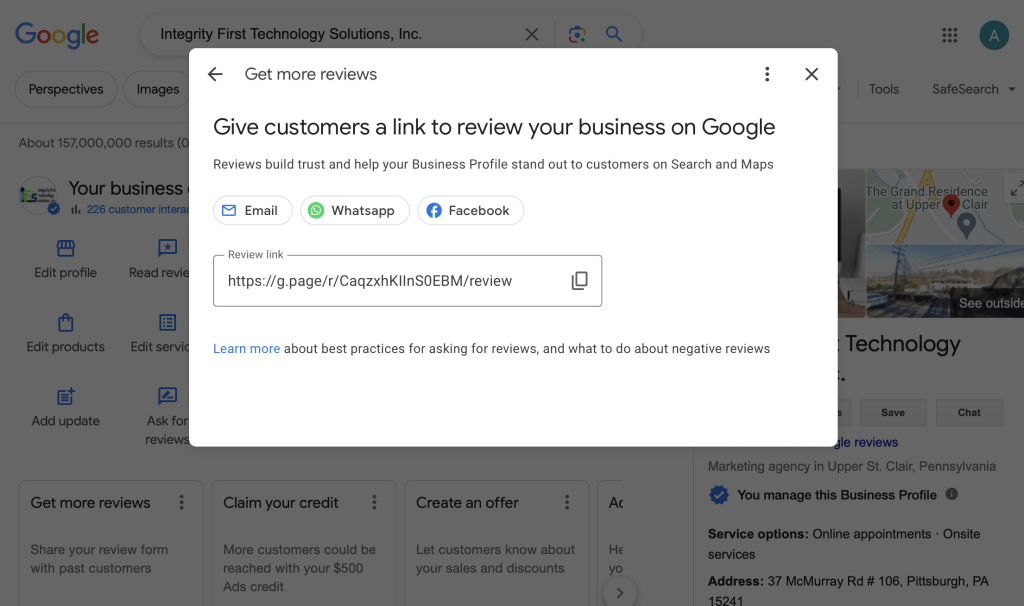
Google provides a direct link that simplifies the review process, leading clients straight to where they can sing your praises.

Copy this link and save it somewhere easy to access; it’s your new best friend.
Step 3 - Make Sharing a Breeze

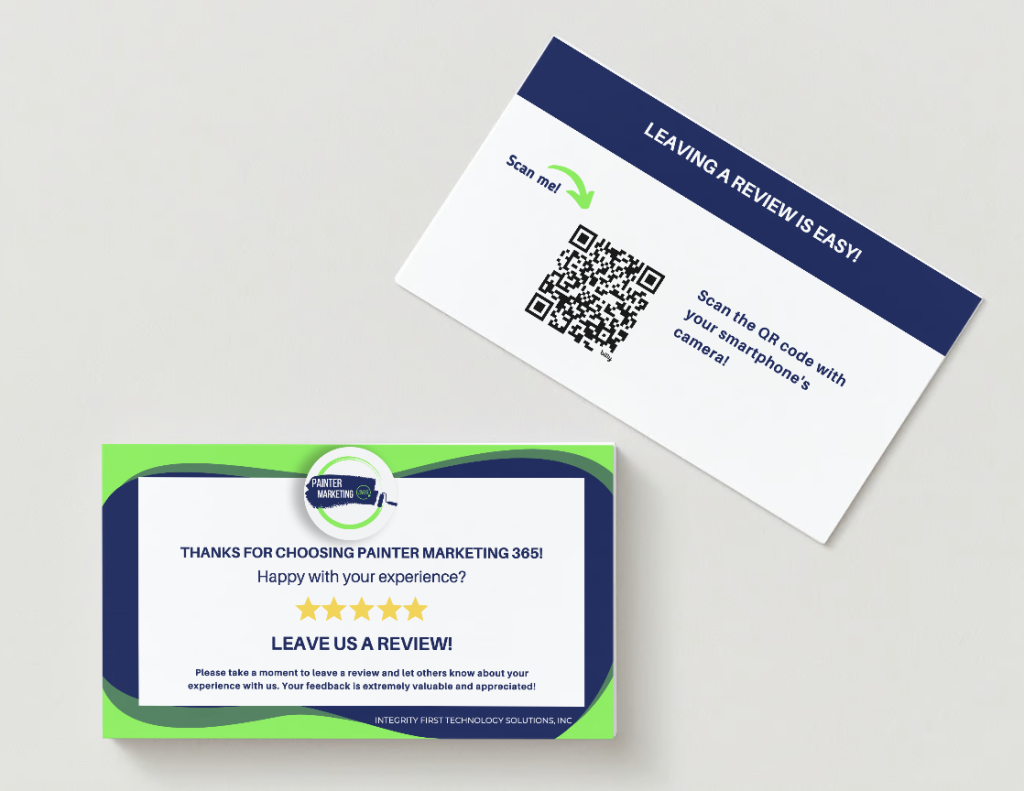
Now, you want to ensure this link reaches your clients without any hassle. Transforming the link into a QR code or a shortened URL via services like Bitly makes asking for a review via email, text, or even in person as seamless as possible.

How to Use Bitly To Get More Reviews
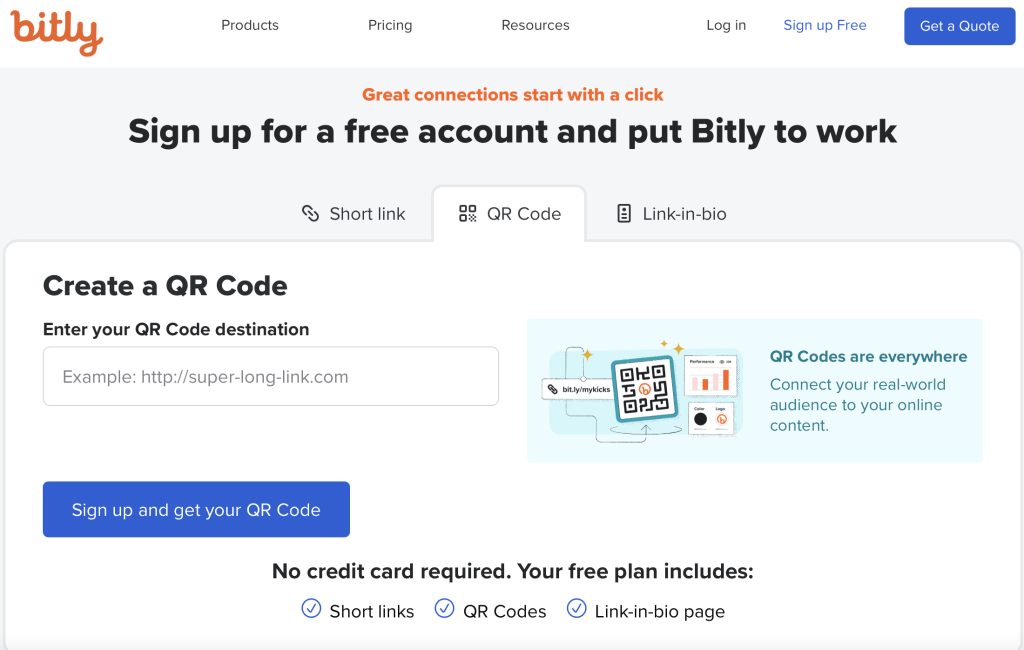
  •  Sign up for an account (you can use the free one to create everything you need and this is not an affiliate link)
  • Click on “Create New” > “Link”
  •  Fill in the URL and the title
  • Create the “Custom Back Half” text for the bitly URL
  • Turn on the QR code and select the color (add your logo if you have the paid subscription)
  • Click “Create”  
  • Download the PNG or JPEG version of your new QR code
  • Copy the bitly link and test it

Imagine you are a house painter and you have added this QR code to your final walkthrough paperwork.  Once you do the final walkthrough and your client is thrilled with their new house, you can pull out the QR code and ask for a review.

Or, imagine you are an attorney.  You could add the QR code to your final invoice or case documents.  When your client is thrilled with you winning their epic legal battle, they will be more than happy to leave that review, and you have made it super simple.

Step 4 - Employ Psychological Strategies

When asking for a review, framing it as a favor can significantly boost your chances of success.

People inherently enjoy reciprocating kindness, and by doing something nice for them, you’re more likely to receive a positive review in return. This approach taps into the basic human desire to give back, making your request much more effective.

Beyond the Basics – Getting More Reviews

Taking it a step further, incorporating the QR code into various client-facing materials can substantially increase your visibility and the likelihood of receiving reviews. Whether it’s a business card, a brochure, or an email signature, every point of contact is an opportunity to prompt a review.
In the next installment of our guide, we’ll explore innovative strategies to leverage these QR codes and Bitly links even further, ensuring every satisfied client has the chance to share their positive experience.
Stay tuned and get ready to transform your business’s review-gathering strategy from mundane to monumental.

With these simple steps, your business will not only gather reviews effortlessly but also build a reputation that stands out amongst your competitors.


Boosting Your House Painting Business Revenue: Four Proven Ways to Improve Google Ads Results

Are you a house painting business owner who wants to save money on Google Ads and get more customers? 

We’ve got four simple tips to help you do just that. 

In this blog post, we’ll show you how to make Google Ads work better for your painting business, and it’s not as hard as you might think.

Tip 1 - Make a Special Page For Your Google Ads (Your Landing Page)

To get better results with Google Ads, you need a special page on your website, called a landing page, just for the people who click on your ads. This page should make it easy for them to contact you. 

Be sure that you include your phone number in the upper-right hand side and have a form that they can fill out.  You may also want to consider having a way to directly schedule the appointment, like a calendar or a chat function for the people that cannot wait to get started.

Don’t worry about making it show up on Google.  It doesn’t have to be optimized for SEO (search engine optimization) because you are sending paid traffic to it. 

Instead, make it all about getting people to contact you or leave the page. 

This simple change can make a big difference.

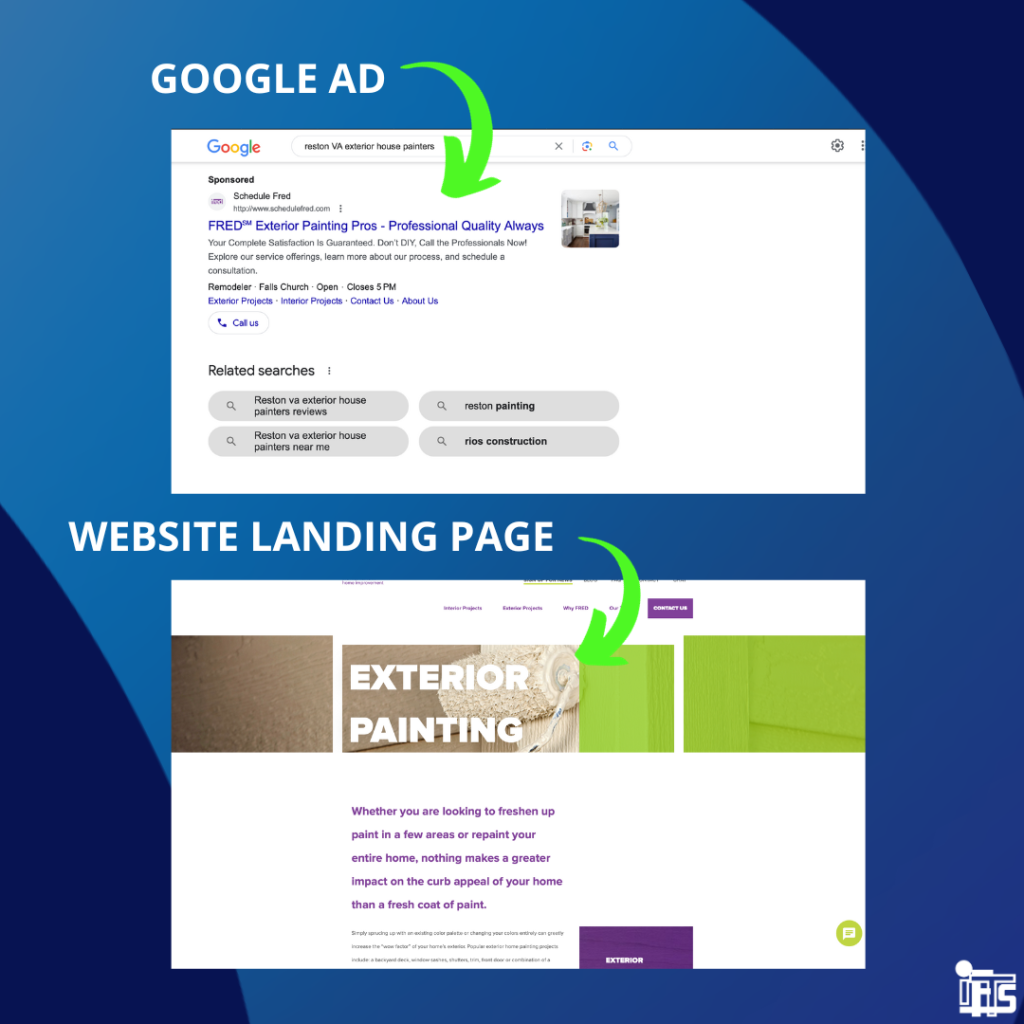
Tip 2 – Make Sure That Your Ads and Page Match (Ad Congruity)

If your ad talks about a specific service or benefit, make sure the page it leads to talks about the same thing. If your ad is about painting a room, the page should be too. If it’s about fixing a ceiling, the page should be all about that. This way, people won’t get confused, and more of them will contact you.

You will also want to use similar fonts, colors and images.

This technique is called “ad congruity” and it helps potential clients make the connection from your ad to your landing page in their mind.  The more they can look alike, the better. 

If your website hasn’t been updated in a while, this article will help!

Tip 3 - Focus on What People Want (Focus on the Client’s What’s In It For Me?)

Instead of talking about what you do, focus on what people want. 

People who need painting services want their homes to look great. So, tell them how your painting services will make their homes look amazing. Talk about the results and benefits they’ll get. This will get more people interested in what you offer.

People always want to know, “What’s in it for me?”

So, answer them in a way that will elevate their status, but will highlight what you can do.  It’s a win-win for everyone.

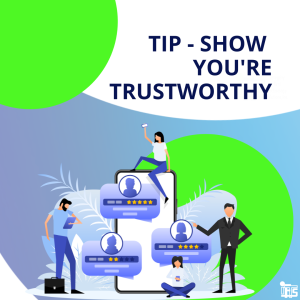
Tip 4 - Show You're Trustworthy

People like to see that others have been happy with your services. In fact, 46% of consumers feel that online business reviews are as trustworthy as personal recommendations from friends or family according to BrightLocal.

Add reviews from past customers to your landing page. These can be written reviews and even short videos where your happy customers talk about their experience. You can even use widgets to embed the latest reviews from Google into your Website if you are using WordPress.

By making it easy to see what people are saying, it helps people trust you and decide to contact you.

Sometimes, people don’t leave reviews because they don’t know what to write.  To make it easy to leave a review, send your client some variation of the following email:

“Mrs. Smith – 

We hope that you found our service to be extraordinary.  If that is the case, we would love for you to leave us a review.

To help you get started (and avoid writer’s block), we have found that the most impactful reviews answer these questions:

  • What work did we do for you and where are you located?
  • Was it done well?
  • Why did you pick our company?
  • What was the best thing about working with our company?
  • Would you recommend us to family and friends?

Please click here and it will take you directly to our Google Review Page: [Link]

Thank you for choosing us and we really appreciate you taking the time to leave a review.” 

We recommend asking for a review after your final walkthrough, which is when your client should be the happiest.

By asking these questions, you help guide them to use the words and phrases that will make your reviews relevant to most searchers looking for companies like yours. In addition, they will leave reviews that look non-spammy and well thought out.

Where To Go From Here

Improving your Google Ads results is doable, even if you’re running a house painting business by yourself. 

By following these simple steps, you can save money on advertising and get more customers. Just make a special landing page, match your ads to it, focus on what people want, and show that you’re trustworthy. These changes can help your business grow. 

If you need more help, feel free to reach out to IFTS. Good luck with your house painting business!

How to Connect Your Google Calendar to GoHighLevel

Benefits of Calendar Integration

If you use GoHighLevel to manage a small painting business, it can help you optimize operations by allowing you to use a single platform rather than multiple apps and platforms. This makes it simple for consumers to learn about you, fill out forms, schedule appointments, and conduct research on your company.

Integrating your Google Calendar with GoHighLevel gives you a lot of benefits that can help you make better use of your time and make you more productive overall.

First, it saves time by getting rid of the need to physically cross-check or update multiple calendars. Second, it makes sure that your work and personal plans are in sync, which keeps them from overlapping or clashing. Third, you can easily plan meetings, set reminders, and add events, which makes you more productive. Lastly, it lets you get updates across all platforms in real time, so you always know if your plan changes.

Connecting Your Google Calendar to GoHighLevel

This can help you streamline your scheduling and ensure that you never miss an important event or meeting. Here’s a step-by-step guide on how to do it:

Step 1: Log into Your GoHighLevel Account

The first step is to log into your GoHighLevel account. If you don’t yet have an account, you can sign up on the GoHighLevel website.

Step 2: Navigate to the Calendar

Once you’re logged in, navigate to the “Calendar” section in your GoHighLevel account.

You’ll see a tab at the top of the page labeled “Calendar Settings” that you can select.

Step 3: Click on 'Integrations'

Find and click on the “Integrations” button located on the left hand side menu of your screen.

Step 4: Google Authorization

To add your email account, you’ll be asked to provide your Google account credentials and to give GoHighLevel access to your Google Calendar. Log in to your Google account and click “allow” to provide the necessary authorization.

Step 5: Sync Your Calendars

After allowing your Google Account to integrate with GoHighLevel, you will then select the “My Profile” tab located in the menu on the left side of the screen. All of your general account information will appear, and you will be able to scroll down to the section labeled “Calendar Configuration” and click the “edit” button.

You will then be able to select your Google Calendar account to sync with your GoHighLevel account. Hit save, and you are all done!

You Are Now Synced!

After following these simple steps, your Google Calendar will be in sync with GoHighLevel. 

Troubleshooting Common Issues

Occasionally, you might encounter issues when connecting your Google Calendar to GoHighLevel. Here are a few troubleshooting tips:

  1. Missing Events: If your events aren’t showing up in GoHighLevel, check to see if they’re marked as ‘busy’ in Google Calendar. Only ‘busy’ events are visible in GoHighLevel.
  2. Duplicate Events: If you’re seeing duplicate events, make sure you haven’t connected the same calendar more than once. Go to the GoHighLevel settings and verify the connected calendars.
  3. Not Receiving Updates: If you’re not receiving updates about changes to your schedule, ensure that your notification settings are correct in both Google Calendar and GoHighLevel.

Remember, if problems persist, don’t hesitate to reach out to GoHighLevel support for further assistance.

Additional Support Options for Calendar Syncing

Beyond the provided troubleshooting steps, there are other avenues for support should issues persist with your calendar syncing. 

  1. GoHighLevel Community Forum: This is a great place to connect with other GoHighLevel users. You can post your queries and get input from individuals who have encountered similar issues. Access the forum here.
  2. GoHighLevel Webinars: These webinars often address common issues, including troubleshooting syncing problems. Keep an eye on the schedule to catch relevant sessions. Find the upcoming webinars here.
  3. Google Support: Google offers comprehensive support for Google Calendar. You can find articles, guides, and community forums to get help. Visit Google’s Help Center here.
  4. Contact Support: If you’re still facing issues after exploring these resources, consider reaching out to GoHighLevel’s customer service directly via email or phone call. They can provide personalized assistance to resolve your problem. Contact details can be found here.

Remember, the goal is to ensure your calendar syncs seamlessly, enhancing your productivity and scheduling efficiency. Don’t hesitate to seek help if you encounter any issues.

​Maximizing Your Calendar Integration

To truly make the most of your Google Calendar and GoHighLevel integration, here are some effective tips:

  1. Check for Conflicts: When syncing your Google Calendar in the profile screen, you can also set up your calendar to check for conflicts.
  2. Utilize Color-Coding: Use different colors for different types of events or tasks. This helps in identifying and prioritizing tasks at a glance. 
  3. Set Reminders: Make good use of the reminder feature. Set reminders for important meetings, deadlines, or tasks.
  4. Use Description Fields: When creating an event, use description fields to note down key points about the meeting or task. This will serve as a quick reference later.
  5. Share Your Calendar: If you’re working with a team, share your calendar with them. This will not only keep everyone informed but also help avoid scheduling conflicts.

Leverage Third-Party Integrations: GoHighLevel integrates with numerous third-party applications. Leverage these integrations to maximize efficiency.

That's it!

You have successfully connected your Google Calendar to GoHighLevel. All of the events in your calendar will now be synced and you’ll never miss another important meeting or event again. 

GoHighLevel also offers a wide range of features that make managing your calendar even easier, such as the ability to view and add events to multiple calendars at the same time, create reminders for upcoming events, and access event details quickly.

Now that you have connected your Google Calendar to GoHighLevel, why not take advantage of some other features?

You can create and schedule tasks directly from your calendar, as well as set reminders for yourself to stay on top of your to-do list. You can also integrate with third-party applications, such as Slack and Zoom, to help streamline communication among teams. 

Remember, efficient use of integrated calendars can significantly boost your productivity and streamline your workflow, saving you valuable time and effort.

With GoHighLevel’s calendar integration features, you’ll have everything you need to stay organized and on top of your daily tasks! Try it out today! We hope you enjoy the convenience of syncing your Google Calendar with GoHighLevel! 

Let us know if you need help with getting your calendar synced with GoHighLevel by contacting si@iftsdesign.com!