fbpx

10 Of Our Favorite Marketing Hacks For House Painting Companies In 2022

Would you like to know about our 10 favorite super sneaky marketing hacks that you can implement today?

We use these marketing secrets to help our painter clients rank their website #1 for their favorite keywords, get more organic traffic and ultimately, get more leads to grow their business.

In this article, we are going to cover ten actionable strategies that you can use RIGHT NOW.

The best part?

You don’t have to be super tech savvy or Elon Musk to get them implemented.

Let’s start this section with our favorite Google Business Profile hacks.

Hack #1 - Social Proof Will Get You More Leads

The best two platforms to get reviews on are:

  • Google
  • Meta (Formerly Facebook)

Google reviews are the best type of reviews that you can receive because not only do they talk you up and show people how great you are, they also help your website with its SEO.  As an added bonus, once you have 100 reviews, your star rating will be shown when you run Google ads.

Meta reviews are great to have as well because of the platform’s popularity in a house painting company’s target market.  Most house painters that we work with have a target audience of women that are between the ages of 35 to 64.  Consequently, that is the majority of Meta users.  By using this platform, you are more likely to get in front of your ideal client than any other social media option.

If you can get a video testimonial from a client, that can go a long way as well.  A lot of people get stuck on the logistics of creating the video, but it shouldn’t be that hard.  You can interview them via Zoom and record that call or just have them use their phone to record a quick video. 

The more authentic the video looks, the better.  This is for two reasons.  One – if the video is over-produced, it will seem scripted and less credible.  Two – if people see that someone took time out of their day to create a quick video for you, it shows that they really liked you and your work.

Once you have these videos, be sure to put them everywhere a potential audience may look.  This could include:

  • YouTube
  • Your website
  • Social Media
  • Your Google Business Profile
  • and more!

Reviews are a great way to show how great you are without you ever having to say a word.

Want some help getting more reviews?  Check out our article on implementing a review system.


Hack #2 - Get Your Listing On Google Maps

Getting your business listed in the Google Maps results is based on many factors.  A few big ones are:

  • how close the searcher is to your business location 
  • your review ranking and volume (which we discussed above in Hack #1)
  • profile completeness
  • local signals

To start, make sure that your profile is completely filled out with correct information.  Your name in the Google Business Profile should match exactly the name on your website.  This goes for your address, website, and phone number as well.  Then, be sure that your business categories and services are filled in completely.  

The final part of your profile that should be completed is the “Photos” section. Be sure to add as many photos as you can as this is a feature that not many painters take advantage of.

For a complete walkthrough of filling out a Google Business Profile, check out our article here: https://blog.iftsdesign.com/introducing-google-my-business/

“Local Signals” are another big factor for showing up early on Google Maps.  These are website links to your website from other local businesses or services.  A few examples of this would be:

  • a back link from the local chamber of commerce
  • a back link from a local scholarship that you sponsored
  • a mention or link to your business from a local paper

Anything that you can do to get your business associated with your area is a great “local signal” to Google.

Hack #3 - Ask and Answer Questions Via Your Profile

An easy way to get keywords and locations associated with your Google Business Profile is through the question and answer section.

Previously, you were not able to add questions to your profile yourself,  You had to wait for someone to ask and then you could answer them.  This has now changed.

The Q&A section of your Google Business Profile is a great way to show all of your most frequently asked questions up front to prospective customers.

Write down the 10 questions that you receive all of the time from prospects and then answer them in 3-5 sentences.  While you are answering them, be sure to use common keywords/phrases as well as locations that you want associated with your house painting business.

Once you have accomplished this task, copy and paste them to your Google Business Profile.

Now, we’ll move to our favorite Paid Ad Hacks.

Hack #4 - Solve Your Prospects’ Small Problems For Free In an Ad

What are the questions you most commonly get asked? If you’ve already implemented Hack #3 from this article, you should have this list already.

Side Note – Need some inspiration?  Check out https://answerthepublic.com/ or https://neilpatel.com/ubersuggest/ for commonly asked or searched questions in your field.

Make videos answering these questions and position yourself as the expert in your area.  Again, just like the testimonials, the videos do not have to be fancy or highly edited.  They should be authentic and can be filmed with your cell phone.  Some painters will even film on the job site.

Sample Common House Painter Questions To Get You Started:

How often should I paint the exterior of my house in this area?

  • What is the best time of the year to stain a deck?
  • How many coats of paint should be used on the exterior of your house?
  • How many coats of paint should be used on the interior of your house?
  • What does it mean for a painting company to be bonded and insured?
  • Should I paint my kitchen cabinets or should I replace them?

Once you have your videos, post them to your social media, YouTube channel and on your website.

You should also run them as Meta ads to your local audience.  You don’t have to spend a lot of money, just one to five dollars per day.  This helps you get in front of a fairly large group of people in a small amount of time.

These videos will help you create an audience that already knows/likes/trusts you when it comes to painting topics.  When they have a painting project come up, you will be the one that they know they can trust.

Hack #5 - Make Your Ad Stand Out

When creating your video, you want to be sure to stand out amongst the crowded marketplace.

The first way to do this is to use contrasting colors to the platform that you are running the ad on.  If you are going to run the ad on Meta (Facebook), we recommend having a red or yellow bar at the top of the video because it helps you stand out from the Meta blue color scheme.  An easy way to do some small edits to your video is through Canva.  

Don’t want to take the time to do any edits to the video?  Try wearing a brightly colored red or yellow shirt.

The second way to stand out is to immediately call out your audience or target market.  So, if you were advertising kitchen cabinet painting to the residents of Dallas, you could start your video with the sentence: 

“Are you living in the Dallas area and thinking about redoing your kitchen?”

Or, you could do some video editing and add that sentence as text to the beginning of the video.

A final way to stand out is to start your video with a big action or a memorable prop at the beginning.  You want to grab someone’s attention – movement or something unexpected will typically draw the eye.

A few big actions you could try:

  • come in through a door
  • big wave and a smile
  • use a paint sprayer or other tool of the trade
  • jump into the frame

A few memorable props you could try:

  • Comically large-sized paintbrush
  • Wall of stacked of paint cans
  • stand halfway up a ladder

The important thing to remember is you want to get their attention within the first 3 seconds of the video and keep them watching.  These tactics all use “pattern interrupt”.  This basically means – do something to get a person to stop scrolling through their feed and watch your video/read your ad.

Hack #6 - Use Retargeting Ads In Multiple Ways

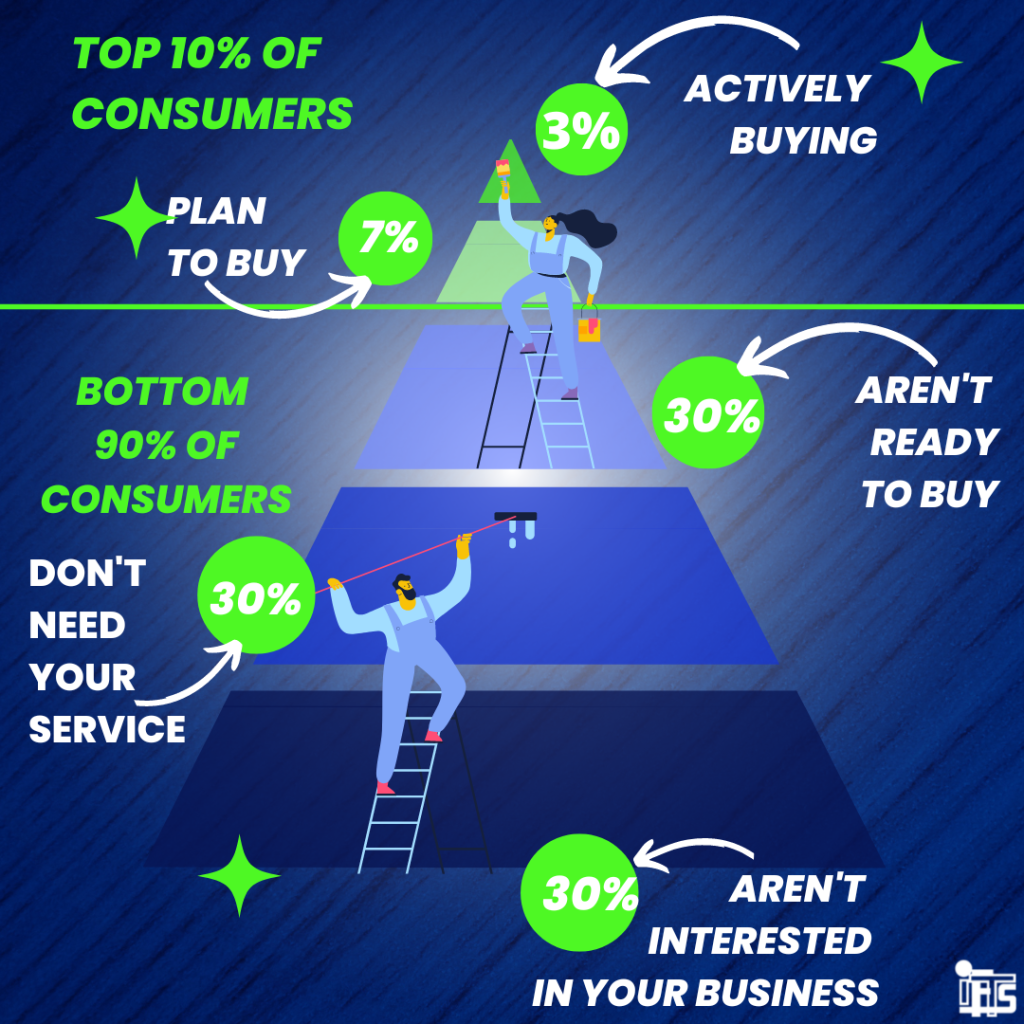
The average consumer is only prepared to make a purchase about 3% of the time

So, how do you attract the other 97% of people?
Retargeting Ads

Retargeting allows you to stay in front of someone that is interested in your services until they are ready to make a purchasing decision.  If you are advertising on Meta (Facebook), you can do this in 2 ways:

  • Meta Pixel
  • Video Viewers

The Meta Pixel is a small piece of code that you install on your website.  It then tracks who has visited the site and allows you to show them ads on Meta.  

One caveat – The usefulness of the Pixel has diminished over time as Apple now requires users to opt in to being tracked.  Only about 10% of people opt in (not surprising).  Advertisers now have a much harder time reaching Apple users via this method.

The other way you can retarget someone is through their video views.  Meta tracks who watches your videos and for how long.  So, you can advertise to people that have watched at least a certain percentage of a video.  

We recommend retargeting people who have watched at least 25% – 50% of a video.

Sample Retargeting Strategy For House Painters

A good video strategy for painters is to run 3-5 FAQ ads to women 35-64 in your local area.  Then, retarget the women who have watched at least 25% of one of the videos with an ad that has a special offer or a more direct call to action.

Finally, let’s cover our favorite psychological marketing tricks.

Hack #7 - Get an Awesome Business Card With Your Picture

One strategy that isn’t commonly used by painters is to get a really nice business card with your picture on it.

Why use your picture?

First of all, people want to do business with people, not a faceless business.  Secondly, it will help them remember who you are.

Now, how nice is nice, you may ask…

Stand out from the crowd of people that are handing out the white, one sided business cards that they ordered by the thousands from VistaPrint for under $50 and get a card that is plastic, like a credit card.  Check out plasticprinters.com for decent pricing.

Not only that, make the card graphically pleasing and “cool looking” by having it designed professionally.  Look on fiverr.com for a great deal on the design aspect.

Because the card is so nice, people feel bad about throwing it away.  So, you’ve got a tangible remarketing tool that they will keep, unlike other painting companies.  This will set you apart from the cheap lookalike cards that are thrown away easily.

[On an aside] We do recommend having 2 sets of cards created.  One set should be plastic and lux for giving away to potential customers.  The other set can be on paper.  These paper ones should be given away to people that may not necessarily hire you, but you may use as a contact or meet at a networking event.

Hack #8 - Make Your Voicemail Work For You

Your clients should never reach your voicemail.  Preferably, you’d have a call center in place to make sure that they never had to talk to a machine.

However, if the perfect set of circumstances happen and they do manage to reach your voicemail, there is one phrase you should add to the end of the message:

Add “I will call you in the next 15 minutes”

When people hear this, they will be much more likely to leave a message because they have that expectation of receiving a call back soon.  Even if you aren’t able to call back in that amount of time, you still get a chance at that lead.

Hack #9 - Give a Compliment At the Beginning

People want to be liked and this plays into that psychology.

Before you start an estimate, give a compliment to the prospect.  It could be about the house, the neighborhood, a family picture, furniture, their pet etc.  People like people who like them.  People also HIRE people who they like.

Most of the time, people don’t remember what you say, but they do remember how you make them feel.  This applies to most human interaction.  So, if you make them feel good about themselves at the beginning, the feeling should carry through the whole experience.  

By making a prospect feel good about themselves, it puts you in a better position for you to get their business.

Hack #10 - Go Get Started

Getting started is half the battle.  Choose one thing from this list that you want to accomplish in the next 24 hours and GO DO IT!  You’ll be ahead of 95% of your competition.

Want Some Help?

Is there something on this list that you would like to implement, but aren’t quite sure how or don’t have the time to do?

This is where IFTS comes in.  We have been working with house painters (and other businesses) for over 5 years on all aspects of their marketing.  Give us a call at 412-715-6266 or send us an email (si@iftsdesign.com).  We’d love to help you grow your painting company.

How to Use Infographics for Marketing Your Painting Business

If you’re looking for ways to stand out online and build your painting company’s brand, infographics are a great way to do it. 

A powerful tool for communicating, Infographics provide complex information in a visually pleasing way that’s also easy to understand. When used the right way, they can be very effective at bringing people to your website and getting them to interact with you on social media, and they don’t have to be expensive or take a lot of time. And because they are so easily shared on social media, they’re a great way to boost your SEO.

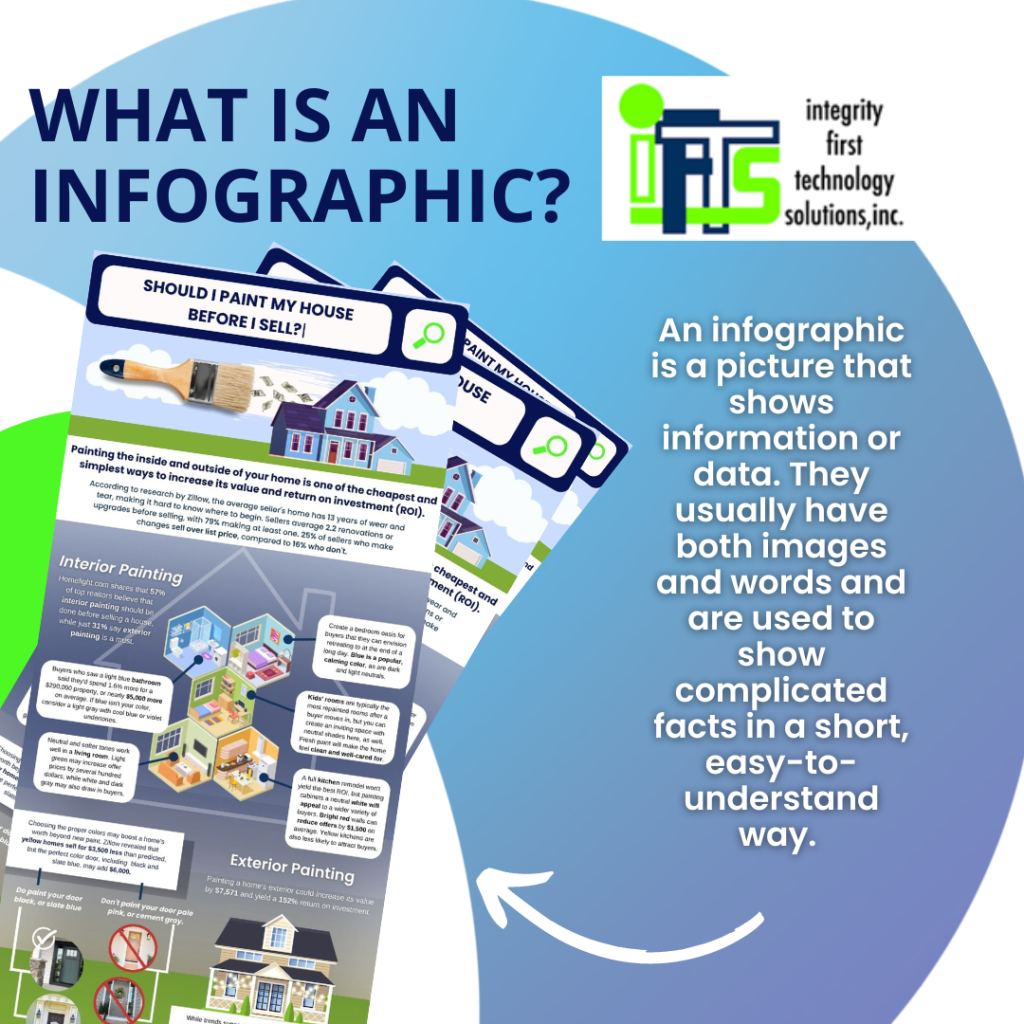
So, what is an infographic anyway?

As a small business owner, you wear a lot of hats. You’re the CEO, the estimator, the team lead, and the marketing team all rolled into one. And while you might be good at a lot of things, there’s only so much time in the day to get your message out. 

Enter – infographics!

An infographic is a picture that shows information or data. They usually have both images and words and are used to show complicated facts in a short, easy-to-understand way. 

Plan to use infographics instead of spending hours poring over spreadsheets, making newsletters, or writing long blog posts. And the best part is, they’re fun to make! 

In this post, we’ll show you the best ways to use and make infographics for your painting business, but feel free to apply these tips to other markets, as well!

Make infographics about your painting services or products.

When creating an infographic about your product or service, be sure to focus on one key point that you want to communicate. 

This should be something that will interest your customers and help them understand what you do. Most of the time, less is more because too much information can turn people off.

Explain how your product or service helps solve a specific problem or shows off an interesting process you use at work. Use clear, concise language and make sure the visuals support the text.

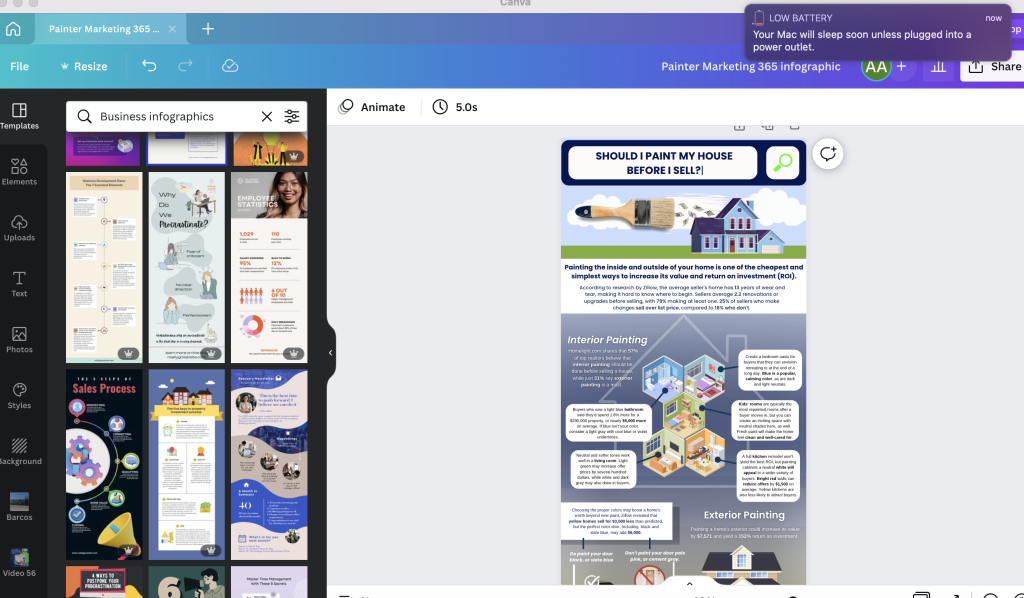
For example, an infographic that points out the areas of a house that should be painted for the best return on investment is a great way to help potential clients decide which walls to paint when they are getting ready to sell their home. 

Or, do you have a favorite way to prepare a surface or a favorite type of paint that you use for different projects? Creating an infographic to share your tips and tricks about this topic, provides a new way for your audience to rely on your years of experience for their painting needs.

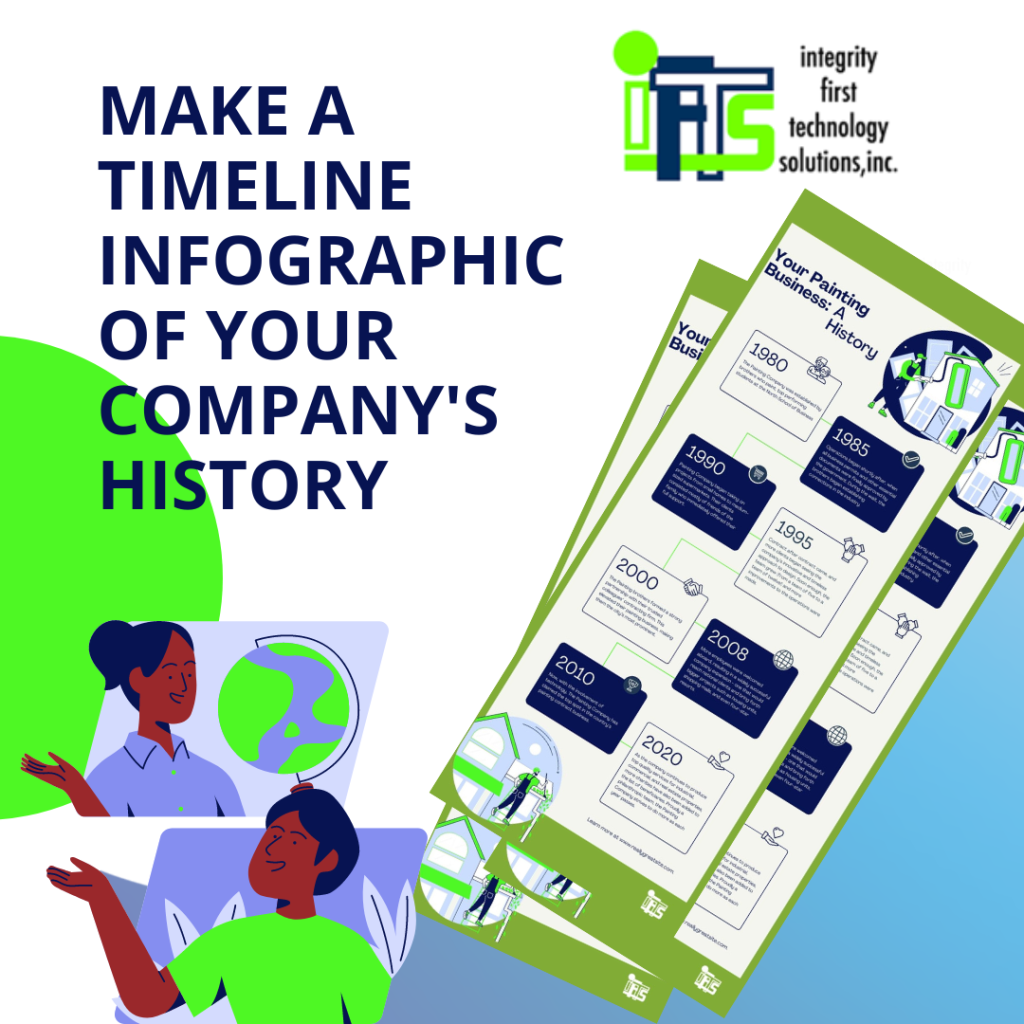
Create infographics about your company's history and personality.

An infographic is a great way to share the history of your business. 

Use it to talk about important people, important events, and even interesting facts about how your business got started. This is a great way to get potential customers interested in your business and show them what it’s all about. 

People LOVE stories! If people know and like your story, it builds trust, making them more likely to want to work with you in the future. 

Another example is an infographic timeline that shows the different kinds of work your business has done over the years. Again, this shows that you have experience and makes your business stand out as unique and likable to potential customers and employees. 

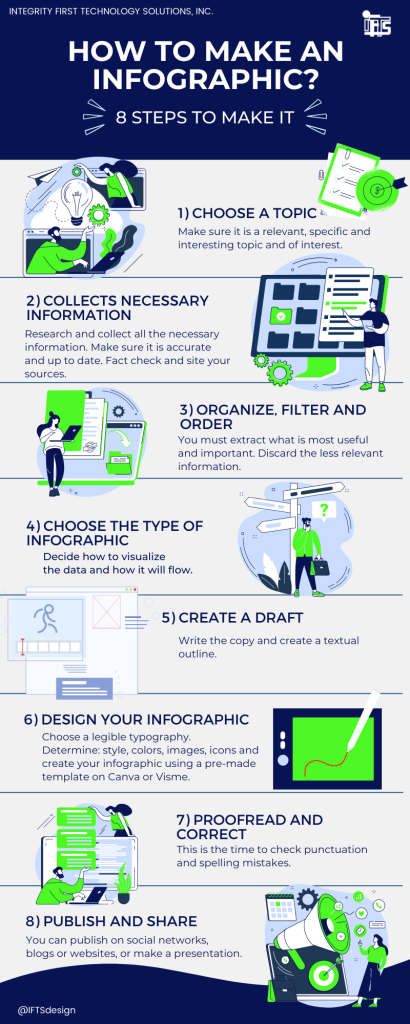
How to make an infographic.

Now you can start making your infographics! 

First, think about your values and your brand’s style. 

What is your mission statement? 

Check out this article on creating a brand style guide for more ideas, and take some time to brainstorm and write down everything that you can think of.

When you really understand your company’s values and style, you’ll be able to communicate with your audience consistently. Which makes sense and builds that trust again!

Also, be sure to think about your customers’ age, gender, location, and income level. 

What are they passionate about? 

What do they like to do in their free time? 

What are their buying habits? 

Answering these questions will help you create content that really speaks to your target market.

Once you have all of this information, you can start designing your infographics. Be sure to use visuals, such as charts and graphs, to make your infographic more engaging and fun to look at. 

Canva is a great, easy-to-use app that you can always turn to. It has infographic templates that you can use to get started quickly, and you can format them for many different social media sites.

Share your infographics.

Now, if you’re happy with your infographic, it’s time to share it with the world! Post it on your website, social media, and anywhere else your target audience is likely to see it.

If you need more ideas on where you should be posting your infographic, learn more about the social media platforms we recommend for your painting business here

By using these tips, you can create informative and visually appealing infographics about your company. This will help you attract new customers and employees and build a strong online presence for your business—and there’s no need to hire a professional designer to create them (although you certainly can if you want to)!

So what are you waiting for? 

Get started making infographics for your small business today!

If you need more help in this area, give IFTS, Inc. a call at 412.715.6266 for a FREE consultation!

The Ultimate Guide to Turning Your Podcast into a Youtube Video

If you want to take your podcast to the next level, you might be wondering if you should start putting videos on YouTube. 

Video is one of the most popular types of content on the internet, and it can be a great way to reach more people. But before you start filming yourself talking into a microphone, there are a few things you should know. 

In this article, we’ll show you how to turn your podcast into a professional-looking YouTube video that keeps people interested and helps you grow your audience. We’ll also tell you how to choose pictures that go with your audio and how to make your video work best on YouTube. 

So, if you want more people to listen to your podcast, keep reading to find out how to turn it into a YouTube video.

Why turn your podcast into a YouTube video?

You might think that YouTube is just for watching videos, but more people listen to audio on YouTube than anywhere else! 

According to the Music Consumer Insight Report, 47 percent of the time people spend streaming music around the world is on YouTube. In fact, YouTube even beat Spotify to become the biggest platform for listening to podcasts in the US. 

People don’t seem to mind staring at a screen that doesn’t change while they listen to something they like. So yes, you can be successful even without a video on YouTube! Many are happy to just sit there and listen without watching while they go for a walk, work out, or fold some laundry. 

Adding some visual interest, though, will grab viewers’ attention and keep them interested when they aren’t just listening. It also lets you add more information that might not be possible in an audio-only format.

Your podcast’s online presence could be more than doubled if you upload it to YouTube! It potentially gets you in front of billions of Youtube users every day, and it’s a great way to make your content available to your audience no matter where they are.  

So before you record that next episode, it’s worth brainstorming ideas about how you can turn your podcast into a YouTube video.

Steps to Getting Started with Youtube

Step 1: Decide what type of video you want to create

There are a few different ways you can go about creating a video version of your podcast. The first is to simply take a video of yourself while recording your podcast. This is the easiest way to create a video, but it can be a little boring for your audience if they’re just watching you sit and talk.

You could also record your podcast on your webcam. You don’t need to buy any fancy equipment to do this. Simply plug your microphone into your computer, use the built-in camera, and use Zoom or QuickTime to record yourself while you speak. Make sure that your podcast microphone is being used instead of the computer’s built-in microphone in your audio settings.

 If you decide not to film yourself, add pictures and short video clips to your audio for visual interest. This is a great way to keep people watching, and it lets you easily add extra information that might not be possible with just sound. 

It’s important to choose high-quality images that fit your brand’s style and aren’t a distraction, so make sure they relate to your topic and add value

Step 2: Record your audio 

Once you’ve decided what type of video you want to create, it’s time to start recording. When recording your audio, it’s important to speak clearly and at a consistent volume. You also want to avoid any background noise that might be distracting to viewers. 

Your sound file alone is an MP3 type of file, which can’t be uploaded to Youtube. Because the video site requires MP4 video files, you will have to have some type of video to go along with your podcast, even if it’s just one image, so that it “plays” and uploads to the site like a video would.

 Step 3: Converting your audio file into a video

If you want to spend even less time uploading your podcast to YouTube, keep reading. 

Create a background image first by using free graphic design software such as Canva or Envato Elements. Both already have YouTube video templates, so you’re not starting from scratch. Adding your logo and changing the colors is pretty simple, and there are thousands of graphics available to really customize your video. 

What should be included in that graphic? 

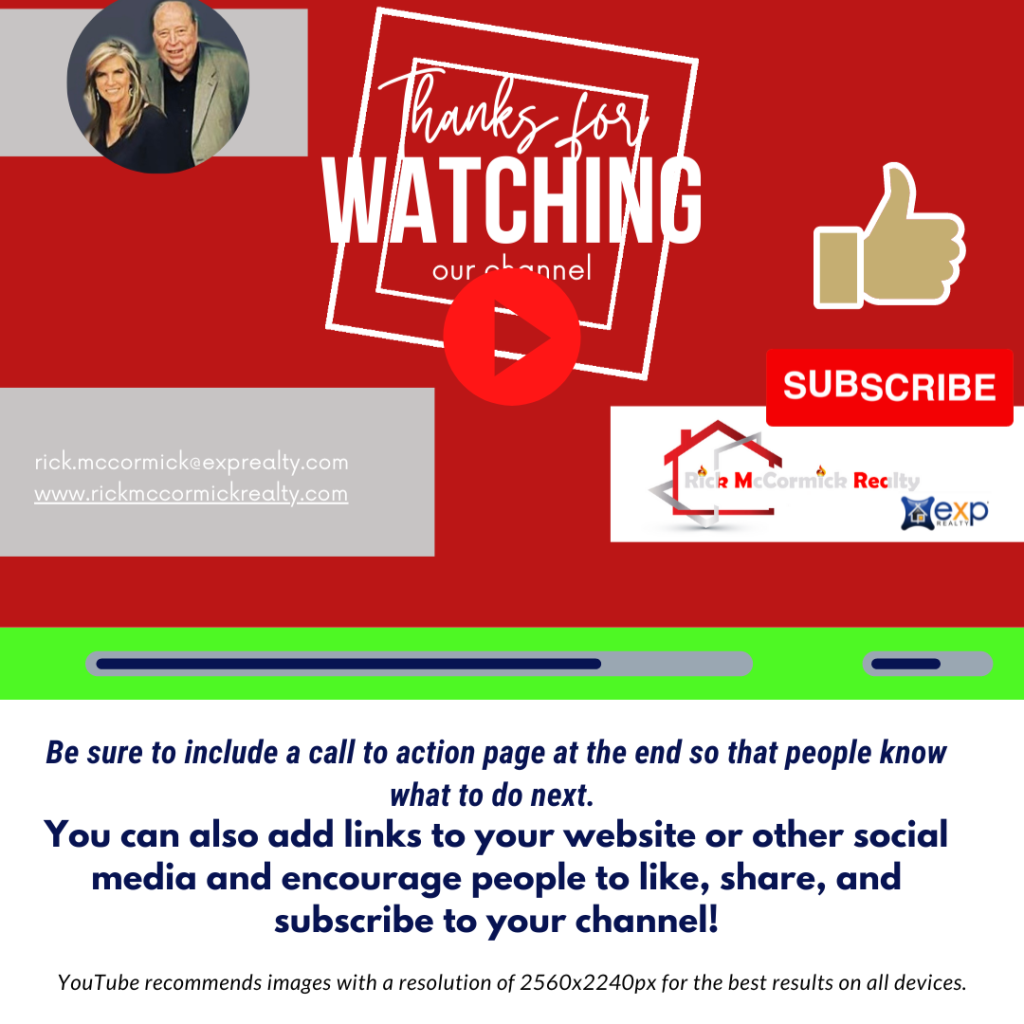
Your company’s logo, name or host, website URL, and any other relevant information. YouTube recommends images with a resolution of 2560x2240px for the best results on all devices. When you upload the MP3 audio file of your podcast to a software app like Canva, you can easily add and switch from one image to another with a wide range of customizable effects to go along with the sound.

Be sure to include a call to action page at the end so that people know what to do next. 

You can also add links to your website or other social media and encourage people to like, share, and subscribe to your channel.

Finally, you now have an MP4 file to upload to YouTube!

Step 4: Optimize your video for YouTube

 After you’ve added your designs and recorded the sound, you need to make sure your podcast is ready for YouTube. It’s important to use keywords that are related to the content when optimizing it. You should also think about adding captions and/or subtitles. 

YouTube says that videos with closed captions get 12 percent more views than videos that don’t. Some polls even show that people are more likely to finish watching videos until the end if there are captions. This is perfect for those times when people might find it easier to watch video content without the sound on. 

Don’t worry, YouTube has its own built-in AI that captions your videos for free once they are uploaded. It may not always be 100% accurate, so remember that the higher the audio quality you provide, the better the AI-generated transcription will be. 

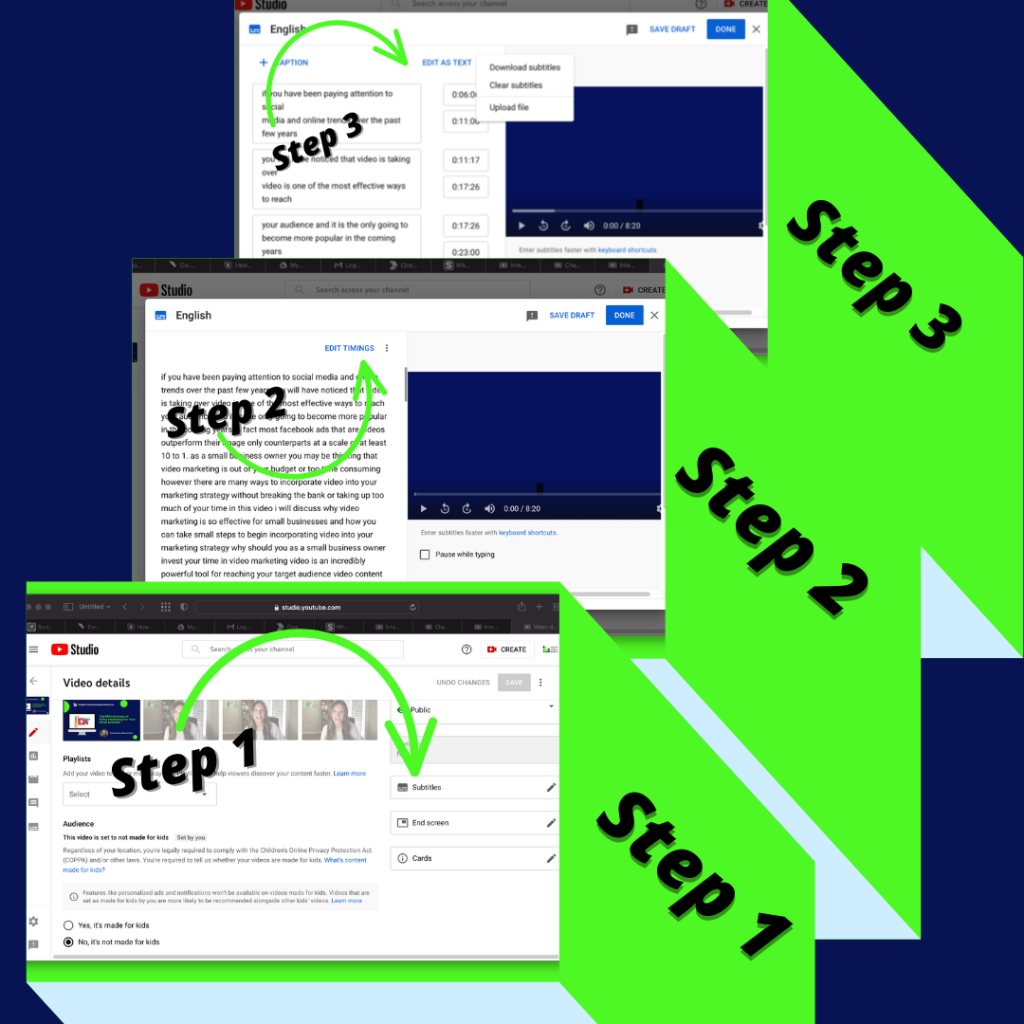
Once you have your Youtube channel with your uploaded videos, you can access and edit the closed captions. Click on the Subtitles section and select the icon below.

You can either edit your subtitles directly within YouTube or upload your audio subtitles using a site like https://otter.ai/home, which will ensure your audio text is indexed and searchable on the internet. This will help your videos rank higher in search engines by turning every word that is captioned into metadata and making it more likely that your videos will show up in Google searches.

Shorter Podcast Clips, Are They Still Worth it?

As we covered in our last blog post, video marketing is definitely worth your time. 

Because YouTube has such a large audience, it’s one of the best places to put podcasts and other types of content. People enjoy YouTube because it’s popular and it’s what they know. 

But what if you don’t have the time right now to post full episodes of your podcast on YouTube? 

That’s okay! You can still promote it by posting shorter clips from each episode. 

This is great for several reasons. Listeners are more likely to download the whole episode on their favorite podcast app, which could mean more endorsements. Also, people are more likely to share a short video than an entire episode that lasts 45 minutes. And finally, they are perfect for sharing on social media.

With a little effort, you too can turn your podcast into a YouTube full length video or short video clip that will help you reach a wider audience! 

If you are looking for help in this area, our team at IFTS is here for you. We are committed to your success and will take the stress out of creating marketing content! Contact us today for a free one hour consultation at 412-715-6266.